What to Do When Bike Brakes Squeak: A Practical Guide
Learn step by step how to diagnose, clean, and fix squeaky bike brakes. Practical maintenance tips, tool lists, and safety guidance from BicycleCost to keep your ride quiet and safe.

By following these steps, you can silence most bike brakes that squeak. Start by identifying whether the noise originates from pads, rims, or cables, then clean, adjust, and lubricate where appropriate. Expect to inspect pad wear, correct pad alignment, and test ride. You’ll need basic tools (hex keys, rag, brake cleaner, and lubricant) and a safe workspace.
Common causes of brake squeal on bikes
Squeaky brakes are a common frustration for riders, but most noises have straightforward explanations. On rim brakes, squeaks often come from glazed pads, contaminated rims, or misalignment that causes the pad to rub unevenly against the rim. On disc brakes, squeals can arise from pad glazing, a contaminated rotor, or moisture on braking surfaces. In both systems, loose components, worn pads, and misadjusted calipers can amplify or sustain noise. Age also matters: as pads wear, the effective bite changes and chatter can develop.
From a maintenance perspective, it helps to distinguish whether the sound occurs only when braking, or also when the wheel spins without braking. A rubbing noise while coasting usually points to alignment issues or foreign material on the rim or rotor. A chirp during braking that changes with speed or heat might indicate glazing, contamination, or worn pads. BicycleCost Analysis, 2026 shows that most squeaks disappear once the pad surface is clean and properly aligned. However, if the rotor or rim is scored or deeply worn, replacement is often the best long term fix.
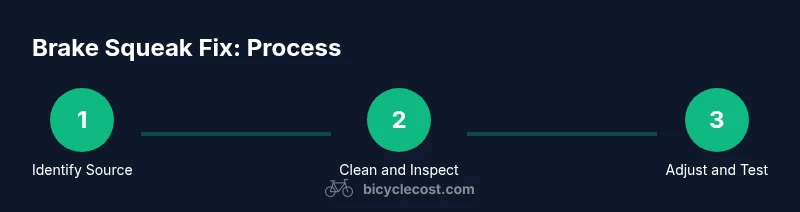
Brand-wise, this guide emphasizes practical steps that minimize recurring noise without risking safety. The BicycleCost team recommends starting with a basic inspection, then progressive fixes. Basic maintenance performed regularly reduces the chance of squeal and prolongs brake life. For riders new to maintenance, think of squeak elimination as a three stage process: identify, clean, and adjust before replacing parts.
How to diagnose the source of the squeak
Diagnosing squeaks requires a systematic check of each braking surface and interaction point. Start by listening closely while applying the brakes lightly and then again with stronger braking. If the noise happens only when you stop and start, it may indicate pad glazing or rotor rim glazing. If it happens consistently under braking, suspect pad alignment, caliper position, or cable tension for rim brakes, or caliper drag and rotor contamination for discs. Inspect the pads for wear indicators and uneven wear, then inspect the rim surface for shiny patches or embedded grit. For disc brakes, check that the rotor is true and clean and that the pad material is not contaminated by oil or grease. A quick wipe with isopropyl alcohol on the braking surfaces (avoiding pads) can reveal whether contamination is the culprit.
During diagnosis, go through a mental checklist: pad wear, rotor or rim wear, contamination, caliper alignment, and loose hardware. If you notice oil or grease on pads or rotors, stop and clean the surfaces thoroughly before testing again. Clear, repeatable symptoms help you choose the correct remedy and avoid unnecessary part replacement.
Step-by-step: cleaning and lubrication basics
A clean braking surface is the foundation of quiet brakes. Start by securing the bike and removing the wheel if necessary to access the braking area. Wipe the rotor or rim with a clean rag dampened with isopropyl alcohol to remove oil, oil film, or grease. Inspect the pads for glazing or embedded grit; if glazing is present, lightly sand the pad surface or replace the pads if wear is too deep. Use a dedicated brake cleaner to remove any residue on the pad backing, caliper, and lever surfaces. Do not lubricate the braking surface itself. Then, reassemble and test the braking action under a controlled environment.
Lubrication should be limited to pivot points and cables only. A small amount of lubricant on pivot points helps smooth caliper action, but any contact with pads or rotors will reduce braking efficiency. If you must lubricate, apply sparingly and wipe away any excess. Always allow cleaners to dry completely before applying brakes again to avoid chemical contamination. For reference, BicycleCost analyses indicate that routine cleaning and pivot lubrication prevent most squeaks from returning within a short riding window.
Adjusting pad alignment and toe-in for rim brakes
Pad alignment is a common source of recurring squeaks. Start with the pad centered on the rim braking surface, allowing even contact across the pad width. If the pad wears unevenly, adjust the position to minimize rim wear and vibration. For rim brakes, toe-in adjusts how the front edge of the pad touches the rim; a tiny toe-in can dramatically reduce squeal as the pad sweeps across the rim. Use hex keys to adjust pad mounting bolts and caliper alignment screws. Recheck the bite point after each adjustment and go for a short test ride to gauge changes. If you hear new noises after adjustment, re-check the wheel alignment and pad wear.
For disc brakes, ensure the caliper is centered over the rotor and that the pad contact is even on both sides of the rotor. A misaligned caliper can cause pads to rub one side of the rotor, producing squeal and uneven stopping power.
Dealing with glazing, glaze removal, and wear indicators
Glazed pads and rotors create a hard, slick surface that reduces friction and can cause high-pitched squeals. If glazing is present, lightly roughen the pad surface with a clean, fine-grit sandpaper or a rubber backing pad designed for brake surfaces. Do not remove material aggressively; the goal is to restore grip, not re-shape the rotor. For rotors with glazing, consider a light resurfacing or replacement if wear indicators show sign of thinning. If rotors are deeply scored or worn beyond the manufacturer’s minimum thickness, replacement is the safer option.
Always replace pads when the wear indicator shows or when the braking feels spongy or inconsistent. For hydraulic disc brakes, ensure that the system is free of air bubbles and that the hoses are intact; air in the line can cause uneven braking and noise. With rim brakes, ensure the rim is true and free of burrs or embedded grit that could grind against the pad surface.
Prevention: seasonal maintenance and best practices
Preventive maintenance is the best defense against squeal. Establish a regular schedule to inspect pads for wear, clean braking surfaces, and check cable tension or hydraulic bleed status as appropriate for your system. After riding in wet or muddy conditions, dry the bike and re-check the braking surfaces to prevent rust or grime buildup. Store your bike in a dry place to limit moisture-induced squeaks. Keep a small toolkit on hand for quick checks and minor adjustments. Apply lubrication only to pivots and cables, never to pads or rotors. By integrating these practices, you’ll keep braking performance consistent and reduce the likelihood of squeaks. BicycleCost Analysis, 2026 shows that riders who maintain their brakes monthly report fewer unexpected squeaks and more reliable stopping power.
When to seek professional help and safety reminders
If you cannot identify the source of squeal after thorough inspection, or if new noises appear after any repair, consult a professional mechanic. Fans of do-it-yourself maintenance should know when a problem exceeds their skill level. Safety first: never ride with compromised braking performance. When in doubt, replace worn components and have the system bled or adjusted by a trained technician. The BicycleCost team recommends scheduling a quick brake check if you notice reduced stopping power, persistent squeaks after cleaning and adjustment, or uneven pad wear.
Tools & Materials
- Hex keys (Allen wrenches) 4mm, 5mm, 6mm(Essential for adjusting caliper mounting bolts and pad bolts)
- Clean rag(Lint-free for wiping rotors and rims)
- Brake cleaner spray(For removing oil, grease, and residue from braking surfaces)
- Isopropyl alcohol (70% or higher)(Used for quick surface cleaning; avoid contact with pads or rotors when possible)
- Bike stand or stable work stand(Makes inspection and work easier, especially on a busy trail bike)
- Lubricant suitable for pivots and cables (silicone-based or dedicated brake-pivot lube)(Apply to pivot points and cables only; never on pads or rotors)
- Replacement brake pads(Keep spares on hand for wear indicators or glazing replacement)
- 600-800 grit sandpaper or a brake pad scuff pad(Used to remove light glazing from pads; use sparingly)
- Torque wrench (optional)(Helpful to avoid overtightening caliper bolts)
Steps
Estimated time: 30-60 minutes
- 1
Identify the noise source
Listen carefully to when the squeak occurs and observe which surface is in contact. Note whether the sound changes with speed, braking intensity, or weather. This helps narrow the cause to pads, rims, rotors, or cables.
Tip: Keep notes on when the noise occurs to guide the next steps. - 2
Secure the bike and access the braking area
Position the bike on a stand or upside down on a clean surface. Ensure the wheel is accessible and the brake area is clear of debris. If you cannot safely access a wheel, use a friend to hold the bike steady.
Tip: Stabilize the bike to prevent shocks during inspection. - 3
Clean braking surfaces and inspect wear
Wipe the rim braking surface or rotor with isopropyl alcohol to remove oils and grime. Inspect the pads for glazing or cracking, and check the rim or rotor for grooves or wear indicators.
Tip: Do not touch the braking surfaces with bare hands to minimize oil transfer. - 4
Adjust pad alignment and toe-in
Loosen pad bolts, center the pad on the braking surface, and ensure even contact on both sides for disc brakes. For rim brakes, apply a tiny toe-in so the front of the pad contacts first, reducing chatter.
Tip: Test-fit before tightening to verify smooth engagement. - 5
Lubricate pivots and check cables
Apply a small amount of pivot lubricant to hinge points and cables, avoiding the braking surfaces. Wipe away any excess and re-check alignment after lubrication.
Tip: Less is more: excess lube can attract dust and create more noise. - 6
Reassemble, test ride, and re-evaluate
Reinstall wheels, re-bleed if necessary, and perform a careful test ride in a safe area. Check for noise, stopping power, and heat buildup. Repeat cleaning or adjustments if necessary.
Tip: Brake gradually during test rides to gauge responses. - 7
Decide on replacements if needed
If wear indicators show significant wear or glazing persists after cleaning and adjustment, replace pads or rotors as needed. For persistent issues, consult a professional mechanic.
Tip: Document wear levels and replacement history for future maintenance.
People Also Ask
Why do brakes squeak after washing my bike?
Water and soap can leave a film on the braking surfaces or wash away lubrication from pivot points. Dry thoroughly and inspect for oil residue. Clean the braking surfaces and re-lubricate pivots if needed.
Water can leave a film on your brakes and wash away lubrication on pivots. Dry, inspect, clean surfaces, and re-lubricate pivots if needed.
Is it safe to ride with squeaky brakes?
If the squeak is isolated to a light rubbing without loss of braking power, you may ride slowly to a safe location. If braking feels spongy or uneven, stop riding and seek professional help.
If braking feels weak or uneven, stop riding and get professional help. A minor squeak can become a safety risk if ignored.
Should I replace pads or rotors first?
Start with pads if they are worn or glazing. If the rotor shows deep grooves or is below minimum thickness, replace the rotor. Always follow manufacturer guidelines for your specific brake system.
Start with worn or glazed pads; replace rotors if they are deeply grooved or past minimum thickness.
Can lubrication fix squeaking brakes?
Lubrication is only for pivots and cables, not for pads or rotors. Excess lubricant on braking surfaces will worsen noise and braking performance.
Lubrication helps pivots, not pads. Avoid lubricants on braking surfaces.
When should I seek a professional?
If you cannot locate the source, if noises persist after cleaning and adjustment, or if you notice uneven wear, seek a professional bike mechanic. Persistent issues can indicate deeper system problems.
If you can't locate the noise or it persists after maintenance, get a professional check.
Watch Video
Quick Summary
- Identify the squeak source before fixing
- Clean and inspect braking surfaces regularly
- Align pads and toe-in correctly to reduce chatter
- Do not lubricate braking surfaces; lubricate pivots only
- Replace worn pads or rotors to restore performance