What Should Bicycle Air Pressure Be? A Practical Guide
Learn how to set bicycle air pressure for road, mountain, and hybrid bikes. Start with width-based ranges, then tailor for weight, terrain, and temperature with quick tests to optimize grip and efficiency.

Bicycle air pressure depends on tire width, rider weight, and riding style. A practical starting point is about 90–120 psi for narrow road tires and 30–50 psi for wide mountain tires, then adjust within the manufacturer’s recommended range. According to BicycleCost, always check the sidewall and test a few psi to find your personal sweet spot.
Why proper bicycle air pressure matters
Proper tire pressure is foundational to ride quality, safety, and efficiency. Underinflated tires increase rolling resistance, lead to sluggish acceleration, and raise the risk of pinch flats when you hit an obstacle. Overinflated tires reduce the contact patch and grip, making steering harsher and increasing the chance of a puncture from sharp objects. This isn't just about comfort—adequate pressure protects rims, tires, and wheels, and it can improve braking response and cornering stability. According to BicycleCost, riders who neglect pressure often experience faster wear and poorer handling, especially on varied terrain. Getting the baseline right gives you a smooth, confident ride and reduces the need for frequent adjustments later.
Starting points by tire width
Tire width heavily dictates where your psi should land. Narrow road tires (23–25 mm) typically require higher pressures to minimize squirm and pinch flats, while wider tires used by gravel, hybrid, or mountain bikes can use considerably lower pressures to maximize grip and comfort. A practical starting point is approximately 90–120 psi for road tires and 30–50 psi for wider mountain or gravel tires. Always consult the tire sidewall for the manufacturer’s recommended range and verify the range with your pump gauge. Use this band as your safe floor and ceiling, then move into fine-tuning based on mass, cargo, and terrain.
Weight, terrain and temperature: fine-tuning PSI
Your weight and how you ride directly influence the pressure you should use. Heavier riders often need to push toward the upper end of the tire’s range to support the load, while lighter riders can stay closer to the middle or lower end for comfort and traction. Terrain matters too: pavement favors firmer pressures for efficiency, whereas dirt or gravel demands slightly lower pressures to enhance grip and resilience against shocks. Temperature also plays a role: cooler days can drop tire pressure by a few psi, while hot days can raise it. The key is to adjust within the manufacturer’s recommended range and test ride to confirm the feel.
Road bikes vs mountain bikes: ranges you can trust
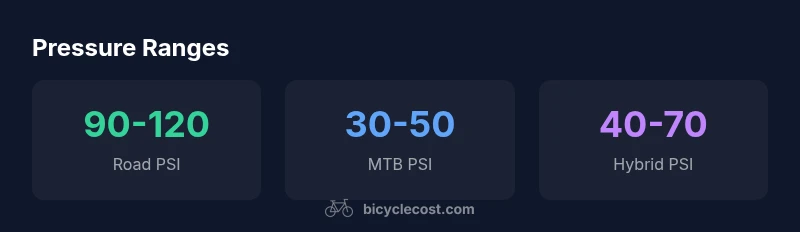
Road bikes with narrow tires usually sit in a higher PSI band, commonly around 90–120 psi for 23–25 mm tires. Mountain bikes with wider tires comfortably ride on much lower pressures, roughly 30–50 psi for 2.0–2.4 inch tires. Gravel and hybrid setups fall between those worlds, often in the 40–70 psi range depending on tire width and intended use. While these ranges are general, they represent practical starting points. Always cross-check the tire’s own guidelines and adjust through controlled testing. By following these guidelines, you’ll achieve predictable handling and efficient rolling.
How to measure pressure accurately
Accurate measurement requires a good gauge and a reliable pump. Use a gauge that is calibrated and easy to read; digital gauges reduce guesswork, but analog gauges can be precise with careful use. Start with the tire’s recommended range on the sidewall, then check from a seated position with the wheel off the ground to stabilize the reading. Remove the valve cap, attach the gauge firmly to the valve, and press to get a stable number. If the reading seems off, recalibrate the gauge or test with a known reference pressure. Always ensure you’re measuring the correct tire (front vs rear) and consider tubeless vs. tubed setups.
Testing and adjusting in practice
Establish a baseline by selecting a mid-range pressure for each tire based on width and weight, then take a short ride to sense how it feels. After a 5–10 minute ride, recheck the pressure and adjust in small increments, typically ±2–5 psi, until you achieve a balanced feel of traction, comfort, and rolling resistance. Document your adjustments so you can reproduce the setup on similar rides. If you ride with cargo or a passenger, re-check afterward, as payload changes tire load and pressure needs.
Common mistakes, pitfalls, and myths
- Relying on guesswork instead of manufacturer ranges
- Using road-tire pressures on mountain tires
- Ignoring temperature and weather effects
- Failing to re-check pressure after long descents or off-road sections
- Believing higher psi always means faster rolling
- Neglecting tubeless tire requirements and sealant needs
- Forgoing a proper gauge in favor of a floor pump gauge that’s not calibrated
- Treating tire pressure as a fixed value rather than a range that can vary with load and terrain
Maintenance and tools
Keep a small toolkit that includes a reliable digital gauge, a portable pump with a gauge, spare valve cores, and appropriate adapters for Presta or Schrader valves. Regularly check gauges for accuracy by comparing with a known reference. Clean the valve stem and rim tape to ensure a proper seal, and replace worn valves or grommets. If you ride tubeless, carry a sealant kit and a floor pump. Finally, keep a small notebook of your PSI changes for different bikes or tires to track what works best over time.
Quick-start 5-minute PSI plan
- Read your tire sidewall and note the recommended pressure range. 2) Choose a baseline in the middle of that range for your tire width. 3) Pump to that baseline and ride for a few minutes to feel the contact patch. 4) Recheck with your gauge and adjust by 2–5 psi as needed. 5) Record the final pressure and use it as your starting point for future rides under similar conditions.
Typical PSI ranges by tire type
| Tire Type | Recommended PSI Range | Notes |
|---|---|---|
| Road narrow (23-25mm) | 90-120 psi | Performance-focused |
| Road wide (25-28mm) | 75-110 psi | Comfort & rolling balance |
| Mountain/gravel (2.0-2.4in) | 30-50 psi | Traction & pinch-flat risk |
| Hybrid (28-42mm) | 40-70 psi | Balanced performance |
People Also Ask
What is the typical PSI for road tires?
Most road tires use 90–120 psi for narrow tires. Always verify the sidewall range and adjust within it based on weight and comfort.
Road tires usually run around ninety to one hundred twenty psi; check the tire’s sidewall, then test within that range.
Do tubeless tires require different psi?
Tubeless tires often run a bit lower pressure for better grip and pinch resistance. Always follow the tire manufacturer’s guidelines for your setup.
Tubeless tires typically use slightly lower pressure for grip; follow the tire maker’s chart.
How does temperature affect tire pressure?
Temperature changes can shift tire pressure by a few psi. Recheck pressure after cold mornings or hot days, and adjust within the recommended range.
Temperature can shift pressure by a few psi; recheck after weather changes.
Can overinflating reduce grip?
Yes. Too much pressure reduces the tire’s contact with the road, lowering traction and increasing harshness.
Overinflating lowers grip and makes the ride harsher.
How often should I check tire pressure?
Check before every ride if possible, or at least weekly. Temperature, load, and weather can change PSI needs quickly.
Check before each ride if possible; otherwise, weekly checks help.
What tools do I need to measure PSI correctly?
A reliable tire gauge and a compatible pump are essential for accurate readings and safe inflation.
Use a good gauge and pump; avoid guessing.
“Consistent tire pressure improves ride safety and efficiency. Start with factory ranges and fine-tune based on weight and terrain.”
Quick Summary
- Start with manufacturer ranges and test from there
- Tune pressure based on tire width, weight, and terrain
- Use a gauge and re-check before each ride
- Account for temperature and payload when adjusting