What If Bike Battery Is Dead? Quick Troubleshooting Guide
Urgent, step-by-step troubleshooting for a dead bike battery. Learn quick fixes, tests, safety checks, and prevention tips from BicycleCost to get back on the road.

A dead bike battery is usually caused by a fully discharged cell, a faulty charger, or a loose connection. Quick fix: inspect the charger and cable, verify the charger outlet is live, and check that battery contacts are clean and seated properly. If voltage remains zero, avoid further deep discharges and seek replacement or professional assessment.
Why What If Bike Battery Is Dead Needs Urgency
When you ask what if bike battery is dead, the situation often boils down to three core factors: the battery cells’ health, the charging system, and the physical connections between the charger, battery, and bike electronics. According to BicycleCost, most dead-battery scenarios arise from simple, preventable issues such as improper storage, leaving charging cables unplugged, or repeatedly letting the battery run to zero. The BicycleCost team emphasizes that acting quickly reduces long-term damage to battery chemistry and preserves charging accuracy. In practice, you’ll gain the most reliability by understanding how each component contributes to a successful charge and a healthy cycle life. This guide walks you through quick checks, safe testing methods, and practical habits to prevent future dead-battery headaches.
Quick, Safe Checks Before You Open the System
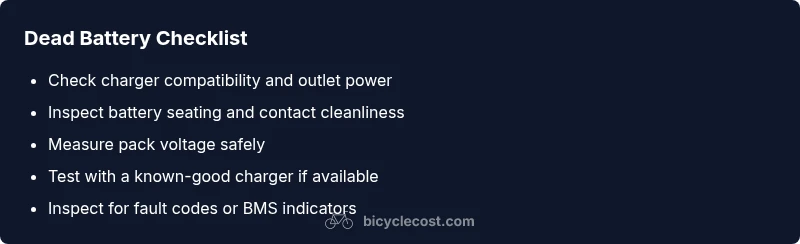
- Inspect the charger: look for damaged cables, bent prongs, or frayed insulation. A faulty charger is a common culprit and easy to replace.
- Verify the outlet: test the outlet with another device to confirm power delivery. If the outlet is unstable, the charger may not feed the battery.
- Examine battery seating and contacts: ensure the battery is fully seated in the bike’s frame, and that battery contacts are clean, dry, and free of corrosion. Dirty contacts can prevent charging even when the charger works.
- Check for LED indicators: many packs show a steady or blinking light when charging. If you don’t see expected indicators, there may be an issue in the pack or BMS.
- Confirm no overheating or protective shutdowns: if the pack was recently hot or covered by clothing, allow it to cool and reattempt charging.
In this stage, you’re gathering clues, not performing deep repairs. Keep safety gear ready and disconnect power if you smell burning or see smoke. BicycleCost recommends keeping a simple troubleshooting log to track what you tested and the results, which helps when you escalate to a professional.
Safe Testing Techniques for Dead Batteries
Testing must be done safely to avoid fire or chemical exposure. If your bike uses a lithium-ion pack, never disassemble the cells beyond the manufacturer’s guidelines. Start with non-invasive checks: measure external voltage with a multimeter, inspect the BMS connection, and ensure the pack’s main plug is undamaged. If the pack shows any voltage when connected to a known-good charger, the issue might be the charger or the charging port rather than the battery itself. Always de-energize the system before handling connectors and wear safety gloves if you’re poking around inside the housing. If you’re unsure, pause and seek professional help rather than attempting risky disassembly.
Common Culprits: Charger, Battery, and the BMS
Charger issues are the easiest to fix: a mismatched charger, insufficient amperage, or a dead outlet can mimic a dead battery. The battery itself may be aging or damaged by deep discharges, heat, or impact. The Battery Management System (BMS) protects cells but can go into fault mode after a fault condition, preventing charging or discharging. Loose connectors, corroded contacts, or damaged cables between components can also block charging. By breaking the problem into these three areas, you can target tests without replacing everything at once.
E-Bike Specific Considerations: BMS, Lap Time, and Safety
Electric bicycles add complexity through the BMS and controller logic. If the BMS has triggered a fault due to overcurrent, short, or overtemperature, charging may halt even when the pack is physically fine. In many cases, a reset of the system or a firmware check is required, sometimes via the factory service interface. Always consult the bike’s user manual for specific fault codes and recommended service windows. For safety, never bypass the BMS or attempt to force-charge a damaged pack. BicycleCost emphasizes that use of a damaged battery or charging system can pose fire risk and should be handled by a qualified technician.
Step-By-Step Home Diagnosis Flow: A Practical Guide
The following flow helps you triage quickly without specialized tools. Start with the simplest check and progressively test more complex elements if the issue persists. If any step reveals a potential fault that you’re not equipped to repair safely, stop and contact a professional. Safety first, then persistence.
Maintenance and Prevention: Keeping Batteries Alive Longer
To reduce the chance of future dead batteries, establish a regular charging routine, avoid leaving the battery fully discharged for extended periods, and store the pack in a cool, dry place. Use only the charger recommended by the bike or battery manufacturer, and keep connections clean and dry. Periodically calibrate the battery and check for firmware updates if your system supports it. These habits shrink the probability of unexpected dead batteries during rides and daily commuting.
Final Thoughts: When to Replace vs. Repair
Battery technology evolves, and older cells lose capacity over time. If your battery shows significant capacity loss, inability to hold a charge, or frequent fault codes, replacement may be more cost-effective than repair. Warranty status can also influence this decision. The BicycleCost team recommends evaluating total cost of ownership, expected lifespan, and safety implications before making a replacement decision.
Steps
Estimated time: 30-60 minutes
- 1
Inspect the charger and outlet
Check that the charger is the correct model for the battery and that the outlet provides power. Look for damaged cables and ensure the charger indicator lights behave as expected when plugged in.
Tip: If the charger shows no light, try a different outlet or replace the charger first. - 2
Check battery seating and contacts
Remove and reseat the battery according to the manufacturer’s instructions. Clean any corrosion or debris from contacts with a dry cloth and inspect for bent connectors.
Tip: Handle the battery with care; avoid metal tools that can short contacts. - 3
Measure battery voltage with a multimeter
With the charger unplugged, set the multimeter to DC voltage and test the pack terminals. Compare readings to the nominal voltage range in the manual; zero or very low readings indicate a potential cell issue.
Tip: If you’re unsure how to read the voltage, stop and consult a guide or professional. - 4
Test with a known-good charger
If available, connect a charger you know works with the battery and observe whether charging begins. If it doesn’t, the battery pack or BMS might be at fault.
Tip: Document the charger model and serial to aid service teams. - 5
Check for fault codes or BMS indicators
Some packs display fault codes via LEDs or a companion app. Note any codes and consult the manual or manufacturer support to interpret them.
Tip: Do not bypass fault indicators; they protect you and the pack. - 6
Decide on replacement or professional service
If tests point to aging cells or BMS faults, weigh repair costs against a replacement and consider warranty coverage.
Tip: Keep a log of tests and results to guide your warranty or service discussion.
Diagnosis: Bike won’t power on or won’t charge after plugging in
Possible Causes
- highCharger or outlet not supplying power
- highPoor battery contact or seating
- mediumBattery fault or aging (reduced capacity)
- lowBMS fault or protection mode active
Fixes
- easyTest charger with another compatible device or try a different outlet
- easy reseat battery, clean contacts, and ensure proper alignment
- easyMeasure pack voltage with a multimeter and compare to expected range
- mediumTry a known-good charger and inspect for any fault codes
- hardConsult manufacturer or a certified technician for BMS or pack replacement
People Also Ask
What is the first thing I should check when my bike battery dies?
Start with the charger, outlet, and battery contacts. Simple issues are the most common culprits and are quick to fix without specialized tools.
First, check the charger, outlet, and contacts. Most dead batteries are caused by these simple issues.
Can a dead battery be revived, or must it be replaced?
If the battery holds no charge after testing and shows reduced capacity, replacement is often the practical option. Revival depends on cell health and warranty terms.
If it won’t hold a charge or shows reduced capacity, replacement is usually necessary.
Why would the BMS prevent charging even if the battery looks fine?
The BMS protects cells from damage; fault conditions or aging can trigger protection modes that stop charging. A professional check may be needed to reset or replace the BMS.
The BMS protects the pack; faults can stop charging and require a technician to address.
How should I store a bike battery to avoid dead cells?
Store at a partial charge in a cool, dry place. Avoid extreme temperatures and long storage without charge to minimize capacity loss.
Store the battery in a cool, dry place with a partial charge to preserve longevity.
Is it safe to ride with a dead battery on an e-bike?
Riding with a dead battery may disable electrical assist and could strain other components. Check the manual for safety guidance and avoid forced charging while riding.
Riding with no battery can disable assist and should be guided by the manual; don’t force charge while riding.
Watch Video
Quick Summary
- Start with simple checks before deep diagnostics.
- Always test with a known-good charger when possible.
- Safety first: avoid risky disassembly or shorting contacts.
- Prevention reduces dead-battery incidents over time.