What Bicycle Gear to Use on Hills: A Practical Guide
Learn how to choose gears for hill climbs, maintain cadence, and optimize efficiency with practical, BicycleCost-backed bike maintenance guidance on gearing, cadence, and technique.

With hills, your goal is to keep a steady cadence by selecting a low gear early and shifting smoothly as the grade changes. Start with a comfortable baseline gear, use a wide-range cassette or a compact chainring, and shift before the climb becomes strenuous. Focus on cadence, posture, and efficient breathing to climb longer hills without redlining.
How Hills Influence Gear Choice
If you’re wondering what bicycle gear to use on hills, the core idea is to keep your legs turning steadily rather than pushing hard in a high gear. Cadence governs fatigue, heart rate, and overall endurance on climbs. A low gear reduces the torque your knees must deliver, allowing you to maintain a smooth pedal stroke. Heavier riders, longer grades, and windy conditions demand a willingness to shift into easier gears early, so you aren’t forced into an unsustainable rhythm mid-climb. In practice, Hill-friendly gearing also means choosing combinations that let you stay relaxed, upright, and breathing evenly while your pace climbs steadily. Regularly inspecting your drivetrain ensures you can rely on those gear changes when the grade steepens.
Understanding Your Drivetrain Options
Your drivetrain determines how many gears you have to choose from and how smoothly you can shift on hills. A 1x setup (single front chainring) simplifies shifting and minimizes weight, but it requires a wide-range rear cassette to cover steep climbs. A 2x or 3x setup offers a broader spread of gears, especially on varied terrain, at the cost of slightly more complex shifting. Front derailleurs can add versatility, while single-ring systems simplify maintenance. For most riders targeting hills, a compact or mid-compact chainring paired with a wide-range cassette provides a balanced mix of available gears and reliable shifting.
Classic Gear Ranges for Common Hill Profiles
Hill profiles vary from gentle gradients to near-vertical ascents. In light to moderate climbs, a mid-range chainring with a broad cassette often offers the best compromise between cadence and speed. For steeper sections, drop to a lower gear earlier to maintain your cadence rather than grinding. If you ride a road bike, you may rely on a compact double or 1x with a wide cassette; mountain bikes naturally favor lower gears. The key is to map out a starting gear you can comfortably maintain for the first minute, then adjust as the grade and wind change.
Cadence as Your Guide to Gearing
Cadence, the rate at which you pedal, is your true compass on climbs. Rather than fixating on speed, track cadence and adjust gear selection to stay in a sustainable range. A common target cadence for many riders on hills is a steady 70–90 revolutions per minute, adjusted for fitness, bike type, and terrain. Cadence feedback can come from a cycling computer, a cadence sensor, or a simple internal count. If you notice your cadence dropping below your target, shift to an easier gear before the climb speeds up, and resume a smooth rhythm as you climb.
Pre-Shift and In-Climb Shifting Strategies
Smart shifting reduces fatigue and chain wear. Before a climb begins, select a low enough gear so you can start turning the pedals immediately without hesitation. As you ascend, anticipate changes in grade and shift early, preferably while the bike is still moving smoothly and before you feel strain. On longer climbs, plan a brief gear transition every 20–40 seconds of climbing to avoid overloading your muscles. After cresting, shift back to a more versatile gear to accelerate efficiently.
Front vs Rear Shifts: When to Use Each
Front shifts (between chainrings) drastically change your available range, so use them judiciously to avoid cross-chaining. Start climbs in a lower front-ring setting and reserve rear shifts for fine-tuning cadence as the grade varies. If using a 1x setup, rely on the rear cassette to navigate changes in gradient. If you have a 2x or 3x setup, keep the front derailleur engaged to prevent rubbing and maintain a smooth pedal feel. Practicing deliberate, anticipatory shifts reduces mechanical stress and keeps you in a comfortable power zone.
Stand Up vs Sit Down: Posture on Hills
Standing up can provide extra power for short, very steep sections, but it often sacrifices cadence control and efficiency. Reserve standing for brief bursts, such as short walls or kickers, and otherwise stay seated to maintain a steady pedal stroke. A seated climb with a relaxed back and relaxed shoulders preserves energy and improves balance. If you feel you’re losing cadence, drop into a lower gear and stay seated to rebuild momentum.
Road vs Mountain Gearing: What Changes on Hills
Road bikes typically feature higher gears and lighter weight, which means steeper climbs require deliberate gear selection and cadence management. Mountain bikes usually offer lower gears and more versatile gearing ranges, which can make long ascents feel easier. For mixed terrain, consider a 1x setup with a wide-range cassette or a compact triple, depending on your riding style. Whichever setup you choose, tailor your gear plan to the climb type, surface conditions, and your personal cadence preference.
Maintenance and Pre-Ride Checks for Hills
A reliable climb starts with drivetrain cleanliness and proper lubrication. Check chain wear and replace it if needed; clean the chain and gears if you ride in muddy or wet conditions. Ensure derailleurs shift crisply and cables are tensioned correctly. Inspect tires for wear and properly inflated pressure to maximize grip on steep grades. Regular maintenance reduces the risk of slipped shifts and mechanical issues during climbs.
Fitness, Pace, and Recovery on Hills
Hill climbing is as much about fitness and pacing as it is about gearing. Build aerobic base and leg strength gradually; include climbing repeats in training, but avoid burnout by balancing workouts with recovery days. On the bike, start climbs at a sustainable pace, avoid sprinting for the first minute, and use efficient hydration and fueling to maintain performance. A well-rounded approach—gearing, cadence discipline, and conditioning—yields the best long-term gains.
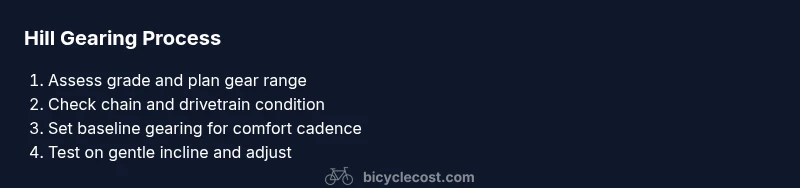
Step-By-Step Practice Plan for Hill Gearing
A structured practice plan helps you tune your gearing for hills over time. Begin with short, gentle inclines to establish a comfortable cadence range and gear baseline. Progress to longer or steeper climbs, practicing early shifts and cadence control. Track your ride data (cadence, power, heart rate) to identify improvements and adjust gear choices accordingly. End with a cooldown and drivetrain check to reinforce good habits.
Personalizing Your Gear Plan: How to Test and Tune
Customize your hill gearing by testing on actual routes you ride. Start with a conservative base gear, then adjust depending on your cadence and fatigue levels. Keep a simple log of hill length, grade, chosen gear, cadence, and perceived effort. Revisit your plan after a few weeks of riding; small refinements can yield meaningful improvements in climb efficiency and consistency.
Tools & Materials
- Gearing-equipped bicycle (multi-speed drivetrain)(Road or mountain bike with at least 7 speeds is common)
- Chain lubricant suitable for conditions(Apply before hills and after wet rides)
- Bike maintenance toolkit (Allen keys, chain tool, patch kit)(Include 4mm, 5mm, 6mm Allen keys)
- Tire pump and pressure gauge(Check tire pressure for grip on climbs)
- Spare inner tube(Bring along for longer climbs or remote routes)
- Cadence sensor or cycle computer (optional)(Helpful to monitor cadence during climbs)
- Hydration and snacks(Maintain energy during longer climbs)
Steps
Estimated time: 60-90 minutes
- 1
Assess hill and set baseline gearing
Before starting, observe the grade and length of the climb. Choose a baseline gear that allows you to begin turning circles immediately, avoiding a dead stop or a grind. This initial choice will guide subsequent shifts as the gradient changes.
Tip: Shift early to avoid scrambling for gears mid-climb; the first 15 seconds set your rhythm. - 2
Check drivetrain and adjust tension
Inspect the chain for wear and ensure the derailleur moves smoothly. Lubricate if needed and verify that cables are not stretched. A stable drivetrain ensures predictable shifts on steep sections.
Tip: Test shifts on a flat surface to confirm reliability before tackling a hill. - 3
Set starting gear for the climb
Dial in a gear that lets you spin without heavy resistance for 15–20 seconds. This keeps your cadence in a comfortable range and protects your knees as the hill begins.
Tip: If your cadence drops below target, ease by shifting to an easier gear early. - 4
Shift before the grade worsens
Anticipate changes and shift while the pedals feel smooth. Moving to a lower rear cog or lighter front chainring early reduces the risk of chain rub and keeps momentum.
Tip: Avoid last-minute shifts under load; plan your changes a few pedal strokes ahead. - 5
Maintain cadence during the climb
Aim for a steady cadence throughout the ascent. If you sense fatigue, ease into a lower gear rather than forcing higher power; cadence consistency sustains performance.
Tip: A cadence monitor helps you stay within your efficient range. - 6
Use body position to conserve energy
Stay relaxed with a quiet upper body, soft elbows, and a balanced pedal stroke. Stand briefly only for short, steep gaps; otherwise remain seated to preserve efficiency.
Tip: Breathing rhythm often mirrors cadence—inhale on easier segments, exhale on harder sections. - 7
Address long or variable hills
On longer climbs, break the route into segments and adjust gear as each segment changes. This helps you avoid sudden fatigue and keeps effort manageable.
Tip: Micro-adjustments every 30–60 seconds prevent large, disruptive shifts. - 8
Descent planning and post-climb shift
After cresting, shift to a more versatile gear to accelerate efficiently. Check your cadence and settle into a comfortable cruise on the descent.
Tip: Reset your cadence to the familiar range before the next incline. - 9
Cool down and drivetrain check
Finish with a gentle cooldown; inspect the chain and derailleur for any wear or alignment issues. Clean and lubricate the chain after the ride if conditions were dirty.
Tip: A quick post-ride check prevents surprises on the next climb. - 10
Record results and adjust
Note the gear choices, cadence, and perceived effort. Use these notes to refine your baseline gearing and shift strategy for future hills.
Tip: Keep a simple log so small improvements add up over weeks. - 11
Practice on varied hill profiles
Practice on short, medium, and long climbs to diversify your gearing strategy. This builds mental muscle for anticipating grade shifts.
Tip: Varied practice builds confidence and reduces hesitation on real climbs. - 12
Personalize and repeat
Use your ride data to tailor the gear range to your strength and bike type. Revisit your plan every few weeks as fitness or route difficulty changes.
Tip: Small, consistent tweaks yield meaningful performance gains.
People Also Ask
What gear should I use on steep hills?
Shift to a low gear before you start climbing and try to keep your cadence steady. Prefer smooth shifts over power surges to reduce fatigue and preserve energy for the longer climb.
Shift to a low gear before the steep part and keep a steady cadence; smooth shifts help you climb without burning out.
Should I stand up to climb?
Stand up briefly for very steep sections or to regain momentum, but most climbs are more efficient when you stay seated and maintain cadence.
Stand up only briefly on the steepest parts; seated climbing keeps you consistent and efficient.
Is a 1x drivetrain enough for hills?
Yes, many riders climb hills well with a 1x setup, provided you have a wide-range rear cassette. It simplifies shifting and reduces weight.
A 1x drivetrain can work well for hills if you have a wide enough cassette; it simplifies shifting.
How can I know if my gearing is right for hills?
Test on actual climbs and adjust so you can maintain a comfortable cadence without excessive effort. If you find yourself grinding or spinning too fast, tweak the gear range.
Test on climbs and adjust until you can maintain steady cadence without straining.
What maintenance helps gearing on hills?
Keep the chain clean and lubricated, check derailleur tuning, and replace worn cogs or chain as needed to ensure smooth shifts on climbs.
Keep the drivetrain clean and tensioned for smooth hill shifts.
Can I ride hills without a front derailleur?
Yes, with a 1x setup you rely on the rear cassette for the range. Expect fewer gears, but simpler maintenance and lighter weight.
Yes, you can climb with a 1x setup; you’ll have fewer gears but simpler maintenance.
Watch Video
Quick Summary
- Set a cadence-friendly baseline before climbs
- Shift early to avoid mid-climb gear juggling
- Maintain smooth, controlled pedal strokes
- Tailor gearing to hill type and bike setup
- Regular drivetrain checks prevent mid-ride failures