Repair Bicycle: Step-by-Step Maintenance Guide
Learn how to repair bicycle basics—from flats to brakes and gears. This comprehensive guide covers essential tools, safety checks, and step-by-step workflows to keep your ride reliable.

By the end of this guide, you’ll be able to diagnose common bicycle issues and perform safe, hands-on repairs, from adjusting brakes and gears to fixing a flat and true wheel. You’ll learn essential tools, maintenance checks, and when to seek professional help, plus a repeatable step-by-step workflow you can reuse.
Why Repair Bicycle matters
Regular bicycle repair and maintenance is about safety, reliability, and value. According to BicycleCost, intentional, proactive maintenance reduces the risk of sudden failures and keeps your ride predictable across seasons and terrains. The repair bicycle mindset is not about becoming a professional mechanic; it’s about adopting a repeatable workflow you can trust. Start with a simple baseline: quick checks before every ride (tires, brakes, chain condition) and a deeper monthly inspection of cables, pulleys, and hubs. When you invest a little time diagnosing and fixing small issues, you reduce risk and increase confidence on every ride. For urban commuters and weekend explorers alike, proper maintenance means fewer flats, smoother shifting, and longer component life. The goal is consistency: identify the symptom, verify with a quick test or inspection, and apply a fix you understand well. If a problem feels beyond your comfort, seek professional service before riding again. The overarching principle is clear: safety, reliability, and enjoyment grow when you practice regular, informed repairs.
Essential tools and safety basics
A solid repair approach starts with the right tools and protective habits. Assemble a compact toolkit you can trust on the road or at home:
- A bike multi-tool with common Allen keys and a chain breaker
- Tire levers (2–3 for stubborn beads)
- Patch kit or tubeless repair kit, plus sealant if applicable
- Pump or CO2 inflator compatible with your valves
- Chain tool for link removal or rivet work
- Bicycle lubricant and a rag for cleaning
Safety first: work in a well-lit, level space, secure the bike on a stand or between sturdy supports, and wear eye protection when popping tires or cutting chain links. Keep a spare inner tube if you frequently ride in areas with rough terrain. Regularly inspect your gloves, eye protection, and footwear to ensure full dexterity during repairs. With the right tools and mindset, you can repair bicycle components like brakes, gears, and the chain reliably and safely.
Diagnosing common problems
Effective repair starts with diagnosis. Look for obvious signs first: brake pads rubbing or squealing, gear shifts not indexing, a sticky rear derailleur, wheels that wobble or feel loose, and tires that lose air quickly. A systematic checklist helps you distinguish between symptoms and root causes. For example, brake issues may arise from worn pads, misaligned calipers, or contaminated rotors. Shifts can fail due to stretched cables, dirty pulleys, or a misadjusted derailleur. Wear patterns on the chain, cassette, and chainrings reveal timing issues and slippage risks. According to BicycleCost Analysis, 2026, most routine problems come from wear, improper tension, or insufficient lubrication. Use a magnifying glass or flashlight to inspect components up close, test ride after adjustments, and document findings. When you feel uncertain or the problem involves critical safety systems, err on the side of caution and seek professional help. Building a habit of quick checks and methodical diagnosis makes future repairs faster and safer.
Puncture repair: fixing a flat
Flat tires are among the most common road-side repairs. Start by identifying the type of tire (clincher vs tubeless) and locate the puncture. If you have a clincher tire, remove the wheel, deflate completely, and use tire levers to free the bead. Remove the tube, locate the puncture with soapy water, and patch or replace as needed. If you patch, roughen the area, apply glue, and hold the patch firmly for the recommended time. For tubeless setups, remove the valve core if needed, inject sealant, and reseat the tire. Inflate gradually and test for air retention. After repairing, reinstall the tube or tire, ensure the wheel spins true, and check for bead seating. Carry spare patches, a spare tube, and a compact inflator to stay prepared on rides. This repair may seem daunting at first, but with practice, you’ll handle most flats quickly and safely.
Brake systems: adjusting calipers & discs
Brakes are non-negotiable for safety. Start by checking pad wear and rotor condition, then inspect the caliper alignment. For rim brakes, loosen the mounting bolts, align the brake pads with the rim, and re-tighten. For disc brakes, ensure the rotor is true and the caliper is centered over the rotor. If you hear squeaks or rubbing, adjust the pad position and cable tension. Bleeding hydraulic brakes is a specialized task and should be done with the correct fluid and tools. Worn pads or contaminated rotors require replacement. After any brake work, test in a safe area with gentle pressure to ensure consistent stopping power. Remember to bed in new pads gradually to avoid glazing and fade. Regular brake maintenance pays dividends for your safety and confidence on every ride.
Gears and derailleur tuning
A smooth drivetrain relies on clean, well-lubricated components and precise indexing. Start by inspecting the chain for wear and measuring with a chain checker. Clean the chain, cassette, and chainrings, then adjust the cable tension and limit screws so the derailleur shifts crisply across all gears. If the chain skips under load, you may need a new chain or a different cog/wear pattern. Align the derailleur hanger if it’s bent, and check that the pulleys spin freely without noise. A well-tuned derailleur reduces friction and extends the life of drivetrain components. After adjustments, test-shift through all gears with light to moderate pedal pressure, ensuring smooth transitions and no chain rub. Regular checks help you catch wear early and avoid expensive replacements.
Wheel true and spoke tension
A true wheel runs evenly without lateral wobble. Inspect the rim for lateral runout and the tire for seating. If you notice side-to-side wobble, you’ll need a truing stand or a sturdy improvised mount. Tighten or loosen spokes carefully in small increments while watching the spoke nipple as you go. A high-pitched 'ping' when tapping the spokes indicates tension variance that should be addressed. Keep an eye on spoke nipples for corrosion and ensure the tire bead seats correctly after truing. If the wheel remains loose or you’re unsure about the tension balance, seek professional help. Proper truing reduces brake rub, improves ride feel, and prevents rim damage.
Chain maintenance and lubrication
The chain is the backbone of the drivetrain. Clean the chain with a degreaser and a rag, removing built-up grime that increases wear. Re-lubricate with a bike-specific lubricant, applying to the inner plates while rotating the pedals backward to distribute it evenly. Wipe off excess lube to prevent attracting dirt. Regular lubrication reduces friction, extends chain life, and keeps shifting smooth. Inspect the chain for stiff links or kinks and replace if needed. A well-lubricated chain not only performs better but also prolongs the life of the cassette and chainrings, saving you money over time.
When to seek professional help and maintenance plan
Some problems require specialized tools and expertise. If the brake system involves hydraulics beyond basic bleeding, if you notice persistent misalignment after adjustments, or if wheel truing demands precise spoke tension, consult a professional mechanic. Establish a simple maintenance plan: a quick weekly check, a deeper monthly inspection, and a thorough quarterly overhaul if you ride regularly. Document issues and fixes to build your personal repair history. A structured approach keeps you confident, reduces downtime, and extends the life of your bike. The BicycleCost team recommends creating a beginner-friendly but thorough routine that grows with your skills, balancing independence with safety.
Bonus: creating a home maintenance routine
Incorporate repair bicycle practices into a weekly schedule that fits your riding calendar. A 30-minute weekly check, plus a longer 60–90 minute monthly service, can cover most minor issues before they become major costs. Use a simple checklist and a small spare parts kit so nothing slows you down. Keeping a log of maintenance activities helps you notice patterns and plan parts replacements in advance. As you gain experience, you’ll rely less on guesswork and more on repeatable steps that ensure your bike remains safe and enjoyable to ride.
Tools & Materials
- Bike multi-tool(Contains common Allen keys and screwdriver, plus a chain breaker)
- Tire levers(2–3 levers for stubborn beads)
- Patch kit or tubeless repair kit(Include patches or plug kit and sealant if tubeless)
- Floor pump or CO2 inflator(Presta/Schrader compatible; carry spare CO2 canisters)
- Chain tool(For rivet links and chain breaks)
- Lubricant(Bike-specific lube; wax lubricants optional for dry conditions)
- Replacement inner tube(Optional; can patch instead of replace)
- Rags/brush(For cleaning and applying degreaser)
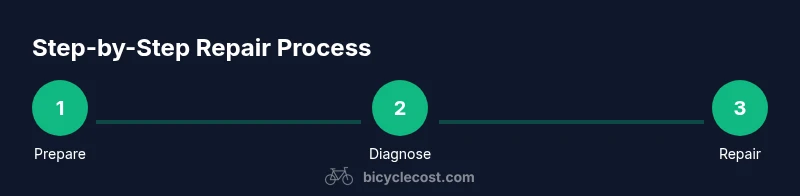
Steps
Estimated time: 60-90 minutes
- 1
Prepare and secure the bike
Place the bike on a stable stand or invert the frame in a safe support. Gather tools, PPE, and a clean workspace. Confirm the ride area is clear and you have adequate lighting before starting any repair.
Tip: Secure the bike well to prevent movement; a slight wobble can cause injury during repairs. - 2
Diagnose the issue with a quick check
Perform a rapid walk-around: check tires for wear and punctures, inspect brake pads for wear, test brake lever feel, and rotate pedals to observe any rubbing or grinding. Note any unusual noises or sensations as clues to root causes.
Tip: Use a simple checklist to ensure you don’t miss a major system. - 3
Repair a puncture and reassemble
If a puncture is found, remove the wheel, deflate completely, pry the tire bead with levers, remove and inspect the tube for holes, patch or replace, and reseat the tire. Re-inflate to the recommended pressure and inspect for leaks.
Tip: Work slowly when removing the tube to avoid pinching the new tube. - 4
Adjust brakes for proper alignment
Check pad alignment with the rim or rotor, centered evenly. Tighten mounting bolts, test squeeze for smooth stopping, and recheck for rub. If squeal persists, adjust pad spacing or rotor lateral alignment as needed.
Tip: Avoid touching brake rotors with dirty hands to prevent contamination. - 5
Index gears and check chain wear
Lubricate and clean the chain, then adjust derailleur tension and limit screws so shifting is clean across all gears. Inspect the chain for wear and replace if stretched beyond your chain wear indicator.
Tip: Make small adjustments and test-shift through every gear after each tweak. - 6
Inspect wheel true and spoke tension
Spin the wheel and observe lateral wobble. If needed, tweak spoke nipples in small increments to bring the wheel into true alignment. Check for rim or spoke damage and address as necessary.
Tip: Only adjust a few spokes at a time; large changes require a stand and experience. - 7
Test ride and document maintenance plan
Take a short test ride in a safe area to verify fixes. Listen for noises and check for smooth engagement across gears and brakes. Record what you did and schedule the next routine maintenance.
Tip: A quick test ride confirms success and helps you spot remaining issues.
People Also Ask
What are the essential tools for repairing a bicycle at home?
A basic toolkit includes a multi-tool, tire levers, patch kit, pump, chain tool, and lubricant. Having a small spare tube helps with quick punctures.
You need a basic toolkit like a multi-tool, tire levers, patch kit, pump, chain tool, and lubricant for home repairs.
Can I fix a flat tire myself?
Yes. With patching or replacing the tube and reseating the tire, you can restore the wheel and resume riding after confirming there are no leaks.
Yes. You can fix a flat with patches or a new tube and then test for leaks before riding again.
How often should I lubricate my chain?
Lubricate after wet rides or every 100–200 miles, depending on conditions. Wipe off excess to prevent dirt buildup.
Lubricate after wet rides or every so often, and wipe away excess.
When should I replace a chain?
Check wear with a chain checker; replace if stretched beyond recommended limit to prevent gear damage.
Check the chain for wear and replace when stretched to avoid gear wear.
Is tubeless puncture repair possible?
Yes. Use sealant and plugs as needed to seal punctures; ensure the tire bead seats correctly after repairs.
Tubeless repairs use sealant and plugs; reseat the bead after repairing.
How can I test my bike after repairs?
Take a short test ride in a safe area, listen for noises, and verify brakes and gears shift smoothly.
Take a short test ride in a safe area to confirm everything works.
Watch Video
Quick Summary
- Develop a repeatable repair routine.
- Carry essential tools on every ride.
- Lubricate and inspect regularly to extend life.
- Know when to call a professional for safety.