How to Use Bicycle Rollers
A practical, educational guide to using bicycle rollers safely. Learn setup, mounting, balance, cadence, troubleshooting, and progression for effective indoor training.

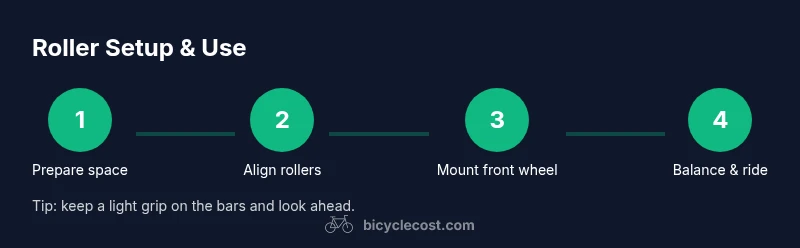
Follow this step-by-step guide to learn how to use bicycle rollers safely, build balance, and improve pedal stroke. You’ll set up space, mount your bike, begin with light cadence, progress to steady riding, and troubleshoot common issues. This quick path moves you from beginner to confident indoor roller training, with safety tips from BicycleCost.
What are bicycle rollers and who should use them?
Bicycle rollers are a set of three cylinders connected by a lightweight frame that let your bike balance on rolling drums instead of a fixed trainer. They demand balance, steering finesse, and smooth pedal action, which makes them excellent for developing cadence and pedal economy. According to BicycleCost, rollers can be particularly effective for endurance riders who want a refined feel for your bike and more realistic pedal dynamics. They’re less forgiving than fixed trainers, so the setup, space, and progression matter: start simple, stay steady, and build confidence as you improve control. If you’re new to rollers, approach them like a skill drill for your cycling fundamentals rather than a sprint workout.
A common beginner goal is to ride comfortably for 10–15 minutes with minimal wobbles, then extend as balance improves. Regular practice helps with balance, core engagement, and bike-handling skills, which translate to better performance on the road. For many cyclists, learning on rollers also reduces the fear of riding in traffic because you gain smoother cadence and more precise pedal strokes. The BicycleCost team recommends a cautious, patient approach and consistent sessions to see real gains without overdoing it.
Safety foundations and space planning
Rollers require a stable surface and enough space to maneuver without bumping into furniture or walls. Clear a space of at least 6 by 8 feet and lay down a non-slip mat to protect the floor and improve traction. Wear comfortable cycling shoes and avoid bulky clothing that could snag on parts of the frame. Keep a wall or sturdy railing nearby for balance during the early sessions. If you start feeling dizzy or off-balance, stop and reset rather than pushing through the wobble. Adequate ventilation and a fan can help you stay cool during longer drills. Finally, never attempt rollers near stairs, pets, or other distractions that could disrupt your focus.
Choosing rollers and bike fit for safe use
Choose a roller set that matches your bike’s wheelbase and tire size, with adjustable width and a solid frame. A moderate, quiet drum is preferable for beginners, as excessive vibration can be startling. Your bike should sit evenly on the rollers when mounted; check wheelbase compatibility and ensure the front wheel is positioned at a suitable height relative to the rear drum. For tires, use a standard road or hybrid tire in good condition with proper inflation. A higher tire pressure reduces squirm on the drums, but avoid over-inflation that could compromise control. A front-wheel riser block is optional but can help align your ride height with the rear roller, making balance easier during the initial sessions.
Mounting, balance, and getting started
Begin with a controlled mounting process: position the bike so the front wheel sits on the front roller and the rear wheel on the rear roller. Hold the handlebars lightly and look forward, not down, to help maintain balance. Start with the lowest gear and a comfortablepedal cadence; don’t push hard or sprint. Maintain a light grip and let the bike steer with your hips and hands as you ride. If you start to drift, gently steer toward the fixed point in front of you and reset. Practice near a wall for extra support and gradually remove your reliance on the barrier as balance improves.
Pedaling technique, cadence, and progression
Aim for a smooth, circular pedal stroke rather than mashing the pedals. A steady cadence—usually slower at first, then gradually increasing—helps you balance and coordinate your hips, knees, and ankles. Focus on a relaxed upper body: elbows bent, shoulders down, and eyes on a fixed point ahead. As you gain confidence, introduce gentle cadence intervals and longer rides, but keep sessions short enough to preserve form and avoid fatigue that can undermine balance. Finish each session with a light cooldown spin to center your muscles and prevent stiffness.
Troubleshooting and advancing your routine
Common issues include wobble, drift toward one side, or losing balance when braking. If you wobble, slow your cadence, soften your grip, and check your foot position. Ensure both rollers are aligned and that your bike is centered on the frame. If you drift, make micro-adjustments with your hips and look at a fixed gaze point rather than scanning the floor. For progression, add 5–10 minutes per session every week, alternate with cadence drills, and gradually introduce low-resistance efforts. Always end sessions with a cool-down and stretch for hips, calves, and lower back.
Tools & Materials
- Bicycle rollers (front roller, rear roller, frame with adjustable legs)(Ensure rollers are parallel and adjustable to fit your bike's wheelbase)
- Bike in good condition with tires suitable for indoors(Check tire tread and inflation; avoid excessively worn tires)
- Non-slip mat or protective floor covering(Prevents slipping and protects floor)
- Front wheel riser block (optional)(Can help align front height with rear roller for easier balance)
- Water bottle, towel, and a fan(Keep you cool and comfortable during longer drills)
- Clear space roughly 6x8 feet(Ensure a safe, obstacle-free zone)
Steps
Estimated time: 60-90 minutes total
- 1
Prepare space and inspect equipment
Clear the area, inspect the rollers and bike tires for wear, and verify the frame is stable. Check that the rollers are aligned parallel and the floor is dry and non-slip. This initial check helps prevent sudden movements once you start riding.
Tip: Take 2 minutes to confirm spacing and alignment before mounting. - 2
Position rollers and bike for alignment
Place the frame on a clean, flat surface and align the distance between the front and rear rollers with your bike's wheelbase. Use a tape measure if needed to ensure symmetry. An even setup reduces unexpected drift during the first pedal strokes.
Tip: Measure the wheelbase once and reuse it as a reference for future sessions. - 3
Mount the front wheel on the front roller
Gently place the front wheel onto the front roller. Keep the handlebars steady with a light grip. Look forward to help your balance and avoid looking down at the wheel.
Tip: Let your hips do the steering; the hands should guide minimally to avoid overcorrection. - 4
Position the rear wheel on the rear roller and balance
Set the rear wheel onto the rear roller. Hold the frame lightly and focus on a fixed point ahead. If you wobble, ease off the cadence and re-establish balance before continuing.
Tip: Use a wall or railing for a safety reference while you find your balance. - 5
Begin pedaling with low cadence and light effort
Start with a very easy gear and a calm pace to find a stable pedal stroke. Keep your upper body relaxed and breathe steadily. Don’t push hard until you can maintain balance for at least 1–2 minutes.
Tip: Maintain a light grip on the handlebars and focus on a smooth circle of motion. - 6
Progress, cooldown, and dismount safely
Gradually extend session duration and cadence drills as balance improves. End with a 2–3 minute easy spin and a gentle stretch. When finished, slow the bike, remove the front wheel, and step away from the rollers slowly to avoid missteps.
Tip: Always finish with a cooldown and check your equipment before storing.
People Also Ask
Do I need special tires or wheels for bicycle rollers?
No special tires are required; standard road or hybrid tires in good condition work well. Check tire wear and inflation before each session.
Typically regular road tires are fine; inspect wear and inflate to normal riding pressure before using the rollers.
Is it safe for beginners to start with rollers?
Yes, beginners can start with rollers by practicing near a wall and using a calm, controlled pace. Take it slow and progress as balance improves.
Yes, start near a wall and go slowly until you’re comfortable.
How long should a first session last?
Begin with 10–15 minutes and gradually extend to 20–30 minutes as balance and confidence grow.
Start with 10–15 minutes and build up gradually.
Can I wear clip-in shoes on rollers?
Clips are permissible, but many beginners prefer flat shoes for easier dismounts. If you use clips, practice exits slowly and confidently.
Clips are okay but start with flat shoes and practice dismounts slowly.
What are common mistakes to avoid on rollers?
Avoid looking down, gripping the bars too hard, and pushing with excessive cadence. Stay relaxed and steer with your hips while keeping cadence steady.
Don’t look down, don’t grip tightly, and don’t push hard; stay relaxed.
How should I progress once I can balance?
Increase session duration gradually, add cadence drills, and introduce short resistance challenges as balance improves. Always end with a cooldown.
Build duration first, then add cadence and light resistance gradually.
Watch Video
Quick Summary
- Practice progressively to build balance and confidence.
- Keep a light grip and steady gaze to stabilize on the drums.
- Maintain smooth pedal strokes rather than mashing pedals.
- Create a safe practice space and end each session with a cooldown.