How to Remove the Rear Bicycle Wheel: A Step-by-Step Guide
Learn how to safely remove the rear wheel from your bicycle, whether you have a quick-release or thru-axle. This guide covers preparation, tools, step-by-step removal, reinstallation, and safety checks.

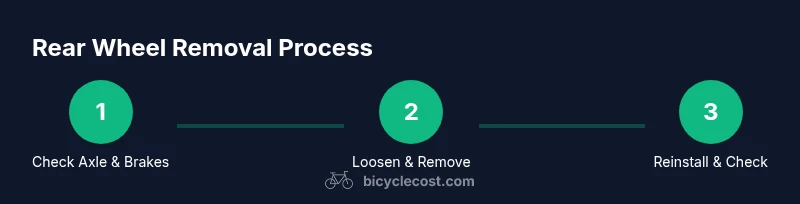
In this guide you will learn how to remove the rear bicycle wheel safely and efficiently. The steps differ by axle type (quick-release vs thru-axle) and brake system, so you’ll see distinct paths for each setup. By the end, you’ll know how to prepare, detach, and reinstall the wheel with confidence.
Why removing the rear wheel matters
Removing the rear wheel is a fundamental maintenance task that enables tire and tube replacement, wheel truing, brake maintenance, and derailleur access. It also helps with cleaning and storage, or transporting your bike. Knowing how to do it safely reduces risk of frame or derailleur damage, and speeds up roadside repairs. According to BicycleCost, mastering wheel removal can save time during long rides where a puncture occurs or a quick tire swap is needed. The BicycleCost Team emphasizes that taking a methodical approach protects parts like the derailleur, cassette, and brake rotors. In this guide, we distinguish between quick-release and thru-axle systems and cover both road and mountain bikes so you can adapt to your setup.
Identify axle type and brake system you have
Most modern bikes use one of two rear-wheel attachment methods: a quick-release skewer or a thru-axle bolt. Quick-release (QR) skewers are lever-operated and typically found on many road and hybrid bikes. Thru-axles are bolted through the frame and wheel with a larger diameter and often require a hex key torque. Disc brakes add a rotor on the wheel hub; rim brakes may require caliper clearance. Before you touch any parts, shift the chain to the smallest ring and smallest rear cog so there is minimal tension and movement in the derailleur. If you have a bolt-on axle, you’ll need the appropriate hex wrench or socket to loosen the axle bolts.
Tools, safety and prep
Before you start, gather these tools and prepare the workspace:
- Hex wrenches: 5mm and 6mm — essential for bolt-through axles and some derailleur hangers.
- Adjustable wrench or torque wrench — helpful for re-tightening to spec on bolt-through axles.
- Tire levers and patch kit — for tube changes after removal.
- Rag or cloth — to clean rotor or braking surfaces.
- Bike stand or sturdy surface — to hold bike steady.
- Gloves and eye protection — to shield from sharp edges or springs.
Safety: never work under a bike supported only by a loose surface; ensure the bike is stable. If you’re unsure about the brake system, consult your manual before removing the wheel. The BicycleCost Team highlights that a stable setup reduces the risk of damaging brakes or the derailleur.
Quick-release rear wheel removal: key steps
If your bike uses a quick-release, follow these general steps to remove the rear wheel. Always shift to the smallest chainring and cog to ease disengagement. For rim brakes, you may need to open the brake caliper to prevent the brake pads from rubbing during removal. Start by flipping the QR lever to the open position, then unscrew the opposite-side nut slightly to free the wheel. With one hand beneath the wheel, gently pull the wheel downward and away from the frame, guiding the derailleur to avoid snagging the chain. Once free, lower the wheel to the ground or a supporting surface. Inspect the cassette, derailleur, and rotor for any damage before proceeding with repairs. The BicycleCost Team cautions to avoid forcing the wheel if it binds; instead, check alignment and brake clearance first.
Thru-axle or bolt-on rear wheels: how this differs
Thru-axle systems require removing the axle bolt with the appropriate hex wrench. Loosen the axle while supporting the frame to prevent twisting, then slide the wheel out straight. Bolt-on axles are similarly removed by loosening bolts on each side, but without a central quick-release lever. For both, ensure the derailleur is in a position that won’t snag the chain as you pull the wheel free. If you have a disc brake, verify rotor clearance and avoid touching the rotor with greasy fingers. After the wheel is removed, inspect the axle threads for wear and clean the dropout slots to ensure a clean reinstall.
Reinstalling the rear wheel and final checks
To reinstall, align the wheel with the dropouts, slide it into place, and resecure the axle or quick-release. Re-center the wheel so it sits straight between the fork or frame, and ensure the rotor (for disc brakes) clears the caliper. Tighten the quick-release lever or axle bolts to the recommended torque, then re-engage the brakes by spinning the wheel and listening for rubbing. Shift through the gears to confirm smooth movement and verify the derailleur alignment. A proper reinstall keeps your alignment accurate and reduces wear on the drivetrain. The BicycleCost Team recommends a final visual check of pad clearance and rotor true before you ride.
Common mistakes and how to avoid them
Riders often forget to loosen the brake clearance, misalign the wheel, or forget to re-tighten the axle properly. Another frequent error is not inspecting the cassette and derailleur after wheel removal, which can hide issues that lead to poor shifting. Always ensure the brake pads are not rubbing after reinstall, and check the wheel spin for any side-to-side play. If you have a tubeless setup, make sure the bead sits evenly during reseating. Remember to keep your hands clear of the chain and crank during this process to avoid pinching or pinching the fingers.
Quick recap: safe wheel removal checklist
- Confirm axle type (QR vs thru-axle) and brake type.
- Gather the appropriate tools and stabilize your bike.
- Shift to the smallest chainring and cog; open the brake if needed.
- Remove the wheel carefully, watching for derailleur or chain interference.
- Reinstall with proper alignment and torque; test brakes and gears.
Tools & Materials
- Allen wrenches (5mm and 6mm)(Essential for many thru-axle and derailleur bolts)
- Adjustable wrench or torque wrench(Helpful for bolt-through axles and torque spec)
- Tire levers(Useful if you plan to roll the tube/tire off the rim later)
- Patch kit or replacement inner tube(Have on hand for punctures during wheel work)
- Rag or cloth(Clean rotor, cassette, and spokes; wipe hands)
- Bike stand or sturdy work surface(Stability helps prevent slips while loosening components)
- Lubricant or light oil(Optional for reassembly or to ease stubborn bolts)
Steps
Estimated time: 30-45 minutes
- 1
Prepare and inspect
Shift to the smallest chainring and rear cog. Check your brakes and the derailleur to ensure nothing is in the way of wheel removal. Make sure you have a stable surface and good lighting before you begin.
Tip: If you’re on a road-side repair, place the bike on the ground with the gear off to prevent the chain from slipping. - 2
Loosen axle fasteners
For quick-release, flip the lever to open and loosen the skewer on the opposite side. For thru-axles or bolts, use the correct hex wrench to loosen, but do not remove completely yet.
Tip: Support the wheel with one hand as you loosen the last turn to prevent it from dropping. - 3
Relieve brake clearance
If you have rim brakes, gently widen the brake calipers to allow the wheel to clear. If you have disc brakes, ensure the rotor has ample clearance from the caliper when removing.
Tip: Do not force the wheel past the brake pads or caliper; adjust caliper clearance first. - 4
Remove the wheel
With the axle loose, tilt the wheel away from the frame and slide it down and out. If a derailleur hanger is in the way, guide the derailleur slightly to clear the chain.
Tip: Keep the chain slack by gently rotating the cranks backward as you remove the wheel. - 5
Inspect and set aside
Place the wheel on a stable surface. Inspect the tire for embedded objects, the tube for punctures, and the rims for damage. If you plan to patch or replace the tube, do so now.
Tip: For tubeless setups, check bead seating and sealant levels before reinflating. - 6
Reinstall the wheel
Slide the wheel back into the dropouts or through-axle, align the rotor with the caliper if applicable, and tighten the axle to the recommended torque. Spin the wheel to confirm true and test brake operation before riding.
Tip: After reinstall, gently squeeze the brake lever to re-center calipers and check for rubbing.
People Also Ask
Do I need to remove the derailleur before removing the rear wheel?
Usually not necessary to remove the derailleur completely. Shift to the smallest cog, align the derailleur, and guide the wheel out slowly to avoid snagging the chain.
You generally don’t remove the derailleur. Shift to the smallest cog, align the derailleur, and guide the wheel out slowly.
My rear wheel won’t come out; what should I check first?
Check brake clearance and ensure the quick-release lever or axle bolts are fully loosened. Make sure the chain isn’t caught on the cog or derailleur. Reposition the chain slightly and try again.
First, check brake clearance and that the axle is fully loosened. Ensure the chain isn’t snagging on the gears, then retry gently.
Can I remove the wheel without deflating the tire?
Deflating the tire is not mandatory for wheel removal, but deflation can make the bead easier to seat on reinstall and reduce the risk of pinch flats during removal.
Not always required, but deflating can help with bead seating and prevent pinch flats on reinflation.
How do I know the wheel is seated correctly after reinstall?
Spin the wheel to check for true rotation, listen for rubbing, and verify that the rotor clears the brake caliper. Inspect the dropouts and ensure the axle is tight to spec.
Spin the wheel to check for rubbing, and make sure the rotor and brake caliper are aligned. Check axle tightness.
Is it safe to ride immediately after wheel removal?
Only ride after verifying the wheel is securely installed, brakes function properly, and gears shift smoothly. A quick test ride on a quiet street is advised.
No, don’t ride until you’re sure the wheel is secure and the brakes and gears are working properly.
Watch Video
Quick Summary
- Identify axle type before starting
- Prepare workspace and tools in advance
- Follow separate paths for QR vs thru-axle removal
- Reinstall wheel with correct torque and alignment
- Double-check brakes and gears after reinstall