How to Keep a Bicycle: A Practical Maintenance Guide
Learn practical, repeatable maintenance steps to keep your bicycle safe and reliable. From cleaning and lubrication to tire care and storage, follow this comprehensive guide for a smoother ride and longer bike life.

You will learn a practical, repeatable routine to keep your bicycle safe and reliable. This guide covers essential cleaning, lubrication, tire care, brake checks, and storage. No specialized tools required for a basic upkeep, and the steps work for most common bicycles. By following a simple schedule, you can prevent common issues and extend your bike’s life while enjoying safer rides.
Why Regular Maintenance Matters
Regular maintenance is the cornerstone of a safe, enjoyable ride. A well cared-for bicycle performs better, lasts longer, and is less prone to sudden failures on the road. The BicycleCost team emphasizes that consistent upkeep reduces the likelihood of rust, wear, and loose components, which translates to fewer costly repairs and more reliable miles. When you invest a small amount of time into a routine, you’ll notice smoother shifting, steadier braking, and fewer flats. This section explains how a simple, repeatable routine can prevent common problems, save money, and extend the life of your bike. Expect a cleaner drivetrain, better tire seal, and a safer ride as you build confidence through regular checks.
Getting the Right Tools and Schedule
Before you begin, assemble a basic toolkit and set a maintenance cadence that fits your riding frequency. A minimal kit includes a multi-tool, tire levers, a pump with a gauge, a chain lubricant, a bike-safe degreaser, clean rags, and a patch kit. The BicycleCost analysis suggests choosing tools you will actually use and storing them in a dedicated bag or box. Create a simple schedule: quick checks before each ride (5 minutes), a thorough clean and lube every 2–4 weeks, and a full inspection every 6–12 weeks, depending on use and climate. Keeping a maintenance log helps you track wear and plan replacements.
Cleaning and Basic Lubrication
Start with a light wipe-down to remove surface dirt. Use a degreaser on the chain and drivetrain, then scrub with a soft brush until grime lifts. Rinse lightly and dry thoroughly. Apply a thin film of chain lubricant to the chain and pivot points, avoiding excessive buildup. Wipe off any excess to prevent attracting more dirt. Regular cleaning prevents corrosion and keeps shifting smooth, especially in wet conditions. Remember: less is more when applying lubricant; over-lubing can attract dirt and hamper performance.
Tire Care and Wheel Trueness
Check tire pressure before every ride, using the recommended PSI printed on the tire sidewall. Inspect tires for cuts, embedded debris, and worn tread. If you notice frequent flats, replace worn tires promptly. Spin the wheels to detect wobble; a minor true can be corrected with spoke adjustments, but significant wobble may require professional service. Keeping tires properly inflated improves efficiency, prevents pinch flats, and enhances ride quality. A well-inflated tire also protects the rim and reduces rolling resistance.
Brake Inspection and Adjustment
Brakes are a critical safety feature; inspect them regularly for wear and proper adjustment. Check brake pads for remaining thickness and alignment with the rim or rotor. If you hear rubbing or feel reduced braking power, adjust tension or pad position as needed. For cable brakes, ensure the cables move smoothly without fraying. Replace worn brake pads promptly and verify that the levers return fully when released. Regular brake checks help you stop reliably in diverse riding conditions.
Drivetrain and Chain Maintenance
A clean drivetrain shifts more smoothly and lasts longer. Wipe down the chainguard and cassette, then degrease the chain thoroughly. Lubricate the chain evenly with a small amount of lubricant, allowing it to penetrate the links before wiping away excess. Inspect the chain for stretch and wear using a chain checker tool; replace if worn to prevent damage to the cassette and derailleur. Regular inspection of the front and rear derailleurs keeps your gears precise and reduces dropped chains.
Riding Safe: Quick Checks Before Every Ride
Develop a pre-ride checklist to confirm readiness: tire pressure, brake response, gear shifting, chain lubrication, and quick frame inspection for cracks or loose bolts. Ensure quick-release skewers or thru-axles are secure. Check lights and reflectors if you ride in low light. This habit reduces surprise failures and keeps you safe on busy streets. A brief mental cue—“Air, Brakes, Gears, Chain”—helps you remember key checks quickly.
Seasonal Storage and Long-Term Care
Store your bike in a dry, sheltered place to minimize corrosion and rust. For long-term storage, clean and lubricate the chain, remove the battery from electric components if applicable, and protect exposed metal from moisture with a light coating of anti-corrosion spray. Inflate tires a bit to avoid flat spots during extended storage (if feasible) and cover the bike or place it on a stand to prevent contact with dust. Regularly check seals, cables, and hoses before bringing the bike back into use.
Building a Simple Maintenance Schedule
Create a recurring plan that fits your riding pattern. A practical schedule starts with a quick post-ride wipe-down and tire pressure check, followed by a more thorough clean and lubrication every few weeks, and a full system check quarterly. Use reminders on your phone or calendar to stay on track. A consistent routine reduces last-minute scrambles and ensures your bike remains ready for the next ride.
Tools & Materials
- Bike toolkit (Allen keys and multi-tool)(Include sizes 2, 3, 4, 5 mm; add 6/8 mm for pedals)
- Bike stand or sturdy work surface(Stable height for easy access)
- Bike-safe degreaser(For chain and drivetrain grime)
- Chain lubricant (dry or wet Lubricant)(Choose based on climate; apply sparingly)
- Clean rags and soft brushes(For grime removal and drying)
- Tire pressure gauge(Know the recommended PSI from tire wall)
- Floor pump with gauge(Ensure accurate inflation for rides)
- Spare tube and patch kit(Carry on longer rides as a precaution)
- Bike-cleaning brushes(Soft brushes help reach narrow gaps)
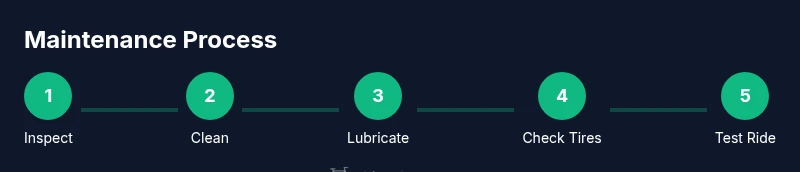
Steps
Estimated time: 60-90 minutes
- 1
Inspect the bike’s condition
Visually inspect the frame, wheel rims, and components for cracks, corrosion, or loose bolts. Check the headset, stem, and seat post for tightness. Note any unusual noises or stiffness during light manipulation of the pedals and handlebars.
Tip: If any part feels loose, stop and tighten it to the recommended torque from the manufacturer. - 2
Prep and set up the workspace
Position the bike on a stand or stable surface. Gather your tools, degreaser, and rags, and remove any mud or grime that could spread during cleaning. This setup reduces mess and saves time during the task.
Tip: Keep a dedicated cleaning area to avoid contaminating other gear. - 3
Clean the drivetrain
Apply degreaser to the chain, chainrings, cassette, and pulleys. Use a soft brush to lift dirt, then rinse lightly and dry completely. A clean drivetrain reduces wear and improves shifting.
Tip: Work from the inside out to minimize recontamination of the chainrings. - 4
Lubricate chain and pivots
Apply a thin coating of lubricant along each chain link while turning the pedals. Wipe off excess to prevent dirt attractants. Lubricate pivot points on derailleurs and brake levers if applicable.
Tip: Avoid applying lubricant to brake discs or rotors; this can reduce stopping power. - 5
Check tires and wheel pressure
Measure tire pressure to match manufacturer recommendations. Inspect sidewalls for cuts and tread wear. Spin each wheel to check for lateral wobble and true; address minor wobbles or consult a shop for larger issues.
Tip: Keep a small pump gauge in your bike bag for accurate, on-the-go checks. - 6
Inspect brakes and adjustment
Check brake pads for wear and alignment with the rim or rotor. Squeeze the brake lever to ensure responsive braking. Adjust cable tension or hydraulic pressure if you notice excessive lever travel or grinding.
Tip: Replace worn pads promptly to avoid metal-on-metal damage. - 7
Inspect gears and derailleur
Shift through all gears to ensure smooth transitions. Check derailleur hanger alignment and limit screws. Clean and lubricate moving parts if needed and test shifts under light load.
Tip: If shifting is rough, it may indicate cable stretch or misadjustment. - 8
Test ride and finalize adjustments
Take a short test ride to confirm that everything feels right. Pay attention to braking, shifting, and overall feel. Recheck fasteners after the ride and tighten if necessary.
Tip: If anything feels off, stop and re-torque critical bolts to the recommended specs. - 9
Create a maintenance log
Record what you did, tools used, and the date. Note upcoming inspection dates and parts that may need replacement soon. A log helps you maintain consistency and plan ahead.
Tip: Set reminders for future checks to stay on track.
People Also Ask
How often should I service my bicycle?
A basic wipe-down and tire pressure check before each ride, a thorough clean and lube every 2–4 weeks, and a full inspection every 6–12 weeks is a solid cadence for most riders. Adjust frequency based on riding conditions and climate.
You should wipe down and check tires before every ride, then do a full service every several weeks depending on use.
What’s the difference between dry and wet lube, and when should I use each?
Dry lube is best for dusty, dry conditions as it attracts less dirt. Wet lube lasts longer in wet conditions but can attract more dirt. Choose based on climate and how often you ride in rain or mud.
Dry lube for dusty days, wet lube for wet conditions; pick based on climate and riding style.
Can I wash my bike with a hose or power washer?
Light rinsing with a hose is generally fine, but keep water away from bearings, hubs, and bottom bracket. Dry thoroughly afterward and re-lubricate exposed components.
A gentle spray from a hose is okay, but avoid blasting water into bearings and keep parts dry afterward.
How do I know when tires or brakes need replacement?
Inspect tire tread and sidewalls for wear and cracking; replace if there are shallow grooves, cuts, or bulges. For brakes, replace pads when thickness is reduced and if braking feels weak or noisy.
Look for worn tread and cracks in tires; replace pads when worn for safe stopping.
Is it worth taking a bike for professional tune-ups?
For complex adjustments, especially drivetrain or wheel truing, a professional service can save time and ensure safety. Use at least a yearly check for high-mileage bikes.
A professional tune-up is worth it for complex adjustments or if you’re unsure about the alignment.
What safety checks should I perform after a repair?
Re-check all fasteners, test brake function, and do a short test ride to confirm smooth gear changes. If anything feels off, revisit the step or seek assistance.
Always re-check fasteners and brakes after any repair and test ride briefly.
Watch Video
Quick Summary
- Establish a simple, repeatable maintenance routine.
- Keep essential tools accessible and organized.
- Regular checks prevent major repairs and extend bike life.
- Use appropriate lubricants and avoid over-application.
- Document maintenance to stay consistent.