How to Get Rid of Bike Rust: A Practical Home Guide
Learn practical, step-by-step methods to remove rust from your bike, protect finishes, and prevent future corrosion with safe tools and proven techniques.

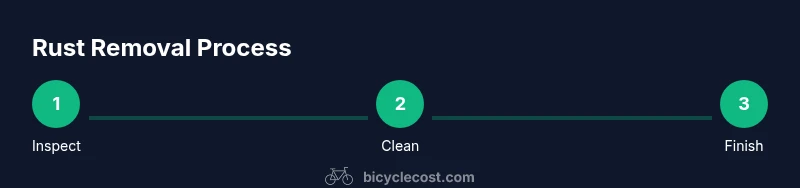
To get rid of bike rust, start with a gentle clean, then remove loose rust with a wire brush or abrasive pad, treat with a rust converter if needed, and seal with primer and paint or clear coat. For severe rust on structural parts like the frame, replace the component or consult a professional.
Why rust forms on bikes
Rust is a natural reaction that occurs when iron or steel is exposed to moisture, oxygen, and electrolytes like salt. On bicycles, rain, humidity, road spray, and sweat can create the perfect conditions for corrosion. According to BicycleCost, rust is a common maintenance issue for cyclists, especially in coastal or winter climates where damp air and road salts are frequent. When rust starts, it often first shows up as reddish specks on chrome or aluminum frames with exposed steel components, or on fasteners, bolts, and chains. Early rust is mostly cosmetic, but if left unchecked it can deepen and compromise strength, pivot points, and fasteners. The key is to recognize it early and act with a plan that fits your bike’s materials and finish. This guide walks you through safe, practical steps to remove rust and prevent its return.
Assessing the rust: surface vs penetrating
Not all rust is the same. Surface rust only affects the outermost layer and is usually removable with a little elbow grease and the right solvents. Penetrating rust reaches deeper into metal and can threaten structural parts if left untreated. Based on BicycleCost analysis, moisture exposure and improper storage are major rust drivers, so your approach should be guided by how extensive the corrosion appears. Start by inspecting the area with good lighting, feeling for roughness or flaky patches, and looking for pitting or discoloration under paint or plating. If you can rub the area smooth and shine a light through the metal, you’re likely dealing with surface rust. If you feel resistance or see deep pits, treat with caution and consider professional help for fragile components.
Cleaning and prepping the metal
Before any rust removal, prepare the work area and the bike. Move the bike to a well-ventilated space, lay down a protective cloth, and remove any parts that complicate the process. Begin with warm, mild soap and water or a dedicated bike degreaser to remove grease and dirt that can mask rust and prevent effective treatment. Dry thoroughly. For painted or chrome surfaces, masking nearby areas with tape helps avoid accidental damage. Have your tools within reach: wire brush, steel wool, sandpaper, rust converter if needed, and a clean cloth for wiping. Proper prep ensures you don’t grind rust into the metal or remove protective coatings unintentionally, which is critical on delicate finishes.
Removing rust safely: mechanical vs chemical options
There are several paths depending on rust type and finish. For light surface rust, mechanical methods work well: gently scrub with a nylon brush and then with steel wool for a smoother surface. If you prefer chemicals, commercial rust removers or rust converters can convert iron oxide to a stable compound that can be painted over. Always follow label directions and wear protective gloves. For chrome or polished areas, avoid aggressive sanding that can dull shine. If you’re dealing with stubborn rust on threads or bolts, apply penetrating oil and let it sit for a few minutes before attempting removal. In all cases, test in an unobtrusive spot first.
Protecting and finishing to prevent future rust
After removing rust, protection is essential. Clean, dry metal can be sealed with a rust-inhibiting primer, then top-coated with color-matched bike paint or a clear coat for protection. In damp climates or on winter rides, consider a wax-based coating or a light oil on exposed metal to slow moisture ingress. Reapply every season or after heavy rain rides. Regular lubrication of moving parts, including pedals, derailleurs, and chain, will reduce friction heat that can accelerate corrosion. Store your bike in a dry, ventilated place, away from salt spray and damp basements.
When to replace or consult a pro
Not all rust can be saved with DIY methods. If you find deep pitting, cracks around welds, or rust that has compromised structural parts such as the frame tubes, forks, or critical fasteners, replacement is safer and more economical in the long run. When components are integral to safety—forks, crank arms, brake mounting points—consult a professional bike shop or frame specialist. It’s also wise to seek help if you’re unsure how to remove rust from an alloy frame without removing protective coatings.
Maintenance to prevent rust in the long term
Prevention is the best cure. After rides in rain, dry the frame thoroughly and wipe down with a clean rag. Apply a light coat of corrosion-inhibiting oil or wax to exposed metal and bolts. Check the frame, chain, and hardware for signs of moisture or salt after winter riding. Use fenders or mudguards to reduce spray that accelerates corrosion. Regular storage in a dry, temperature-controlled space helps, as does periodic inspection of entire frame coatings and fasteners.
Rust on different bike components: frame, alloy, chrome
Different materials react differently to moisture. Steel frames are prone to rust when compromised, whereas aluminum frames generally resist corrosion but can rust at exposed steel fasteners or joints. Chrome plating offers surface protection but can wear away and expose steel underneath. Always tailor your rust-removal approach to the material: avoid aggressive steel wool on chrome, and never sand through paint on aluminum to reach bare metal. For threaded areas, apply anti-seize compounds or appropriate lubricants after cleaning. This nuance matters for safety and longevity.
Practical at-home rust removal kit checklist
Create a dedicated workspace with good lighting and ventilation. Essential items include: protective gloves, safety glasses, a wire brush, steel wool, sandpaper, degreaser, mineral spirits or isopropyl alcohol, rust converter, primer, and paint or clear coat. Mask nearby surfaces with tape, and keep a clean cloth for wiping. Optional additions: rust-removing gel or paste, rust-inhibitor spray, and a small bench vise for stubborn parts. Keeping a simple kit ready makes rust removal faster and less intimidating.
Post-treatment tests: check for hidden rust and structural integrity
After finishing, inspect the entire treated area under good light. Run a finger over joints and fasteners to feel for roughness that indicates remaining rust. Check for any soft spots or visible corrosion that could imply deeper damage. If you used rust converters, ensure the surface is fully cured before handling. A test ride in a safe area can reveal any unusual noises or stiffness that point to residual rust or misalignment.
Quick maintenance routine after cleaning
Develop a short, repeatable routine to prevent future rust: wipe down after rides, apply light lubrication to chain and pivots, inspect for new rust patches monthly, and recoat with protective finish as needed. Keep the bike out of harsh weather when possible and store it off the ground to reduce moisture exposure. Noticing early signs of rust—reddish specks, rough patches, or dull metal—gives you a chance to prevent escalation.
Authoritative sources and further reading
For deeper guidance on rust and metal preservation, consult reputable sources on metal corrosion and bicycle maintenance. See Britannica's overview of rust and corrosion, major publications with practical rust removal guidance, and bike-maintenance authorities for step-by-step techniques. Remember, every bike is different; choose methods appropriate to your frame material and finish.
Tools & Materials
- Safety glasses(Protect eyes from rust particles and solvents)
- Nitrile gloves(Respiratory protection not required but helps skin safety)
- Wire brush(For initial rust removal on larger surfaces)
- Steel wool pad(Use fine to medium grit for smoother finish)
- Sandpaper (grit 400-800)(Finish work and prep for coating)
- Bike degreaser or mild detergent(Remove grease before rust work)
- Mineral spirits or isopropyl alcohol(Clean surfaces after degreasing)
- Rust converter(Converts rust to stable layer before coating)
- Metal primer(Prepares bare metal for paint)
- Paint or clear coat(Protects treated metal from moisture)
- Masking tape(Protect adjacent surfaces)
- Rags or microfiber cloths(For wiping and polishing)
- Penetrating oil (optional)(Eases removal of stuck bolts)
Steps
Estimated time: 60-180 minutes
- 1
Inspect rust area
Begin by visually examining the affected area under good light. Document the extent with photos and feel for roughness or flaking. Decide whether the rust is superficial or has penetrated deeper into the metal.
Tip: Take close-up shots from multiple angles to track progress. - 2
Clean and degrease
Wash the bike section with mild detergent or degreaser, rinse, and dry completely. Removing grease helps rust abrasives and chemical treatments work more effectively.
Tip: Work in a well-ventilated area and wear gloves. - 3
Remove loose rust
Scrub with a nylon brush, then use steel wool on stubborn patches. Wipe away debris as you go to prevent rubbing it into fresh metal.
Tip: Keep your strokes light and even to avoid scratching coatings. - 4
Apply rust converter (optional)
If you choose a converter, apply according to label instructions and allow it to cure. This step stabilizes the rust before coating.
Tip: Test in an inconspicuous area first to confirm compatibility. - 5
Sand and prep for coating
Lightly sand the area to create a key for primer. Wipe away dust and ensure the surface is completely dry before priming.
Tip: Avoid sanding through paint or protective coatings. - 6
Prime and paint
Apply a thin coat of metal primer and let it dry fully. Follow with paint or a clear coat for protection; multiple thin coats are better than one thick coat.
Tip: Maintain even distance while spraying and avoid runs. - 7
Lubricate and reassemble
Reinstall any components you removed and lubricate moving parts to reduce future wear and moisture retention.
Tip: Use appropriate lubricants for each metal surface. - 8
Test ride and monitor
Take a cautious test ride in a safe area and listen for unusual sounds or stiffness. Reinspect the treated area after a day of use.
Tip: If rust reappears, reassess with a pro before riding aggressively.
People Also Ask
What is the difference between surface rust and penetrating rust on a bike?
Surface rust is shallow and often removable with brushing and cleaning; penetrating rust digs deeper and can threaten structural parts. Treat appropriately and seek pro help if unsure.
Surface rust is shallow and usually removable with cleaning; penetrating rust goes deeper and may require professional help if it harms structure.
Can I use household items to remove rust on my bike?
Mild detergents and purpose-made rust removers are safer for bike finishes than strong acids. Avoid abrasive household cleaners that can strip coatings.
Use mild cleaners or bike-specific rust removers; avoid harsh acids that can damage coatings.
Is rust removal safe on paint and chrome finishes?
Yes, with care. Don’t aggressively sand chrome or painted areas; test in an inconspicuous spot first and follow product instructions.
Be careful with chrome and paint—test a small area first and follow the product directions.
When should I replace a rusty bike component?
If there is deep pitting, cracks near welds, or rust that compromises safety-critical parts, replacement is the safer option. Minor surface rust can often be treated.
If safety-critical parts are affected, replace rather than risk failure.
How can I prevent rust from returning after cleaning?
Keep the bike dry, apply a rust-inhibiting coating, and store in a dry place. Regular maintenance helps catch early signs.
Keep it dry, seal exposed metal, and store in a dry spot to prevent rust.
Do professional rust removal services exist for bikes?
Yes. Bike shops or frame specialists can handle severe rust; major damage may require component replacement.
A pro can help with severe rust or structural concerns.
Watch Video
Quick Summary
- Identify rust type and extent before treatment.
- Choose mechanical vs chemical methods appropriately.
- Finish with primer and a protective coat to prevent recurrence.
- Protective storage reduces future rust risk.
- Regular maintenance catches rust early.