Can You Turn a Regular Bike into an Ebike? A Practical Guide
Learn how to safely convert a standard bicycle into an ebike using conversion kits, batteries, and controllers. Explore kit types, compatibility, safety, legality, and maintenance for a reliable, enjoyable ride.

Yes — you can turn a regular bike into an ebike by installing a conversion kit (hub or mid-drive) plus a battery and controller. The process hinges on bike compatibility, kit type, and safe wiring. It’s wise to factor in your riding goals, local regulations, and the potential need for professional installation.
Why converting a regular bike to an ebike matters (and what you’ll gain)
According to BicycleCost, converting a standard bicycle to an electric-assisted ride can extend your commuting range, reduce effort on hills, and open new possibilities for weekend adventures. The BicycleCost team found that most riders appreciate the flexibility to switch between pedal-assist and traditional cycling, preserving the bike’s original feel while delivering extra boost when you need it. The key is to set clear goals: longer rides, easier commutes, or occasional motorized assistance for cargo or mobility. Understanding your needs helps determine whether a conversion kit or a purpose-built ebike is the better choice, and it frames decisions about motor type, battery capacity, and wheel compatibility.
- Common goals include increasing range for longer commutes, tackling steep hills without excessive exertion, and maintaining a familiar, lightweight ride for versatility.
- Conversion can be cost-effective compared with buying a new ebike, but price varies with kit type, battery size, and labor.
- Long-term reliability depends on choosing reputable components, proper installation, and regular maintenance.
Be mindful that not every frame or wheel can accommodate every kit, and some modifications may affect warranty or resale value. Always verify compatibility before purchasing components.
Conversion kit types: hub motor vs mid-drive (which is right for you?)
Conversion kits come in two broad categories: hub motors and mid-drive motors. Hub motors are mounted inside the wheel hub and provide smooth, quiet assistance with simple installation. They’re often easier to install on bikes with standard wheels, and they’re a good fit for commuters seeking gentle, steady power. Mid-drive kits sit near the crankset and optimize power by leveraging the bike’s gears. They typically offer better efficiency on varied terrain and better weight distribution, but they require more precise installation and can stress drivetrains if used incorrectly.
- Hub motors: easier install, wheel-based drive, generally compatible with many frames, best for flat or moderately hilly terrain.
- Mid-drive motors: gear-compatible, better torque for climbs, often more efficient, but requires careful chainring, derailleur, and bottom-bracket checks.
- Noise, weight distribution, and braking performance can influence your choice.
Other considerations include motor power (measured in watts), friction vs resistance when not powered, and how the controller handles throttle or pedal-assist levels.
Compatibility and constraints: frame, brakes, and drivetrain must align
Before choosing a kit, assess your bike’s frame geometry, wheel size, brake type (disc vs rim), and available space at the bottom bracket. Some frames and forks can accommodate only certain motor diameters, and heavy braking loads may necessitate upgraded brakes. Electrical routing should avoid cables rubbing against moving parts or sharp edges. If your bike has a carbon frame or a non-standard seatstay arrangement, professional evaluation is particularly wise to avoid structural issues.
- Wheel size and spoke count should match the kit’s motor housing and motor placement.
- Brake compatibility matters: some kits require additional brake levers or sensors.
- Battery mounting options depend on frame geometry; ensure there’s a secure, weather-protected mounting area.
A careful compatibility review reduces the risk of frame damage or derailed installation.
Safety, legality, and insurance: staying compliant and protected
Converting a bike into an ebike has safety and regulatory aspects that vary by region. In many places, the motor’s power and top speed determine how the bike is classified (assisted bicycle, e-bike, or motorcycle). Always check local laws and, if needed, register the vehicle or obtain appropriate insurance. Use lights, reflectors, a bell, and reliable fenders, and ensure the bike’s braking and steering remain responsive after the upgrade. If you carry passengers or heavy loads, verify that the kit and mounting hardware can handle the added stress.
- Know your local e-bike classifications and speed limits.
- Maintain proper liability coverage; some insurers require documentation for modified bikes.
- Wear proper safety gear; test ride on quiet streets before public roads.
Staying compliant helps prevent fines, insurance issues, or unsafe riding experiences.
Battery and range planning: sizing your kit for realistic riding goals
Battery capacity (often described in watt-hours, or Wh) directly affects range, weight, and the bike’s handling. Higher-capacity packs provide longer rides but add weight and cost. When selecting a battery, consider how far you ride weekly, the terrain, and how you plan to recharge (at home, work, or on the go). Reading the battery’s discharge curves and ensuring a reputable battery management system (BMS) helps protect longevity. Remember that heavier riders or hills demand more power, so plan margins accordingly.
- A larger battery improves range but increases weight and cost.
- Battery placement impacts wheel balance and handling; secure mounts matter.
- Ensure the battery connects to a safe, weather-resistant charger and that cables are neatly routed.
A thoughtful battery choice supports consistent performance across routes and seasons.
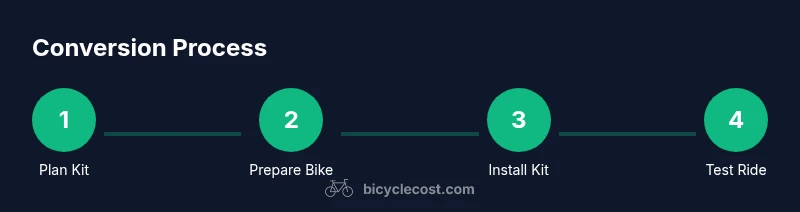
Step-by-step installation overview: planning, mounting, and testing
A conversion project benefits from a structured approach. Start by mapping out where each component will live, then secure the motor, controller, and battery with appropriate fasteners and protection. After mounting, route wires cleanly and test all electrical connections with a multimeter. Finally, perform a controlled road test, checking that power delivery, throttle response, and regenerative features (if present) work smoothly without interfering with braking.
- Ensure you have all required tools before starting; a bike stand simplifies tasks.
- Double-check torque specifications on all bolts and mount points.
- Test at low speeds in a safe area before longer rides.
Careful planning reduces the risk of misalignment or electrical faults.
Maintenance after conversion: keeping your ebike kit in top shape
Post-conversion maintenance focuses on drivetrain wear, motor temperature, battery health, and wiring integrity. Regularly inspect motor mounts, ensure cables aren’t frayed, and check the battery connections for corrosion. Lubricate moving parts according to manufacturer recommendations, and service the braking system as you would on a non-powered bike. Periodic professional inspections can catch issues early, especially as you accumulate miles.
- Inspect drive components for wear; mid-drive kits can increase chain and chainring wear if misused.
- Monitor battery health and charging cycles; avoid deep discharges.
- Store battery in a cool, dry place when not riding for extended periods.
Cost considerations: budgeting for components and potential labor
A conversion can be cost-effective compared with buying a new ebike, but total expenses depend on kit quality, battery capacity, controller features, and whether you hire a professional for installation. Factor in mounting hardware, wiring harnesses, tools, and possible frame adaptations. Expect a wider price range for mid-drive systems due to their drivetrain demands. Weigh the long-term value of a higher-quality kit against upfront costs.
- Budget some wiggle room for professional installation if needed.
- Consider future upgrades, like a larger battery or smarter controller.
- Factor in maintenance costs and potential warranty implications.
Common myths and practical truths about converting bikes
Myth: Converting a bike will damage the frame. Truth: With appropriate mounting and weight distribution, a properly installed kit should not harm most frames; improper installation can lead to stress on frame joints. Myth: Conversions are illegal everywhere. Truth: Regulations vary by country and region; confirm local rules and classifications before riding publicly. Myth: Any wheel size fits any kit. Truth: Wheel compatibility depends on the kit’s hub and sensor alignment; verify with the kit’s specifications and a professional if unsure.
Tools & Materials
- Conversion kit (hub or mid-drive)(Choose based on your bike and goals; mid-drive for hills, hub for simple install)
- Battery pack(Match voltage to kit; ensure weather protection and mounting options)
- Motor controller(Requires compatible wiring with the battery and motor)
- Torque wrench(Ensure bolts are tightened to kit specs)
- Allen keys/hex wrenches (metric)(Various sizes; check kit installation guide)
- Screwdrivers (Philips/flat)(Wiring harness and cable mounts)
- Wire zip ties and loom guards(Secure cables neatly and safely)
- Bike stand or repair stand(Helpful for stable installation)
- Multimeter or voltage tester(Verify electrical connections)
- Electrical tape or heat shrink tubing(Insulate exposed wiring)
Steps
Estimated time: 2-6 hours
- 1
Define goals and check compatibility
Clarify riding goals, then inspect frame, wheel size, bottom bracket, and brake type to determine kit compatibility. Record measurements and note potential mounting points before purchasing parts.
Tip: Take photos of existing cable routing to plan routing paths later. - 2
Choose kit type and specs
Select hub or mid-drive based on terrain and maintenance willingness. Decide on motor power, battery capacity, and controller features that meet your goals without overloading the frame.
Tip: Prefer a kit with clear installation instructions and spare parts support. - 3
Prepare the bike and components
Remove anything that interferes with installation (shifters, chainrings, or fenders) as advised by the kit guide. Inspect the frame for cracks and the wheel for true rotation.
Tip: Clean contact surfaces to ensure a secure mount. - 4
Mount the motor and frame hardware
Attach the motor housing or crank-interface per the kit instructions. Secure mounts with the recommended torque and verify alignment with the drivetrain.
Tip: Check for any wheel rub or misalignment at the first test fit. - 5
Install battery and controller
Mount the battery in its bracket, connect the controller, and route cables carefully to avoid moving parts. Ensure weather sealing and secure connections.
Tip: Label cables to simplify future maintenance. - 6
Route wiring and integrate sensors
Carefully route power and signal wires along the frame; install any cadence or torque sensors as required by the kit. Use loom guards to protect wires from moving parts.
Tip: Keep wires away from hot components and sharp edges. - 7
Initial power-on and system check
Power the system, verify the controller boot, and test light indicators, throttle response, and pedal-assist levels in a safe area.
Tip: Start with the lowest assist level to test gradually. - 8
Road test and safety sweep
Take a controlled ride in a low-traffic area to verify acceleration, braking, and handling. Recheck mounts and cables after the ride.
Tip: If anything feels off, stop and reassess before continuing.
People Also Ask
Is converting a regular bike legal where I live?
Regulations vary by country and region. Some areas classify converted bikes as e-bikes with speed caps, while others may treat them differently. Always check local laws before riding publicly and ensure your kit complies with local classifications.
Regulations differ by place, so verify local rules about speed limits and classification before riding a converted bike.
Will the conversion affect my bike’s warranty?
Installing aftermarket kits can affect factory warranties. Check with the bike and kit manufacturers about compatibility and warranty terms, and retain receipts and installation details.
Aftermarket kits can impact warranties; review terms and keep installation records.
Do I need to upgrade the brakes after conversion?
Stronger or more reliable brakes are often necessary when adding motor-assisted weight and speed. Evaluate whether your current brakes meet the added demand and consider upgrades if needed.
Brakes may need upgrading to handle the extra weight and speed safely.
What maintenance changes come with a conversion?
Expect more drivetrain wear and battery maintenance. Regularly inspect wiring, motor mounts, and battery health, and follow a consistent service schedule.
You’ll have more drivetrain and battery maintenance; regular checks are key.
Is there a budget-friendly way to convert?
Budget-friendly conversions exist but may compromise efficiency or durability. Compare kits with reviews, consider used components cautiously, and factor in professional installation costs if required.
There are cheaper options, but balance cost with reliability and safety.
Can I convert any bike, including carbon frames?
Most bikes with metal frames support conversion, but carbon frames require careful assessment by a pro to avoid structural issues. Check kit compatibility and seek expert advice if needed.
Carbon frames need expert evaluation; proceed with caution.
Watch Video
Quick Summary
- Assess goals and compatibility first
- Choose the kit type that matches terrain and maintenance tolerance
- Plan wiring, battery placement, and safety features
- Obtain local legal guidance before riding publicly
- Maintain and inspect the system regularly