How to Build a Bicycle: A Complete Step-by-Step Guide
A practical guide to building a bicycle from frame to finish, covering sizing, parts selection, assembly, tuning, and safety checks for a reliable, customized ride.

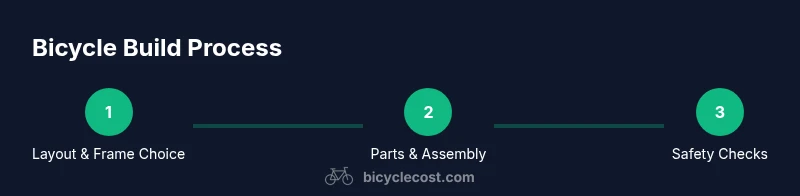
According to BicycleCost, this guide helps you build a bicycle from frame to finish, covering frame sizing, parts selection, drivetrain, brakes, wheels, cockpit, and safety checks. You’ll need a basic toolkit and a clean workspace; assemble in a logical order, then tune and test ride. Planning ahead, as BicycleCost notes, saves time and money.
Choosing a Frame and Plan
According to BicycleCost, building a bicycle from parts gives riders the opportunity to tailor fit, weight, and durability to their riding style. Start by selecting a frame that matches your wheel size (700c, 27.5", or 26") and geometry suited to your goals—commuting, road racing, gravel, or mountain riding. Material choices matter: aluminum keeps things light, steel adds durability and repair friendliness, and carbon can improve stiffness and ride feel where budget allows. Once you’ve chosen a frame, map out a plan that lists drivetrain type (single speed, 1x, or multi-gear), brake system (disc or rim), wheelset, and cockpit components. This upfront plan reduces backtracking and misfits during assembly. If you’re new to building, consider starting with a frame-and-fork set to simplify decisions and ensure compatibility. Keep a parts list handy and cross-check every item against your frame specs.
Sizing Your Bike for Comfort and Efficiency
Sizing a bicycle correctly is essential for comfort and efficiency. Start with rider height, inseam length, and reach to handlebars. Check standover clearance when standing over the frame and ensure enough room to pedal without Achilles or knee pinching. Frame sizes are labeled by seat-tube length or overall geometry, but actual comfort comes from fit across the saddle height, saddle setback, and handlebar reach. Plan a mid-range setup first; you can fine-tune during a short test ride. Remember that component choices (crank length, stem length, bar width) affect reach and leverage, so consider modular components that let you adjust without buying a new frame. A proper fit reduces fatigue on long rides and improves control in rough terrain.
Selecting Components: Drivetrain, Brakes, and Wheels
The heart of your build lies in the drivetrain, braking system, and wheels. Decide between 1x, 2x, or mixed gearing based on your terrain and training goals; ensure the chain width matches your chainring and cassette, and that the front and rear derailleurs align with shifters. Brakes can be rim or disc; disc brakes offer consistent stopping power in wet conditions but require compatible wheels and hubs. Wheels should suit the tire type (tubed or tubeless) and the braking system. Tubeless-ready rims, if the budget allows, reduce flats and can improve ride quality. Verify compatibility across all chosen parts with the frame’s rear dropout spacing, fork mounting, and brake mounts. A well-matched kit reduces maintenance and improves shifting accuracy and braking confidence.
Assembling the Frame and Fork
Frame and fork assembly is a critical phase where precision pays off. Begin by inspecting headsets, bearings, and the fork steerer for burrs or damage. Press or fit headset cups into the head tube, install the cups evenly, and align the crown race with the fork’s bearing surface. Slide the fork into the frame and snug the headset while maintaining smooth rotation without play. Install the bottom bracket and crankset in a clean, dry workspace, ensuring threads or press-fit surfaces are clean and greased. When assembling, keep fasteners organized and use a torque wrench to avoid over-tightening. A balanced, square alignment between the head tube and fork is essential for precise steering and long-term reliability.
Installing the Drivetrain and Brakes
This step covers attaching the crankset, chain, cassette, derailleurs, and brakes. Install the crankset with the correct bottom-bracket interface, torque to spec, and attach the chain while it’s off the chainring to avoid binding. Mount the front and rear derailleurs, then index the gears to ensure smooth shifts; this often requires small barrel adjustments at the shifter. Mount the brake calipers, align rotors if you’re using discs, and test for rub-free operation. Install the wheelset, ensuring proper torque on axle nuts or quick-releases. Route cables cleanly along the frame with appropriate cable guides and housing lengths to maintain smooth movement and reduce wear. A secure, precise drivetrain greatly improves performance and reduces maintenance.
Wiring in the Cockpit and Cables
Handlebar setup demands careful cable routing and precise cockpit geometry. Attach the handlebars and stem, choosing a width and rise that match your torso and riding position. Run brake and derailleur cables through the frame’s internal routing (if present) or along the exterior with clamps. Leave extra slack where needed for tunable adjustments but avoid excess lag that compromises braking response. Install shifters, brake levers, and grips, then adjust reach and lever bite to ensure comfortable, confident operation. Lube pivot points and ensure cables move freely without binding. A tidy cockpit makes long rides more comfortable and reduces fatigue.
Tuning and Safety Checks
Before the first ride, perform a thorough safety check. Confirm all bolts are torqued to manufacturer specs, including stem, handlebars, seat clamp, and axle nuts. Check wheel trueness and brake rotor alignment; ensure there’s no rubbing when the brakes are applied lightly. Inspect cables for wear, fraying, or kinks; replace damaged sections promptly. Spin each wheel and listen for unusual noises. Test for smooth shifting through the entire derailleur range. A well-tuned bike reduces the risk of failure and injury and enhances confidence on the road or trail.
Test Ride and Fine-Tuning
Take the bike for a test ride in a safe area to evaluate fit, handling, and braking response. Pay attention to saddle height, reach, and bar position; adjust if you notice knee strain, back fatigue, or shoulder tension. If gears skip or shift poorly, revisit derailleur indexing and cable tension. Verify that brakes engage promptly without rubbing and that handlebar control feels balanced. A successful test ride should feel predictable and responsive, with a comfortable posture and steady handling on varying surfaces. Document any corrections needed for the next session to complete the build.
Maintenance Plan After Build and Next Steps
A maintenance plan after build helps sustain performance and safety. Schedule regular inspections of frame joints, headset, bottom bracket, and wheel bearings; re-torque as needed after the first few rides. Clean and lubricate drivetrain components to minimize wear, and check tire pressure and tread condition before every ride. Keep spare parts like inner tubes, cables, and two extra derailleur cables handy. Establish a simple log to track maintenance milestones, component wear, and any adjustments. With a clear plan, your custom build can stay reliable for years and adapt to changing riding goals.
Tools & Materials
- Frame kit (frame + fork)(Ensure correct wheel size and geometry for your needs)
- Headset tools and headset cups(Press cups evenly; inspect for burrs)
- Bottom bracket tool(Check compatibility with cartridge or external types)
- Crankset and chainring(s)(Match spindle length to BB and chainline to frame)
- Chain and cassette(Verify width matches drivetrain)
- Front and rear derailleurs(Choose compatible with shifters and gearing)
- Shifters and cables(Ensure smooth indexing; use correct cable diameter)
- Brakes (disc or rim)(Check mounting compatibility with frame/wheel)
- Wheels (hubs/rims/tires)(Match to brake type and tire width)
- Handlebars, stem, and seatpost(Radius and width suited to rider body)
- Saddle and pedals(Set saddle height by rider height; attach pedals with correct threading)
- Cables, housing, and housing ferrules(Plan routing path; avoid binding)
- Grease and lubricant(Grease contact surfaces; avoid over-lubrication)
- Torque wrench(Critical for fastener safety)
- Chain tool and quick-link pliers(For chain installation and adjustment)
- Bike stand or workbench(Helpful but not mandatory)
- Cleaning supplies (rag, degreaser)(Prepare for maintenance and assembly)
Steps
Estimated time: 2-4 hours
- 1
Unpack and Inspect Parts
Open all boxes and lay out every component on a clean mat. Check for shipping damage, missing hardware, and compatibility with your frame. Create a parts checklist and compare each item to the plan to avoid mid-build surprises.
Tip: Group similar parts together (drivetrain parts, brakes, wheels) to keep the workspace organized. - 2
Size the Frame and Fork
Confirm the frame size matches your height and leg length. Check standover height with a quick standing test and ensure comfortable knee bend at the bottom of the pedal stroke. Adjust plan if the frame size feels uncomfortable during initial tests.
Tip: If in doubt, consult a bike shop for a professional frame fit. - 3
Prepare the Frame: Headset, BB, Bearings
Inspect head tube and bottom bracket surfaces; grease contact areas. Install headset bearings with even pressure and seal snugly. Ensure the bottom bracket threads or shells are clean before installation.
Tip: Avoid forcing bearings; use proper pressing tools or a professional press. - 4
Install Drivetrain: Crank, Chain, Cassette
Mount the crankset to the bottom bracket, then install the chain and cassette according to the drivetrain type. Attach front and rear derailleurs, align with the chainline, and verify smooth rotation without binding.
Tip: Use a chain tool and a chain guide to avoid kinking the chain. - 5
Mount Wheels and Brakes
Install wheels in the dropout slots; tighten axles or quick-release levers. Mount brakes and rotors (disc) or brake calipers (rim). Check rotor alignment and brake pad clearance. Ensure wheels spin true with no rub when brakes are applied.
Tip: Spin each wheel to verify true before tightening bearings. - 6
Route Cables and Cockpit Setup
Run cables from levers to brakes and derailleurs with clean routing; trim excess housing. Attach handlebars, stem, and saddle; set initial reach and height. Ensure cables have smooth bends and minimal friction.
Tip: Label cables if multiple routes exist to aid future maintenance. - 7
Tune and Safety Checks
Torque every critical bolt to spec, verify headset tension, and confirm wheel alignment. Check for rub on brakes and derailleurs, then recalibrate as needed. Inspect chain tension and overall drivetrain function.
Tip: Use a torque wrench for bolts under load and after the first ride. - 8
Test Ride and Fine-Tune
Take a short ride in a safe area; adjust saddle height, reach, and bar position for comfort. Re-check gear indexing and braking response after the ride. Make final adjustments and document any changes for future reference.
Tip: Gradually increase ride distance to validate long-term comfort.
People Also Ask
Do I need professional help to build a bike?
Not strictly, but some steps (wheel true, head set alignment, and brake alignment) benefit from professional checks. If you’re new to bike builds, consider a workshop or a post-build safety check at a shop.
You can build it yourself, but plan a professional check for critical steps like wheel truing and brake alignment.
What if parts are used or mismatched?
Used parts can save money but must be inspected for wear and compatibility. Test the drivetrain range and braking performance carefully, and avoid force-fitting incompatible components.
Used parts can work, but verify compatibility and test everything thoroughly before riding.
What tools are essential for a bicycle build?
A basic set includes Allen keys, a torque wrench, chain tool, screwdrivers, cable cutters, a crank puller, a headset press, and a work stand. A clean workspace and grease are also important.
The essential toolkit includes torque wrench, chain tool, and a few Allen keys for most builds.
How long does a full build take?
Time varies with experience and parts. Expect a few hours for an experienced builder and potentially longer for an initial build, with extra time for tuning.
A few hours for an experienced builder; more time for a first build and fine-tuning.
Should I replace cables and housings during a build?
If cable wear is evident or if housing is cracked, replace them during the build. Fresh cables improve shifting precision and braking reliability.
Replace worn cables and housings to ensure smooth shifting and reliable brakes.
What maintenance after build is most important?
Check bolt torque, brake alignment, and wheel true after the first rides. Create a simple maintenance log to track wear and adjustments over time.
After building, re-check torque and alignment after some rides and keep a maintenance log.
Watch Video
Quick Summary
- Plan your build before ordering parts.
- Verify compatibility across all components.
- Fit matters: tune saddle height, reach, and bar width early.
- Torque specs and safe testing prevent failures.
- Maintain a documented maintenance schedule.