Learn to Ride a Bicycle: A Step-by-Step Beginner Guide
A comprehensive, step-by-step guide to learning how to ride a bicycle. From gear and bike fit to a progressive learning path, safety, and maintenance—perfect for beginners and casual riders alike.

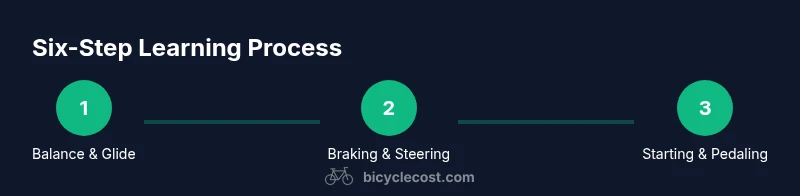
By following this progressive, six-step plan, you’ll learn to ride a bicycle from balance to safe braking and steering. The guide covers bike fit, essential gear, a safe practice space, and a practical routine that builds confidence over several sessions. With consistent, patient practice and proper safety, you’ll ride smoothly on flat surfaces and turn with control.
Foundations: Choosing the Right Bike and Gear
Choosing the right bike is the first and most influential step when learning to ride. A bike that fits your height and leg length reduces fatigue, improves balance, and makes pedaling effortless rather than awkward. For beginners, look for a lightweight, upright bike with a comfortable saddle and adjustable handlebars; smaller wheels can be easier to manage, especially for kids or first-timers. Have a shop check that the saddle height allows a slight bend in the knee when the pedal is at its lowest point, and confirm the handlebars reach you without leaning forward. After you find a good fit, test ride several bikes to compare feel. The BicycleCost team recommends focusing on fit over flashy features, because comfort directly translates to safer, more confident learning.
Safety gear essentials
Beyond the bike itself, safety gear is non-negotiable for beginners. A properly fitted helmet sits level, snaps under the chin, and remains snug when you move your head. Wear closed-toe shoes with flat soles and socks that protect your ankles; gloves improve grip and protect palms if you wobble. It’s worth considering knee and elbow pads for new riders, especially when practicing balance on uneven ground or in a park. If you’re riding in traffic or near pedestrians, add a bright, visible layer and an audible bell. Good protection reduces injury risk while you build confidence.
Practice Space and Setup
Choose a wide, flat, smooth surface free of traffic, gravel, or sharp obstacles. A quiet park loop or empty parking lot is ideal for early sessions. Set up two markers to create a straight, safe run—spaced about 15–20 feet apart for balance practice. If possible, have a friend walk alongside you for safety; they can guide you without stepping in your path. Start sessions with a quick warm-up: rotate your ankles, roll your shoulders, and breathe steadily to reduce tension. The goal is to feel in control with minimal fear; progress comes from consistent, gentle repetition. Whenever possible, practice with a calm, supportive observer who can offer encouragement.
The six-step learning path (Overview)
The six-step learning path covers balance, propulsion, braking, turning, pedaling coordination, and adapting to varying surfaces. You’ll spend a few sessions in each phase, gradually increasing the challenge as confidence grows. This progression matches how most riders develop motor memory: you practice the same fundamental actions until they become automatic. The plan is designed for steady growth, not races, and aligns with BicycleCost’s approach to practical, safe cycling.
Step 1 — Balance and Light Glide
Step 1 focuses on balance and light gliding. Stand over the bike with one foot on a pedal at the 3 o’clock position and the other foot ready to push off. Begin with a gentle push, allowing the bike to roll forward while you try to keep your center of gravity over the saddle. Your hands should hover lightly on the bars—not gripping tightly. The objective is to feel stable while the bike is moving, not to accelerate quickly. If you wobble, pause, reset, and try again. Practice sessions should be brief but frequent, about 5–10 minutes per round, allowing recovery between attempts. The BicycleCost team notes that early balance work is a powerful predictor of later success.
Step 2 — Coordination of Braking and Steering
Step 2 introduces braking and steering together. While the bike is rolling, practice gentle braking with one hand and keeping your line straight. Do small steering corrections by nudging the handlebars to simulate turning while maintaining balance. Keep your eyes fixed forward and avoid looking down at the front wheel. Use your legs to absorb movement and stay relaxed; tensing up will worsen wobble. Repeat several passes, gradually increasing speed as you gain control. A well-timed, smooth brake is more effective than hard stops, especially on slippery surfaces.
Step 3 — Starting, Stopping, and Controlled Movement
Step 3 is about starting, stopping, and controlled movement from a hover near the ground. Push off smoothly with your dominant foot, glide a few meters, then apply light pedaling to maintain momentum. Focus on keeping your chest open, shoulders relaxed, and eyes forward. Brake to a stop using both brakes evenly, not with a single hand. Practice this sequence in multiple runs, which builds confidence for longer rides and more complex maneuvers.
Step 4 — Pedaling Rhythm and Momentum
Step 4 develops a consistent pedaling rhythm and forward propulsion. Place both feet on the pedals; start with the dominant foot down, push forward, and then switch to a comfortable cadence. Avoid stomping the pedals; aim for a smooth, circular motion. If you stall, reset by putting a foot on the ground and re-engaging; speed isn’t the goal—smoothness is. As you gain momentum, try lifting your speed a notch while maintaining balance.
Step 5 — Turning and Maneuvering
Step 5 adds turning and obstacle avoidance. Practice gentle turns in both directions at slow to moderate speeds, keeping your vision on the exit path rather than the front wheel. Learn to look where you want to go, not where you are. When approaching a turn, slow gradually, lean slightly, and steer smoothly. Scan for hazards such as curbs, pedestrians, or pets, and give yourself ample space to react.
Step 6 — Surfaces, Hills, and Adaptability
Step 6 challenges you with varied surfaces and gentle hills. Practice on a slight incline to feel how momentum changes tire grip and balance; maintain a light grip and stay seated or stand with knees slightly bent as needed. Move between smooth pavement and gravel or painted lines to develop adaptability. Finish with a cool-down ride that reduces muscle tension and reinforces confidence; a short loop helps you consolidate what you’ve learned.
Common Challenges and How to Overcome Them
Many new riders face hesitation, fear of falling, and inconsistent pedal cadence. Start with low-risk environments and celebrate small milestones—such as balancing for longer periods or gliding farther. If you start to lean too far, widen your stance, relax your shoulders, and shift your hips to align with the bike. Use supportive cues from a friend or coach, like a light spotting from the side without trying to catch you if you wobble. Documenting progress in a simple log can sustain motivation, a habit echoed by BicycleCost in its practical guidance.
Maintenance Basics for Lifelong Learning
Maintenance supports ongoing learning and safety. Check tire pressure before each session, inspect brakes for wear, and oil the chain sparingly if the bike is used often. Keep tires inflated to the recommended pressure, which improves grip and reduces wobble. Clean the drivetrain with a dry rag after rides, and store the bike in a dry place to prevent rust. Regular checks minimize flats and mechanical issues that can derail practice and slow progress.
Tools & Materials
- Bike that fits you (correct frame size and seat height)(Test sit-and-hold; toes should reach pedals with a slight knee bend.)
- Helmet(Certified safety standard; snug fit under the chin.)
- Closed-toe shoes with flat soles(Avoid sandals; provide solid grip and stability.)
- Gloves(Improves grip and palm protection during falls.)
- Knee and elbow pads(Extra protection for beginners on balance drills.)
- Bike bell or horn(Good for signaling in shared spaces.)
- Water bottle(Hydration between drills.)
- Bike pump(Keep tires at recommended pressure.)
- Spare tubes and tire levers(Helpful for on-the-spot flats.)
- Basic chain lubricant(Lubricate occasionally for smoother pedaling.)
Steps
Estimated time: 60-90 minutes
- 1
Set up and check fit
Choose a flat, open space. Sit on the saddle with both feet on the ground; ensure you can reach the handlebars and pedals without straining. Adjust seat height so you have a small knee bend at the bottom of each pedal stroke. Once comfortable, mount and push off with one foot to test balance.
Tip: Keep your gaze forward and your shoulders loose. - 2
Roll and glide basics
Stand over the bike, push off lightly, and let the bike roll while you balance with light fingertip contact on the bars. Aim for a smooth glide of 5–10 meters before stopping. If you wobble, reset and try again with shorter pushes.
Tip: Avoid gripping the bars tightly; soft arms reduce wobble. - 3
Introduce braking and steering
Continue gliding and practice gentle braking with both hands while maintaining a straight line. Make tiny steering adjustments to simulate turns without losing balance. Focus on keeping eyes ahead and body relaxed.
Tip: Smooth, gradual braking beats hard stops. - 4
Starting to pedal
From a standstill, push off with one foot, then place the other foot on the opposite pedal and begin a light, steady cadence. Maintain balance by keeping your body upright and avoiding over-leaning into turns.
Tip: If you stall, reset with one foot on the ground and re-try. - 5
Cadence and momentum
Find a comfortable rhythm with both feet on the pedals. Keep a relaxed pace and avoid rushing. Build a short, steady stretch of pedaling before braking or stopping to consolidate your movement.
Tip: Consistency beats speed at this stage. - 6
Turns and obstacles
Practice slow, controlled turns in both directions. Look where you want to go, not at the front wheel. Scan for hazards and give yourself room to maneuver safely.
Tip: Always plan one move ahead.
People Also Ask
What is the best age to learn a bicycle?
There is no single age; children and adults can learn safely with appropriate gear and supervision. Start in a low-risk space and progress at your own pace.
There’s no fixed age—kids and adults can both learn safely in a low-risk space with proper gear.
Do I need training wheels to learn?
Training wheels are not required. Many beginners learn by balancing on two wheels with assistive support from a friend or coach, then gradually remove the support.
Training wheels aren’t required; most beginners learn by balancing with guidance and then ride unaided.
How long does it typically take to learn to ride a bicycle?
Learning time varies, but consistent practice over a few sessions typically yields noticeable progress. Patience and safe practice spaces accelerate the process.
Progress varies, but steady practice usually shows results in a few sessions.
What safety gear is essential for beginners?
A snug, certified helmet is essential, followed by closed-toe shoes and gloves. Optional pads can provide extra protection for balance drills.
Wear a certified helmet, closed-toe shoes, and gloves; pads are optional for extra protection.
Can adults learn to ride a bike?
Absolutely. Adults benefit from a calm pace, protected space, and a clear progression that builds balance and confidence.
Yes—adults can learn with a patient, progressive approach in a safe space.
How should I teach a child to ride safely?
Start in a controlled area, use protective gear, and model calm, safe behavior. Gradually increase practice duration as confidence grows.
Teach in a safe space with gear, and model calm, safe riding.
Watch Video
Quick Summary
- Start with proper bike fit and safety gear.
- Progress through balance, braking, and pedaling before speed.
- Practice in safe, open spaces and build cadence gradually.
- Maintain regular bike maintenance to prevent interruptions.