How to Bike on Road: Safe Riding Essentials
Learn how to bike on road safely with practical tips on gear, positioning, signaling, and maintenance. This BicycleCost guide covers route planning, traffic interactions, pre-ride checks, and progression strategies for confident road riding.

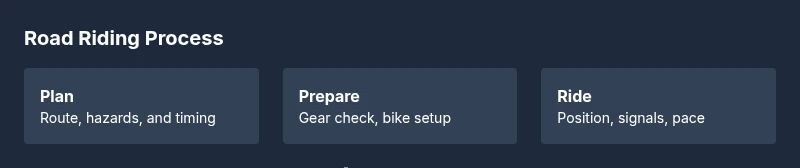
You will learn the core steps to ride safely on public roads: choose the right gear, establish a stable riding position, signal clearly, and stay predictable in traffic. This guide emphasizes visibility, planned routes, and consistent maintenance routines to reduce risk while you ride on shared roadways. By following these steps, you’ll build confidence and ride with greater control on every road.
How to Bike on Road Safely: Foundational Mindset and Purpose
If you’re looking for a practical answer to how to bike on road, start with a mindset built on preparation, visibility, and predictable behavior. Road riding isn’t just about speed; it’s about sharing space with cars, buses, pedestrians, and other cyclists. According to BicycleCost, thoughtful preparation reduces risk, while the BicycleCost team emphasizes visibility and predictable movements as the backbone of safe road riding. In this guide you’ll learn how to plan routes, fit your bike, and develop habits that keep you visible and in control on busy streets. The first step is recognizing that road riding is a balance between assertiveness and courtesy—assertive enough to be seen, courteous enough to avoid surprising others. By embracing this approach, you’ll learn how to bike on road with greater confidence and fewer near-misses.
In addition to gear and technique, practicing in low-traffic areas before tackling busier corridors helps you develop muscle memory for signals, lane positioning, and braking. This gradual progression is a cornerstone of safe road riding and aligns with BicycleCost’s practical approach to bike safety. Remember: every ride on the road is a small experiment in estimating risk, reading traffic, and adjusting your position accordingly. By starting with a clear plan and the right setup, you set yourself up for safer, more enjoyable road sessions.
Keywords to anchor your practice include how to bike on road, road safety, and ride tips.
wordCountBlock1": null"
block1_placeholder":null},{
Gear, Fit, and Visibility for Road Riding
Choosing the right gear sets the foundation for safe road riding. Start with a properly fitted helmet that fits snugly and sits level on your head. Add bright, high-visibility clothing and ideally front and rear lights that are visible in daylight and legal at dusk. Tires with adequate tread and correct pressure reduce flats and improve grip on wet or uneven pavement. Your bike should fit you comfortably: proper saddle height, reach, and handlebar position help you maintain control, reduce fatigue, and improve braking response. For longer road rides, consider gloves for grip, glasses to protect from wind and debris, and a lightweight rain shell in unpredictable weather. Pre-ride checks should include brakes, tire wear, chain lubrication, and quick-release skewers. This gear and setup boost your safety profile on the road and align with BicycleCost’s safety recommendations.
Practical tip: carry a spare tube and patch kit, a multi-tool, and a portable pump to handle flats or minor adjustments on the go. A quick gear checklist before every ride keeps you prepared and reduces last-minute stress. When you start riding, keep your hands positioned on the tops or hoods to stay relaxed while remaining ready to brake or signal. This combination of gear and fit supports stable steering, braking, and overall confidence on the road.
Recall the core idea: quality gear, correct fit, and high visibility are non-negotiables for safe road riding.
wordCountBlock2": null
block2_placeholder":null},{
Core Riding Position: Balance, Vision, and Cadence
The way you position your body on the bike directly affects handling on the road. Sit with a relaxed core, elbows slightly bent, and your eyes scanning several seconds ahead rather than just the wheel in front of you. Maintain a light grip on the handlebars and a smooth cadence to avoid sudden weight shifts during lane changes or braking. When riding on the road, position yourself where you are most visible to motorists—usually at least a full bike lane width from parked cars when the lane is narrow, and in the middle of the lane where you have space to maneuver around hazards. Your cadence should be steady, not erratic, to communicate predictability to drivers. Braking should be progressive: squeeze the lever gradually rather than slam it. By practicing a steady position and controlled braking, you’ll ride more predictably in traffic and feel more in control of the bike.
As you build skill, practice emergency stops in a safe area or a deserted stretch of road to understand how your bike responds under braking and weight transfer. This builds confidence for tighter urban conditions and helps you handle unexpected events with calm and precision. The aim is to keep your riding smooth, predictable, and legible to others sharing the road. This approach aligns with BicycleCost’s guidance on road readiness and technique.
Key takeaway: the road rewards calm, consistent technique as much as raw speed.
wordCountBlock3": null
block3_placeholder":null},{
Signals, Communication, and Predictable Movement
Communication with other road users reduces confusion and increases safety. Learn and use clear hand signals well before you enter an intersection. A left-hand signal indicates a left turn, a right-hand signal indicates a right turn, and a stop signal (hand upward or palm facing backward) alerts others you’re slowing or stopping. Maintain eye contact with drivers when possible and avoid sudden lane changes. Your body language—steady cadence, deliberate movements, and consistent use of signals—helps drivers anticipate your actions. In addition to hand signals, use your voice to indicate hazards or intention when appropriate (for example, “car back” or “slowing”).
On busy roads, position yourself to maximize visibility and space to maneuver. If a lane is narrow or a turning lane is approaching, signal early and move with confidence rather than darting in and out of gaps. Practicing signals and assertive, predictable behavior makes you safer and more credible on the road. BicycleCost’s safety-oriented approach highlights clear communication as one of the most effective tools for navigating traffic on road rides.
Pro tip: practice your signals in a quiet area until they feel automatic.
wordCountBlock4": null
block4_placeholder":null},{
Navigating Intersections, Roundabouts, and Lane Sharing
Intersections require extra awareness and planning. As you approach, slow down gradually, check for turn signals from drivers, and be prepared to yield when you have the right of way. When turning, choose a lane position that provides a clear exit path and signal early. In multi-lane roundabouts or complex intersections, reduce speed, scan for vehicles entering the circle, and wait for a safe gap before merging. When sharing lanes with vehicles, avoid riding on the immediate curb side and maintain a steady line that communicates predictability.
Urban riding often involves filtering and choosing when to ride toward the center of a lane for visibility, versus hugging the right edge to avoid door zones. Use your mirrors or peripheral vision to stay aware of parked cars and potential hazards like door openings. Tailor your approach to the traffic context: on a quiet street, you may have wider margins; on a busy corridor, anticipate car maneuvers and adjust accordingly. These practices reduce risk on the road and improve your confidence when approaching intersections.
Note: consistency in signaling and position is essential for the safety of all road users.
wordCountBlock5": null
block5_placeholder":null},{
Pre-Ride Checks, Maintenance, and Quick Adjustments
A reliable road ride starts with a quick, systematic pre-ride check. Inspect brakes for proper engagement and even wear, verify tire pressure is within the recommended range, and ensure the chain runs smoothly. Check the headlights or taillights if you’ll be riding during low light, and confirm the battery or cable connections are secure. Lubricate the chain if it’s dry, clean the rims and rotors if you have disc brakes, and ensure quick-release skewers are tight. Carry basic tools, a patch kit, and a spare tube so you can address flats or minor adjustments away from home. These checks reduce the chance of mechanical failure that could endanger you on the road.
If you’re riding in wet or cool conditions, check your tire tread and consider lower tire pressure for better grip on slick surfaces. Conversely, in hot, dry weather, slightly higher pressure can reduce rolling resistance. Periodic maintenance—about every few hundred miles or as needed—keeps your bike performing well on road rides. Based on BicycleCost research, routine pre-ride checks are correlated with fewer surprises and more consistent ride quality on road routes.
Tip: keep a small maintenance kit in your saddle bag or backpack for on-the-road adjustments.
wordCountBlock6": null
block6_placeholder":null},{
Common Mistakes, Fixes, and Progressive Practice
New road riders often make common mistakes that compromise safety and enjoyment. Avoid riding too close to parked cars, which increases the risk of door collisions. Don’t rely on a single front light or on headphones to listen to traffic—stay alert with ambient hearing and situational awareness. Overconfidence can lead to sprinting gaps that aren’t safe; instead, ride with steady tempo and predictable movements. Another frequent error is ignoring wind currents and grade changes, which can suddenly affect balance and speed. As you progress, practice maintaining a straight line, changing lanes smoothly, and braking with both hands for even control. Gradually increase distance and speed only after you’re consistently applying safe road habits.
To build proficiency, create a practice plan that includes quiet streets for signal drills, busier routes for real-world traffic, and occasional group rides to simulate social riding dynamics. This staged approach aligns with BicycleCost’s emphasis on safe progression and steady skill development. Remember: road riding is an ongoing learning process, and consistent practice translates into safer, more enjoyable experiences on the road.
Bottom line: focus on consistency, not speed, and use deliberate checks to stay safe.
wordCountBlock7": null
block7_placeholder":null},{
Night Riding, Weather, and Advanced Safety Considerations
Riding on the road after dark requires additional precautions. Use bright front and rear lights, wear reflective clothing, and position yourself to be clearly visible to drivers from all angles. Plan routes that minimize dark stretches and avoid high-risk areas when visibility is poor. Weather introduces new challenges: rain reduces traction, wind affects balance, and temperature impacts tire pressure and rider comfort. Before rides in inclement conditions, perform a longer pre-ride check, tighten mounts, and adjust tire pressure and clothing to maintain comfort and safety. If conditions worsen, consider postponing the ride. Road safety remains the priority, and proper lighting, visibility, and weather awareness help you ride with confidence no matter the forecast.
The BicycleCost team suggests simulating adverse conditions in a controlled setting to build resilience and practical strategies for handling rain or wind on real rides. Practice becomes your best safety tool, enabling quicker decisions and steadier reactions when you encounter slick surfaces, gusts, or reduced visibility.
Key practice: always have a plan for getting home safely if weather or traffic deteriorates.
wordCountBlock8": null
block8_placeholder":null},
Tools & Materials
- Helmet(CE-certified, properly fitted; straps snug under chin.)
- Front and rear lights(Visible in daylight; replace batteries as needed.)
- High-visibility clothing(Bright colors or reflective gear; consider reflective ankle bands.)
- Cycling gloves(Grip, comfort, and hand protection.)
- Repair kit (spare tube, patch kit)(Patches, tire levers, and portable pump.)
- Multi-tool(For quick on-road adjustments and repairs.)
- Tire pump with gauge(Check pressure before every ride.)
- Water bottle and cage(Hydration during longer routes.)
- Chain lubricant(Lubricate drivetrain if noise or stiffness occurs.)
Steps
Estimated time: 45-60 minutes
- 1
Inspect bike and gear
Before you ride, check brakes for responsiveness, verify tire depth and pressure, and ensure quick releases are secure. Confirm lights are functioning and your helmet sits properly. A quick pre-ride assessment prevents surprises on the road.
Tip: Go through a mental checklist aloud to build consistency. - 2
Check tires and brakes
Test tire pressure to match your ride conditions and inspect tires for wear or embedded debris. Squeeze the brake levers to confirm even response and no rubbing. If you feel softness or rubbing, address it before leaving.
Tip: Carry a portable pump and patch kit for on-the-go fixes. - 3
Put on gear and lights
Wear your helmet, strap in securely, and switch on all lights. Ensure visibility in both daylight and low-light conditions. Glasses and gloves add comfort and protection.
Tip: Test lights in a dark space to confirm proper mounting. - 4
Plan route and lane position
Choose routes with quieter streets and fewer hazards. Position yourself where you’re visible to drivers and able to react to hazards, avoiding the door-zone on parked cars.
Tip: Practice a safe number of positions on your route to stay legible. - 5
Start riding with steady cadence
Assign a comfortable cadence and maintain a smooth, predictable pace. Avoid erratic acceleration or braking, which confuses surrounding traffic.
Tip: Keep hands ready on the brakes and shifters. - 6
Signal turns early
Use clear hand signals well before intersections or lane changes. Verbal cues can also help in dense traffic when visibility is limited.
Tip: Signal and verify drivers’ responses before acting. - 7
Scan for hazards and slow down
Regularly scan ahead for cars turning, pedestrians, or debris. Reduce speed before hazards so you can react safely without sudden braking.
Tip: Practice in a controlled environment to build faster hazard recognition. - 8
Return home safely
After your ride, perform a quick post-ride check for any issues and store your gear properly. Hydrate, stretch, and review any insights for next time.
Tip: Note any recurring issues to address during maintenance.
People Also Ask
What gear is essential for road riding?
Essential gear includes a properly fitted helmet, front and rear lights, high-visibility clothing, a pump, spare tube, patch kit, and a multi-tool. Gloves and glasses improve comfort and safety, while a hydration setup supports longer rides.
Essential gear for road riding includes a helmet, lights, bright clothing, and a basic repair kit for on-road fixes.
How should I position myself on busy roads?
Maintain a visible, steady position in the lane when necessary for safety and space to maneuver. Avoid sitting in motorists’ blind spots; anticipate turns and keep your cadence smooth to communicate intent clearly.
Stay visible and predictable; position yourself to be seen and plan turns early.
What are the best practices for signaling?
Signal well before turns or lane changes using clear hand signals. Combine signals with eye contact where possible and smooth, predictable movements to help drivers read your intentions.
Signal early and clearly, and combine hand signals with looking for drivers.
How do I handle intersections safely?
Slow down as you approach, check for cross traffic, and yield when required. Signal your intent early and make your move decisively once the path ahead is clear.
Take intersections slowly, signal early, and yield when needed.
Is it safe to bike on road at night?
Night riding is feasible with proper lighting, reflective gear, and cautious route choices. Avoid high-speed roads if you’re uncomfortable with reduced visibility.
Yes, with good lights, reflective gear, and careful route planning.
How often should I service my bike for road rides?
Regular maintenance depends on use, but a monthly check and a pre-ride inspection are good guidelines. Address squeaks, wear, and drivetrain issues as they arise.
Do a basic monthly check and pre-ride inspection, addressing any wear or noise quickly.
Watch Video
Quick Summary
- Plan your route before riding.
- Wear bright gear and use lights for visibility.
- Signal clearly and ride predictably.
- Perform pre-ride checks and maintenance regularly.