How to Bicycle with a Baby: A Safe, Practical Guide
Learn practical, step-by-step guidance for riding with a baby on a bicycle, from seating options and safety gear to route planning and maintenance. Build confidence with a simple setup and pre-ride practice.

Learn how to bicycle with a baby safely by selecting a compatible seat, fitting it correctly, and equipping both rider and child with helmets. This quick answer previews the essential steps: seating options, safety gear, setup procedure, riding technique, and a simple pre-ride checklist to build confidence on your first family ride.
Seating Options for a Baby on a Bicycle
When you plan how to bicycle with a baby, you have several seating choices that affect safety, control, and comfort. Rear-mounted child seats attach to a bike's rack or frame behind the rider, providing stability and good balance for most riders. Front-mounted seats place the child between you and the handlebars, offering better visibility and interaction, but can affect steering and weight distribution. Trailers and prams are alternatives that allow a separate carriage behind the bike, often easier on beginners and suitable for longer rides. Regardless of option, always consult the seat manufacturer for weight and age guidelines, harness design, and installation instructions. The BicycleCost team notes in BicycleCost Analysis, 2026 that consistency in setup and supervision is crucial for safety.
To maximize safety, choose a setup you can consistently inspect before every ride and practice in a controlled environment before venturing onto streets. Practice with an empty seat first to verify mounting points, then gradually introduce weight to confirm balance and braking performance. Remember that every attachment must be compatible with your bike model and approved by the manufacturer.
Safety Gear You Must Use
Riding with a baby requires dual-layer protection: gear for the rider and gear for the child. A certified helmet for both the adult and the child is non-negotiable, with secure straps and properly fitted sizing. In addition, wear high-visibility clothing, gloves for grip, and eye protection if needed. Ensure the child wears a comfortable, appropriately sized helmet and secure footwear if the seat design requires closed-toe protection. Jackets or covers should be snug but not restrictive, preventing loose fabric from tangling with the bike’s moving parts. Remember, visibility is key: use reflective tape, lights, and a bright ride setup, especially at dawn, dusk, or during poor weather.
These safety measures should become part of your routine. If the seat has a window or ventilation option, keep the child comfortable without overheating. Avoid loose accessories near moving parts, and check that the child’s harness and the rider’s gear do not interfere with braking or steering.
How to Setup Your Bike for a Baby
Preparing your bike for a baby starts with confirming compatibility and secure mounting. Install the seat following the manufacturer’s instructions, ensuring all bolts and fasteners are tight and re-check after a short test ride. Adjust the seat angle to optimize safety and comfort for the child; a slight recline is common, but avoid extreme angles that could restrict breathing. Confirm clearance around the rear wheel and drivetrain, and ensure the harness is correctly threaded through all buckles. Finally, perform a quick stability test with the seat occupied by a weighted object to simulate a child’s presence before attempting a ride with your baby.
The key is deliberate setup and verification: if you’re unsure, consult a qualified bike shop for a safe installation.
Choosing the Right Child Seat and Attachment
Not all seats fit every bike. Look for a seat that matches your frame type (road, mountain, city) and the mounting method (rack, seat post, frame mount). Harness systems should be five-point or equivalent, padded, and easy to adjust with child seated. Check the seat’s weight rating and age recommendations; never exceed the manufacturer’s limits. Assembly should include anti-slip padding and secure attachment to prevent movement. If your bike lacks a rear rack, you may need a retrofit or trailer option. Make sure the attachment points do not interfere with gears or brakes, and test maneuvers at slow speeds in a safe area.
Always verify compatibility and install only according to authoritative instructions.
Riding Techniques with a Baby Onboard
Riding with a passenger changes weight distribution, braking response, and steering feel. Start with slow speeds in low-traffic areas to learn how weight affects cornering and deceleration. Keep a longer stopping distance and practice smooth, progressive braking. Use gradual acceleration and maintain a steady cadence to avoid jarring the child. When cornering or turning, anticipate the load and reduce lean, steering with wider radii. Communicate with the child through the seat—if they’re old enough, talk to them about where you’re going and what you’re doing. Avoid abrupt maneuvers and aggressive riding styles that could unsettle the rider or child.
Route Planning and Safety Considerations
Choose routes with calm traffic, smooth pavement, and clear sightlines rather than busy highways. Prefer bike lanes or dedicated paths when available. Check weather conditions in advance; rain can affect traction and visibility, and cold or heat can affect comfort for both of you. Plan rest stops and hydration opportunities, especially on longer rides. Always carry a basic repair kit and a spare helmet if possible. If you must ride on mixed terrain, choose routes that minimize abrupt changes in surface and grade. The goal is predictable, controlled riding with consistent supervision.
Pre-Ride Checklist and Daily Practice
Develop a short pre-ride ritual that you perform before every journey. Verify that the seat is securely mounted and the harness is fastened correctly. Check tire pressure, brakes, lights, and your own protective gear. Ensure the child’s helmet is properly fitted and the harness is snug but comfortable. Practice balance and braking in a safe area without distractions before attempting road riding. Gradually increase ride distance as your confidence and the child’s tolerance grow. Keep a log of routes and ride times to identify what works best for you and your baby.
Maintenance and Inspection of Baby-Transport Setup
Regular maintenance is essential for ongoing safety. Inspect seat mounting points for looseness and corrosion, tighten all bolts to the manufacturer’s torque specs, and check harness webbing for fraying. Inspect the child seat’s padding and buckles for wear and replace any compromised components. Clean the seat and mountings with mild soap and water, avoiding harsh chemicals that could degrade plastics. Periodically check the bike frame for cracks and ensure that the mounting hardware remains aligned after rough terrain rides. A simple weekly check can prevent most on-road failures.
Common Mistakes and How to Avoid Them
Avoid common errors such as using an incompatible seat, failing to secure the harness, or riding with loose gear. Do not place the child in a seat with improper recline or with straps twisted. Never ride while distracted or in high-traffic areas without adequate skill and confidence. Ensure the child’s head and neck are supported, and never strap them into an ill-fitting harness. Finally, avoid riding long distances on unfamiliar routes until you’ve built up experience and the child’s tolerance. Learning to ride with a baby is a gradual process that rewards patience and consistent practice.
Legal and Insurance Considerations
Laws about riding with a baby on a bicycle vary by jurisdiction. Always check local regulations regarding passenger seating, helmet requirements, and permissible routes. If you carry personal or bicycle insurance, confirm coverage for child passengers and equipment. In some areas, liability coverage may apply differently for trailers versus seat-mounted options. When in doubt, consult local authorities or a licensed bike shop for guidance. Staying compliant helps protect you and your little rider and ensures peace of mind on every trip.
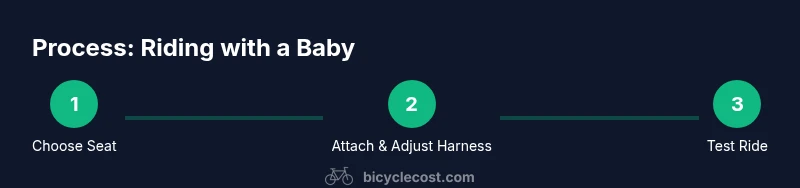
Getting Started: A Simple 4-Step Plan
- Check your bike for compatibility and gather essential safety gear. 2) Choose and install a suitable child seat with a secure harness. 3) Fit helmets for both rider and child and perform a slow, controlled test ride in a quiet area. 4) Plan a short, route-friendly first ride to build confidence and gradually increase distance as comfort grows. Following this plan helps you establish a safe routine for future rides.
Tools & Materials
- Child bike seat compatible with your bike(Rear- or front-mounted, ensure it matches your frame and mounting options)
- Helmet for child(Certified, properly sized with adjustable straps)
- Helmet for rider(Certified, properly sized and fastened)
- Mounting hardware and adapters(As specified by seat manufacturer)
- Allen wrenches and basic bike tool kit(For installation and adjustments)
- Spare harness buckles and padding(Optional replacements)
- High-visibility gear (vest, lights, reflective tape)(Enhances visibility in low light)
- Weather-appropriate covering for baby and rider(Rain gear or sun protection)
- Water and snacks for route planning(Hydration and energy for longer rides)
Steps
Estimated time: 60-90 minutes
- 1
Check bike compatibility
Confirm the bike can safely support a child seat and that mounting points are clean and undamaged. If unsure, consult a bike shop. This prevents misalignment and potential accidents.
Tip: Review manufacturer torque specs before tightening any bolts. - 2
Attach the seat securely
Mount the seat per the manual, then verify all fasteners are snug and evenly tightened. Wriggle test the seat and confirm there is no movement.
Tip: Do not ride with any looseness in the seat or harness. - 3
Fit child harness and helmet
Secure the child’s harness snugly with toes free and hips low. Ensure the helmet sits level and straps are snug without pinching.
Tip: Double-check strap width and ensure no slack at shoulders. - 4
Prepare rider’s safety gear
Put on your own helmet, adjust gloves, and verify lights/reflectors. Ensure clothing won’t snag on drivetrain.
Tip: Trim pant cuffs to avoid catching chain or chainrings. - 5
Perform a slow test ride
Ride in a quiet area to test braking, steering, and balance with the added load. Make adjustments as needed before public roads.
Tip: Practice gentle starts and stops to minimize jostling the child. - 6
Plan your first route
Choose a short, smooth, low-traffic route with reliable rest stops. Practice gradually increasing distance as you gain confidence.
Tip: Have a backup plan for weather or route changes.
People Also Ask
What is the safest seating option for a baby on a bike?
The safest option depends on your bike, but rear-mounted seats are common for stability, while front-mounted seats offer interaction and visibility. Always follow manufacturer guidelines and ensure proper mounting and harness design.
Rear-mounted seats are generally stable, but you should follow manufacturer guidelines for your bike and ensure a secure harness for safety.
At what age can a baby start riding on a bike seat?
Age guidelines vary by seat and child development. Always consult the seat’s manual for minimum age and weight limits, and ensure the child can sit upright and hold head control.
Check the seat’s manual for minimum age and weight limits and ensure your child has good head and neck control.
Is a trailer safer than a seat for a baby?
Trailers can offer a stable alternative for beginners or longer rides, but they require different equipment and practice. Compare stability, braking, and turning dynamics, and practice in safe areas before long trips.
Trailers can be a good option for beginners, but you’ll need to practice and consider route safety before long rides.
What should I check before every ride?
Inspect seat attachment, harness integrity, helmet fit, tire pressure, and brakes. Confirm visibility aids and lights are working, and ensure there’s no clothing snag risk.
Check seat security, harness, helmet fit, and brakes before every ride for safety.
Can I ride with a baby on busy streets?
Riding on busy streets is more challenging and requires higher skills and increased caution. Start on quiet roads, and gradually move to busier routes as confidence and safety practices improve.
Start in quiet areas and build up to busier streets as you gain experience.
Watch Video
Quick Summary
- Choose a seat that fits your bike and child securely.
- Prioritize helmets and high-visibility gear for both rider and child.
- Test setup in a safe area before road riding.
- Plan routes with low traffic and smooth surfaces.
- Regularly inspect the seat, harness, and mounting hardware.