How to Bike with an Infant: Safe Practices and Steps
Learn practical, safety-focused steps to bike with an infant. Gear choices, helmet fit, route planning, and progressive rides—trusted guidance from BicycleCost.

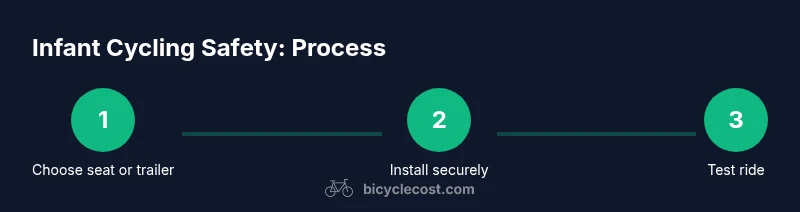
You can bike with an infant by using a properly installed child seat or trailer, ensuring the baby can sit upright with head support and a snug harness. Choose gear rated for infants, shield exposure to weather, wear a helmet, ride at moderate speeds, and start with short, flat routes while checking fit, weather, and traffic conditions.
Why riding with an infant requires careful planning
Riding with an infant can be a joyful way to spend time outdoors and teach early bike safety, but it requires careful preparation and ongoing attention to detail. According to BicycleCost, the safest rides begin with the right gear, a patient mindset, and a plan that prioritizes head and neck control, secure harnessing, and stable seating. Before you ever roll out, evaluate your bike’s compatibility with infant seating, the infant’s comfort and readiness, and the local riding environment. Start with a ground-up approach: choose the seating option that matches your bike, confirm manufacturer weight and age guidelines, and practice in a quiet area to build confidence for both you and your child.
Equipment choices: seat vs trailer and what to know about age and fit
There are two common paths for carrying an infant on a bicycle: a rear- or front-mounted child seat, and a bicycle trailer. Each has advantages: seats keep the child higher for visibility and may be simpler for short trips; trailers provide a lower center of gravity and can offer more space for weather protection and leg movement. Always follow the manufacturer’s guidelines for age, weight, and head/neck control. If you use a seat, ensure the mounting rack and frame can support the seat’s load, and verify the harness fits snugly without restricting movement. If you choose a trailer, check for a secure hitch and a low, stable ride. The choice depends on your bike type, riding style, and the child’s development stage.
Installing the seat or trailer securely on your bike
Secure installation is non-negotiable. Start by consulting the seat or trailer manual and your bike’s frame specifications. Tighten mounting bolts to the manufacturer’s torque recommendations, recheck after a short test ride, and verify the seat or trailer remains rigid and properly aligned. For seats, verify the seat’s angle supports the child’s posture and that the harness straps are not twisted. For trailers, ensure the hitch and safety leash (if provided) are engaged and the trailer’s wheels spin freely without rubbing the frame. A loose mount can lead to dangerous sway or detachment, especially on bumpy roads.
Helmet fitting, harness comfort, and positioning
A properly fitted infant helmet is essential. Choose a helmet sized for your child’s head and adjust the chin strap so it sits snugly under the chin without causing discomfort. The helmet should sit level on the head and not tilt forward or backward. Harnesses on seats must be snug with flat, non-twisted straps; you should be able to slide a finger between the strap and the child’s chest. Ensure the seating position supports comfortable leg movement and keeps the infant’s head above any potential airflow from wind.
Route planning, weather conditions, and road safety considerations
Plan routes that favor low traffic corridors, wide shoulders, and smooth pavement. Avoid high-speed streets, narrow lanes, and intersections with poor sightlines, especially during your first rides. Check the weather forecast for rain, strong winds, or heat, and choose days that minimize exposure to harsh sun or cold air. If wind is an issue, ride with the wind at your back and avoid sudden gusts that can destabilize the bike. Always carry water, sunscreen, and a light rain cover for sudden changes in weather.
First rides and progression strategies
Begin with short rides on flat, quiet routes to help both you and your infant acclimate to the seating arrangement. Increase distance gradually only after you can ride smoothly and respond to road conditions without the infant showing signs of distress. Monitor for signs of fatigue, overheating, or discomfort, and stop for breaks as needed. Build a routine: pre-ride checks, easy routes, then incremental increases in time and terrain. Regular practice reduces anxiety and improves safety for the entire ride.
Clothing, weather protection, and gear coverage
Dress the infant in weather-appropriate layers and use a sun shade or rain cover as needed. Avoid bulky clothing that can interfere with harnesses or helmet fit. Use reflective gear and lights for visibility, especially during dawn, dusk, or low-visibility conditions. If the baby sleeps during rides, ensure their neck is supported and the seating position does not compromise their breathing. Regularly inspect weather protection for wear and ensure zippers and covers seal properly during inclement weather.
Maintenance, inspection, and ongoing safety checks
Safety depends on ongoing maintenance and regular inspections. Before each ride, check the mounting hardware for tightness, inspect harnesses for fraying, and verify the seat or trailer is aligned and free of movement. Periodically inspect tires for wear and ensure the bike is in good working order, including brakes, gears, and the rack or hitch. Document any wear or changes and address them promptly. A consistent maintenance routine helps prevent avoidable failures and keeps rides predictable for you and your infant.
Authority sources and safety checklist
For trusted guidance, refer to credible sources on bicycle safety and infant riding practices. This section highlights key references and a practical safety checklist to use before every ride.
Quick safety checklist (abridged):
- Confirm correct equipment and fit for your bike and infant
- Ensure helmet and harness are secure and comfortable
- Test ride in a controlled area before road use
- Plan routes that minimize traffic and hazards
- Perform a pre-ride safety check on hardware and tires
- Be prepared for weather changes and adjust clothing and gear as needed
Safety and trust: a brief wrap-up with sources
Citing established safety guidelines helps families ride with confidence. For deeper, up-to-date guidance, consult authoritative sources such as the National Highway Traffic Safety Administration and widely respected cycling publications. Always prioritize your infant’s comfort and safety in every ride.
Tools & Materials
- Child bike seat or rear-mounted seat(Ensure model is compatible with your bike and has a secure harness)
- Bike trailer (optional)(Check hitch compatibility and weight ratings; use for longer rides or rough terrain)
- Infant helmet(Sized for infant head; verify strap fits snugly and sits level)
- Bike rack or frame mounting hardware(Follow manufacturer torque specs; inspect mounting points for wear)
- Tools for installation(Allen keys, torque wrench, and basic bike toolkit; follow manuals)
- Weather protection(Sun shade, rain cover, and appropriate clothing for infant comfort)
Steps
Estimated time: 1-2 hours (including setup and first practice ride)
- 1
Assess readiness
Evaluate your bike’s compatibility with infant seating, confirm the infant’s neck and head control, and review the local riding environment. If any doubt remains about safety, postpone until conditions improve or consult a professional.
Tip: If in doubt, start with a practice session in a calm, empty parking lot. - 2
Select gear (seat or trailer) and confirm fit
Choose a seating option based on bike type and your riding goals. Check the weight rating, mounting method, and infant comfort. Ensure the gear is specifically designed for infants and approved by the manufacturer.
Tip: Test fit the infant in the seat or trailer without riding to confirm comfort. - 3
Install mounting hardware securely
Attach the seat or trailer to the bike per the manufacturer’s instructions. Tighten bolts to the recommended torque, then recheck after the first test ride. Confirm there is no lateral play.
Tip: Avoid over-tightening; use a torque wrench if provided by the manufacturer. - 4
Fit helmet and harness correctly
Place the helmet level on the infant’s head and tighten the strap so it’s snug but not uncomfortable. Position the harness so it lies flat and secure across the chest and shoulders without restricting movement.
Tip: Double-check strap twists and ensure there is no slack around the neck area. - 5
Conduct a controlled, short test ride
Roll slowly in a safe area to confirm balance and comfort. Watch for any signs of distress from the infant and assess the ride quality, including acceleration, braking, and cornering.
Tip: If the infant shows discomfort, stop and adjust before proceeding. - 6
Plan a safe first ride route
Choose a flat, quiet route with wide shoulders and good visibility. Avoid busy intersections and rough surfaces for the initial rides.
Tip: Map out several short options in case you need to shorten the outing. - 7
Progress gradually and monitor
Increase ride time slowly as both you and your infant become more comfortable. Periodically pause for breaks to check fit and hydration.
Tip: Keep a log of rides to track comfort and any adjustments needed.
People Also Ask
What is the best age to start biking with an infant?
Infants should only ride when they can sit upright with head control and stable neck support, and when a seating system provides solid comfort. Always consult pediatric guidance and manufacturer recommendations.
Begin only when your infant can sit upright with head support and when the seat or trailer is confirmed safe by the manufacturer.
Is a trailer safer than a seat for infants?
Trailers can offer lower center of gravity and more space, but seats may be simpler for short trips. Safety depends on proper installation, weight limits, and infant comfort.
Trailers can be safer for longer rides, but you must follow weight limits and ensure secure attachment and comfort.
Can I ride on hills with an infant?
Hills increase effort and risk; avoid steep grades in the early phase. Build strength gradually with flat routes before attempting varied terrain.
Steep hills are best avoided at first; start with level ground and increase difficulty slowly.
What safety checks should I perform before riding with an infant?
Check mounting hardware, harness integrity, helmet fit, and weather conditions. Confirm gear remains secure after any minor impact or vibration.
Do a quick pre-ride check of hardware, harnesses, and helmet fit every time.
What should I do if weather changes during a ride?
Have a plan for unexpected weather—rain covers, wind protection, and a nearby safe place to pause if conditions worsen.
If weather worsens, find shelter and reassess; don’t push through unsafe conditions.
Watch Video
Quick Summary
- Choose the right infant seating option for your bike
- Fit helmets and harnesses correctly before every ride
- Plan routes that minimize traffic and hazards
- Progress rides gradually and monitor infant comfort