How to Bike on Ice: A Practical Guide for Safe Winter Riding
Learn how to bike on ice safely with gear, tire choices, and proven riding techniques. This BicycleCost guide covers studded tires, brakes, and risk-aware routes for confident winter cycling.

You can bike on ice by preparing with proper tires and riding technique. Choose studded tires or tire socks in winter; lower tire pressure slightly for grip; ride slowly, keep your weight over the bike, and avoid sudden movements. Practice on quiet routes and stay alert for patches of glare ice.
Why Ice Riding Demands Respectful Caution
Riding a bicycle on ice tests balance, concentration, and gear choices. Ice surfaces vary dramatically—from gleaming, glassy patches to rough, granular slush. Temperature shifts, sun exposure, and traffic can create sudden changes in grip. According to BicycleCost, riders who prepare for these variations and practice in controlled settings reduce the risk of a fall and build lasting confidence. Always check local forecasts and look for shade where ice linger; avoid sections that show refreezing or melt-and-freeze patterns. Before you ride, plan a route that stays on well-plowed bike lanes or paths with reliable grit, and steer clear of freshly salted patches that can alter traction. The core principle is to progress slowly, test traction before committing to a turn or descent, and be ready to retreat if grip is uncertain. This is not a sport for bravado—it’s a skill that rewards patience and preparation.
Essential Gear for Ice Riding
For safe ice riding, you need layers that keep you warm without bulk, a helmet with a warm liner, and gloves that stay grippy even when damp. Lighting and reflective gear improve visibility on overcast days when ice looks especially slick. Tires are the single biggest safety factor: studded tires or traction aids dramatically improve grip on frozen surfaces. The BicycleCost analysis shows riders who pair studded tires with proper layering report higher confidence and more predictable braking in cold conditions. Carry a compact patch kit and spare tube in case of a puncture, and bring a small pump or CO2 inflator to adjust tire pressure for surface conditions. Pack a hand warmer and extra socks for cold hands, and consider knee and elbow pads if you’re trying aggressive turns or long descents. Finally, ensure your bike chain and derailleur are clean and lightly lubed to prevent stiff shifting in cold weather.
Tire Options: Studded vs Non-Studded and When to Use Them
Studded tires excel on ice and packed snow by providing bite through slick layers. Look for a balanced count and placement of studs to avoid excessive noise and vibration, and ensure your rims and brakes have clearance for the setup. In above-freezing conditions with damp surfaces, light winter-specific tires can also work, but avoid relying on smooth road tires on true ice. If you ride on mixed surfaces, carry a secondary wheel or be prepared to switch tires when you encounter a long icy stretch. The choice between studded and non-studded should hinge on expected conditions and how much time you’ll spend on ice versus dry pavement. The BicycleCost approach recommends testing traction in a safe area after installing new tires and adjusting pressure for better grip.
Riding Technique on Ice: Balance, Pedal Stroke, and Braking
Keep your weight centered over the bike with relaxed elbows and a light grip on the bars. Use smooth, circular pedal strokes to maintain traction and avoid power surges that can kick the rear wheel sideways. When braking, apply gentle, progressive pressure and favor the rear brake to avoid front-wheel lock. Look well ahead, not at your front tire, and practice eye-line and steering micro-inputs to maintain control through turns. Practice on flat patches before negotiating declines, and remember that slow, deliberate actions beat fast, abrupt moves on ice. Wearing proper gloves helps you maintain grip; if hands get cold, consider a hand warmer to keep tactile feedback reliable.
Surface Assessment and Risk Reduction
Before any ride, check the forecast, look for sun exposure that can melt ice, and identify patches of glare ice or where water is present. If you see black ice or a suspicious patch, choose an alternate route or walk it. When you encounter mixed surfaces, switch to a pace that allows you to feel the traction constantly and be ready to stop or retreat. Keep a safety buffer around vehicles and pedestrians, and reduce speed near crossings or intersections where ice accumulates. Carrying a small tool kit helps you handle minor fixes that could otherwise force you to end the ride early.
Drills to Build Ice Confidence
Perform gradual balance drills off the bike (static stance on pedals, light squats) before riding. On the bike, practice a straight-line glide on a calm surface, then introduce slow, controlled braking and tiny steering inputs. Do a few tight turns at very low speed to learn how much lean is needed to regain balance, then repeat with eyes up and looking toward the exit of the turn. End each drill with a short cooldown to prevent finger stiffness and maintain focus for the next block of riding.
Emergency Scenarios: What to Do If You Slip
If you start to slip, stay relaxed, avoid panicking, and try to balance by shifting weight toward the outside foot. Do not slam on the brakes; instead, ease off power and straighten the bike, looking for solid traction. If you fall, roll onto your side to avoid wrist injuries and check for injuries before standing. After a slip, inspect the tires and surface before resuming riding and consider walking difficult patches if grip remains uncertain.
Transitioning from Ice to Dry Pavement
As you move from ice to dry pavement, your braking response will change. Gradually reintroduce front braking, but avoid sudden pressure that could cause skidding. Take more time to accelerate and stability-bringing movements to re-establish confidence. If you can, ride on milder surfaces first to regain balance, then continue. This transition helps prevent abrupt changes in traction and reduces the risk of future slips.
Tools & Materials
- Studded bicycle tires(Choose size to match wheel rims; ensure studs are intact and compatible with your braking system)
- Tire levers(For removing tires if you need to install studded variants)
- Patch kit and spare tube(Carry extra patches and at least one spare tube per ride)
- Mini-pump or CO2 inflator(Keep air pressure appropriate for ice conditions; test before riding)
- Warm, grippy gloves(Insulated and with good tactile feel on brake levers)
- Thermal base layer and windproof outer layer(Layer properly for warmth without bulk)
- Helmet with warm liner(Ensure fit and visibility; consider a windproof cover)
- Reflective gear and bike lights(Low-light days demand high visibility)
- Gaiters or waterproof pants/boots covers(Optional for deep snow or slush conditions)
Steps
Estimated time: 60-90 minutes
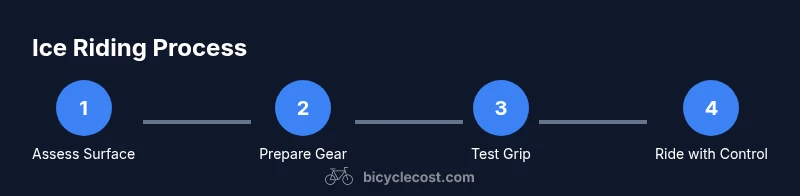
- 1
Inspect conditions and plan route
Check the forecast, sun exposure, and ice patches along your planned route. Choose surfaces with known grit and minimal traffic where possible. Decide if you’ll walk any sections with uncertain traction.
Tip: Always have a backup route in mind in case conditions worsen. - 2
Prepare bike and gear
Inspect chain, brakes, and cable routing; ensure studded tires are properly mounted. Put on warm layers, helmet with liner, and gloves. Check visibility with lights and reflective gear set.
Tip: Test your brakes gently on a dry patch before hitting ice. - 3
Install tires and adjust pressure
If you’re swapping to studs, do so in a clean area and verify clearance. Inflate tires to the lower end of the recommended range for wet/icy surfaces to improve grip.
Tip: Avoid over-inflation which reduces contact patch on ice. - 4
Test grip and warm up
Ride a short distance on a safe, flat ice-free patch to warm up joints and check grip. Gradually approach the icy area, adjusting speed according to feel.
Tip: Keep hands soft on the bars and shoulders relaxed. - 5
Riding with control
Maintain a straight line, pedal smoothly, and apply braking progressively. Look ahead to anticipate ice patches and adjust steering with small inputs.
Tip: Avoid sudden power changes that can cause slips. - 6
Braking and turning on ice
Use light pressure on both brakes, favor the rear to prevent front-wheel skid. When turning, slow down first and lean gently—do not twist handlebars aggressively.
Tip: If you feel loss of traction, stop braking and straighten the bike.
People Also Ask
Is it safe to bike on ice?
Riding on ice carries elevated risk; with proper gear, conservative technique, and situational awareness, you can reduce the danger. Always assess conditions and be prepared to stop or walk if traction is uncertain.
Riding on ice carries higher risk, but with the right gear and calm technique you can ride safely. Always assess conditions and be prepared to walk if traction is uncertain.
What tires are best for icy surfaces?
Studded tires provide the most reliable grip on ice, especially on smooth patches. In milder, damp ice, be cautious and consider traction aids or additional caution.
Studded tires offer the most grip on ice; in damp or mixed surfaces proceed with extra caution.
How can I tell if the ice is safe to ride on?
Look for consistent texture, absence of water pooling, and no visible cracks or slush. Clear, dry patches can be safer, but never ride on black ice or areas with signs of refreezing.
Look for stable, textured patches and avoid any shiny or wet-looking ice. Don’t ride on black ice.
How should I brake on ice?
Brake gently and progressively, using mainly the rear brake to prevent front-wheel skidding. Practice modulation in a safe area before encountering ice.
Brake softly and steadily, mostly with the rear brake to avoid skidding. Practice in a safe spot first.
Can I ride on ice without studded tires?
Riding on ice without studs is riskier and generally not recommended for extended icy exposure. If unavoidable, choose milder patches and slow, deliberate movements with extra caution.
Riding without studs on ice is riskier; if you must, ride slowly and cautiously.
What should I do if I slip?
Stay calm, release power, and try to realign the bike with light steering. If you fall, protect your wrists and slide to a safe position before standing up.
Stay calm, ease off power, and steer gently to regain balance. If you fall, protect yourself and assess before continuing.
Watch Video
Quick Summary
- Plan routes with known traction and avoid risky patches
- Choose appropriate tires and adjust pressure for ice
- Ride slowly with smooth inputs and look ahead
- Practice in controlled settings before challenging ice