How to Bike When It's Cold: A Practical Winter Guide
Learn practical tips for cold-weather cycling, from layering and gear to bike maintenance and safety. BicycleCost's guide helps you ride confidently in winter.

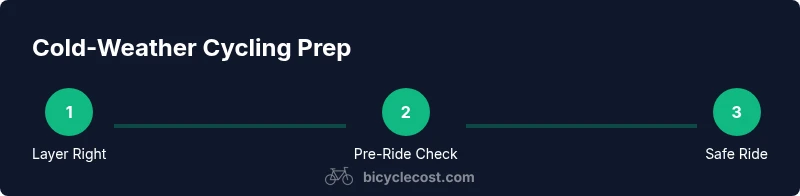
Cold-weather biking hinges on layering, reliable bike checks, and tuned tires. Use a clear, step-by-step plan to stay warm, safe, and productive on every ride. See our full guide for the exact actions.
Why cold weather changes riding dynamics
In this guide on how to bike when it's cold, you’ll discover how lower temperatures, wind, and precipitation change the way your body feels and how your bike handles. According to BicycleCost, winter riding requires extra planning, warmer layers, and a mindful approach to traction and visibility. Cold air can reduce blood flow to extremities and damp surfaces decrease grip, so pre-ride decisions matter more than in warm weather. By recognizing these changes, you can adapt your clothing, bike setup, and riding technique to maintain comfort and safety. Always check the forecast, road conditions, and your route before heading out, and adjust your plan if the risks look higher than your readiness. A small amount of preparation pays off with safer miles, steadier performance, and more enjoyable winter rides. According to BicycleCost, practical planning pays dividends in winter miles.
Essential layering for warmth and mobility
The cornerstone of comfortable cold-weather riding is the three-layer layering principle: base, mid, and outer shell. Your base layer should wick moisture away from the skin; merino wool or synthetic blends are ideal, while cotton traps sweat and chills you. The mid-layer provides insulation but remains breathable; fleece or light puffy jackets work well without adding bulk. The outer layer protects against wind, sleet, and rain while allowing moisture to escape. Layer adjustments are easier than removing gear mid-ride, so start a ride slightly cooler and add layers as needed. Don’t forget extremities: thermal gloves, a thin hat or headband under the helmet, and socks designed for cold weather. If your feet or hands sweat, you’ll chill more quickly, so choose fabrics that regulate temperature and dry fast.
Bike setup for cold conditions
Cold conditions demand some tweaks to your bike setup. Check tire tread and adjust tire pressure for colder air (air pressure drops with temperature, so inflate slightly more than you would in warm weather if you ride on icy patches). Consider wider tires or studded tires for icy sections, and ensure your brakes are free of moisture and work reliably after warm-up. Lube the chain lightly; winter grime can accumulate, but avoid over-lubing as it attracts dirt. If you ride a bike with a derailleur, ensure the shifting is smooth; stiff cables plummet performance in the cold. Pack a small pump or CO2 kit, spare tube, and patch kit. Fenders can help keep spray off your lower legs, but they can trap moisture on very wet days.
Clothing and accessories for comfort
Hands, feet, and face are most exposed to cold, so cover them well without sacrificing dexterity. Invest in insulated gloves with a snug fit and grippy fingertips; consider glove liners for extra warmth. Use toe covers or insulated overshoes to keep feet toasty, and wear moisture-wicking socks to minimize dampness. A windproof face mask or scarf can protect your nose and cheeks on windy days. Choose eye protection if you wear glasses; anti-fog lenses help maintain visibility. Remember to bring a lightweight shell that you can put on if the ride becomes windy or wet.
Safety considerations in low visibility
In winter days shorten and lighting becomes crucial. Equip bright front and rear lights, ideally with daytime running modes. Wear high-visibility clothing or reflective accessories to make yourself conspicuous in dawn, dusk, and overcast conditions. Clean your lights regularly and test them before every ride; cold weather can reduce battery life, so carry spare batteries or a USB power bank for USB-rechargeable lights. Add reflective ankle bands or ankle strips to improve visibility when riding on street corners. Protect your eyes with glasses or goggles if wind is harsh.
Riding technique and traction on cold surfaces
Cold surfaces increase slip potential, so adjust your riding technique accordingly. Brake early and gradually, avoiding abrupt deceleration that can cause skidding. Use lower, steadier cadence to maintain traction on ice or packed snow. When cornering, steer smoothly and avoid late braking. Look ahead farther to anticipate changing surface conditions and choose smoother lines. If you ride with a dropper post or a rigid fork, keep controls simple to minimize exposure to the cold. Practicing on a safe, quiet loop helps you refine these skills.
Maintenance and pre-ride checks before heading out
Winter grime, salt, and moisture demand diligence. Wipe the frame and components after each ride to prevent corrosion. Check tires, brakes, and gears for proper operation; keep cables clean and lubricated. Inspect the chain and chainrings for stiffness, and lubricate the chain sparingly to avoid attracting dirt. Ensure the headset and bottom bracket move freely. If you store your bike outside, cover it and protect it from moisture. Bring a small repair kit and spare tube in case of flats on slick winter roads.
Quick warm-up routines and post-ride care
Begin with a quick indoor warm-up before mounting the bike: leg swings, ankle circles, and light cardio help awake muscles. During the ride, warm core muscles by maintaining steady tempo and breathing. After stopping, remove helmet, gloves, and outer layer and allow your body to cool gradually; avoid sudden exposure to cold air. Dry wet areas promptly, especially feet and hands, to prevent chills. Rehydrate and perform light stretches to reduce stiffness. Proper post-ride care reduces soreness and speeds recovery in cold conditions.
Training and planning for consistent winter mileage
Plan a weekly schedule that balances shorter, more frequent rides with longer endurance sessions as conditions permit. Track mileage, weather data, and route difficulty to avoid overexertion. If days are consistently icy or dark, consider cross-training alternatives like indoor cycling or brisk walks to maintain fitness without risking injury. Set realistic goals and adjust them as winter progresses. The BicycleCost team recommends documenting what works for your local climate and adapting your plan as daylight hours change in 2026.
Common mistakes and how to avoid them
Common mistakes include overdressing, ignoring warm-up, neglecting lighting, underestimating slick surfaces, and skipping pre-ride checks. To avoid these, follow the three-layer rule, do a pre-ride check, and ride with a plan that prioritizes visibility and traction. Learning from others and practicing in safe conditions improves confidence and safety over time.
Tools & Materials
- Base layer (moisture-wicking)(Merino wool or synthetic; avoid cotton)
- Mid-layer insulation(Fleece or lightweight puffer with breathability)
- Outer shell jacket/pants(Waterproof or water-resistant; breathable fabric)
- Thermal gloves(Windproof; consider liners for extra warmth)
- Insulated socks and overshoes(Keep feet dry; avoid cotton)
- Headwear under helmet(Thin cap or headband that fits under a helmet)
- Lights and reflective gear(Front and rear lights; reflective vest or bands)
- Bike repair kit (multi-tool, patches, spare tube)(Compact and reliable)
- Tire options for winter(Studded or wider tires for ice/snow)
- Fenders(Helpful in wet or slushy conditions)
Steps
Estimated time: 45-60 minutes
- 1
Inspect bike and forecast
Begin with a quick overall bike check: tires, brakes, chain, and lights. Check the day’s forecast and route conditions to decide if your planned ride is appropriate or if you should switch to a shorter or drier route.
Tip: Carry a compact multi-tool and spare tube in every ride. - 2
Dress in three layers
Put on a moisture-wicking base layer, add a warm mid-layer, and finish with a windproof outer layer. Adjust for comfort during a quick test pedal inside your doorway before heading out.
Tip: If you start to sweat, unzip the outer layer slightly or remove a glove layer. - 3
Check tires and brakes
Inspect tread, confirm tire pressure is appropriate for cold conditions, and ensure brakes respond smoothly after warming up. Lubricate the chain sparingly to avoid attracting winter grime.
Tip: Test brakes gently at a slow speed to gauge grip on a safe surface. - 4
Test lights and visibility
Power on front and rear lights; ensure battery performance is reliable in the cold. Wear reflective gear and consider additional ankle or arm reflectors for aftermarket visibility.
Tip: Carry spare batteries or a power bank for longer winter rides. - 5
Warm up before riding
Do dynamic moves indoors: leg swings, hip openers, ankle circles to wake muscles. A quick warm-up reduces injury risk once you start pedaling.
Tip: Aim for 3 minutes of targeted movement before you mount. - 6
Ride with controlled traction
Enter intersections and turns with gradual acceleration and softer braking. Choose smoother lines and look farther ahead to anticipate icy patches.
Tip: Keep a lighter grip on the bars to reduce fatigue and improve control. - 7
Post-ride care
Dry your gear, swap damp outerwear, and store your bike out of the cold if possible. Hydrate and do light stretches to aid recovery.
Tip: Wipe down the chain and drivetrain to prevent corrosion.
People Also Ask
Is winter riding safe in freezing rain or snow?
Winter riding can be safe with cautious planning. If roads are slick, shorten rides, choose routes with plowed or treated surfaces, and reduce speed. Use proper lights and keep a wider following distance.
Winter riding can be safe if you reduce speed and choose plowed routes with good visibility.
What should I wear under my outer layer?
Choose a moisture-wicking base layer, a warm middle layer, and a windproof outer layer. Avoid cotton next to skin to prevent dampness and chill.
Wear a moisture-wicking base layer, a warm middle layer, and a windproof outer layer.
How should I adjust tire pressure in winter?
As temperatures drop, air pressure decreases. Start slightly higher than your warm-weather target and test grip on a quiet patch before committing to a route.
Test grip on a safe patch after adjusting tire pressure for cold.
Are studded tires worth it in winter?
Studded tires can improve traction on icy surfaces but are not necessary for every winter ride. Consider your local conditions and ride risk when choosing tires.
Studded tires can help on ice, but assess local conditions first.
How long should a winter ride be?
Winter rides are often shorter due to daylight and temperature constraints. Plan for quality mileage and adjust based on daylight and safety of routes.
Winter rides are usually shorter; plan for quality miles within daylight.
Watch Video
Quick Summary
- Layer correctly to stay warm without overheating
- Do thorough pre-ride checks for cold conditions
- Use lights and reflective gear for visibility
- Adjust tires and braking for traction on ice or snow
- Warm up indoors and dry gear after riding