How to Make a Bicycle Electric: A Practical Guide
Learn how to convert a standard bicycle into an electric bike with practical steps, kit selection tips, safety checks, and maintenance guidance from BicycleCost.

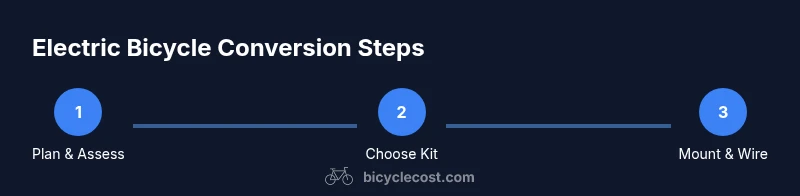
According to BicycleCost, this guide will teach you how to make bicycle electric and turn a regular bicycle into an electric-assisted bike. You'll choose a compatible conversion kit, select the motor and battery, install the system, wire the controls, and perform safety checks. We’ll cover power options, weight considerations, legal limits, and maintenance to keep your e-bike reliable.
Why Convert a Bicycle to Electric?
If you're curious about urban mobility, converting a bicycle to electric opens new possibilities for commuting, errands, and weekend rides without a car. The idea is to add a compact motor, a battery, and a controller that powers assist as you pedal or via throttle. The BicycleCost team emphasizes that for many riders, an electric conversion is a cost-effective alternative to buying a purpose-built e-bike, especially when you already own a sturdy bicycle. Before you begin, it helps to assess your bike's frame, fork, and drivetrain so the kit you choose won't strain spokes or cranks. You’ll also think about how you ride: hill climbs, long commutes, or casual weekend loops all influence motor power and battery size. In practice, converting a bike can be a smart way to extend your pedal range, preserve your current geometry, and tailor performance to your needs. Remember, the goal is safer, quieter, and more reliable assistance that complements your existing cycling habits.
According to BicycleCost, you’ll benefit from a thoughtful plan that matches your riding style with the right motor type, battery capacity, and mounting approach. The result should feel natural and maintain your bike’s handling characteristics while adding meaningful support on tougher terrains.
Core components and how they fit together
Building an electric drivetrain begins with four core components: a motor, a battery, a controller, and a sensor/assist system. Hub-motor kits place the motor inside a wheel hub, keeping weight near the wheel and simplifying wheel swaps. Mid-drive kits mount near the crank and leverage your existing gears for efficiency on varied terrain. Each design affects weight distribution, handling, and maintenance needs. You’ll pair a throttle or pedal-assist mode with a control display that shows speed, battery level, and assist level. The kit includes cables, connectors, and mounting hardware, but you must ensure frame clearance and brake compatibility. As you shop, compare reliability, warranties, and ease of installation. If you’re unsure, rely on trusted guides from BicycleCost and choose a setup that aligns with your typical rides, whether city commuting or weekend adventures. When in doubt, pick a kit with serviceable parts and clear documentation.
Choosing hub vs. mid-drive kits
Choosing between hub and mid-drive kits is a common decision point. Hub motors are generally easier to install and preserve your existing gear ratios, making them appealing for casual riders or bikes with simpler drivetrains. Mid-drive systems offer superior efficiency on hills and variable terrains by using the bike’s gears, but they can be more demanding to install and service. Consider frame strength, spoke tension, and available space for a battery pack. If you ride on steep grades or carry cargo, a mid-drive kit may deliver smoother power delivery; for flat routes and easy installs, a hub motor can be a practical choice. Always confirm that your wheel size, brake type, and frame clearances are compatible with the kit you select, and check for warranty terms and local regulations. The BicycleCost team suggests starting with a test fit to verify alignment and cable routing before final mounting.
Battery options, safety, and charging
Battery choice is a major determinant of range, weight, and overall ride feel. Lithium-ion packs are common, offering good energy density with manageable weight. Consider voltage, amp-hour rating, and the battery’s mounting method. A low center of gravity and secure mounting reduce wobble and improve handling. Always use a compatible charger and never mix chargers for different chemistries. Practice safe charging habits: avoid leaving a charging pack unattended for long periods, keep packs away from heat sources, and inspect connections for signs of wear. Remember to evaluate charging infrastructure on your routes and how frequently you’ll recharge during trips. For added peace of mind, select a battery with a reputable warranty and a manufacturer-supplied BMS (battery management system) that protects against overcharge and deep discharge.
Installation overview: mounting, wiring, and control integration
Installing an electric kit involves mounting the motor, attaching the battery, and routing cables neatly to avoid snagging on moving parts. If you’re new to bike electronics, follow the kit’s mounting templates and torque specs for bolts to prevent frame damage. Run power wires along the frame using zip ties and protective sleeves to minimize wear. Install the controller in a dry, accessible location and connect the display and input devices (throttle or pedal-assist sensor) where they’re easy to reach while riding. Keep wire lengths tidy to prevent interference with shifting and braking. Finally, perform a system check with the multimeter, ensure there’s no short circuit, and confirm the battery is charging correctly.
Safety, legality, and maintenance
Safety should be your top priority when converting a bicycle to electric. Secure all fasteners, verify spoke tension after wheel modification, and test brakes with the added weight and momentum. Be aware that local regulations may limit motor power or require equipment like speed sensors. Maintenance after conversion is straightforward but important: inspect connections regularly, check for heat buildup after rides, and service the drivetrain as you would on a conventional bike. The BicycleCost team recommends keeping a simple maintenance log to track wear on bearings, cables, and connectors, and to schedule periodic inspections if you ride in wet or dusty conditions.
Troubleshooting common issues and quick fixes
Common issues after installation include intermittent power, poor charging, or noisy operation. If the motor cuts out suddenly, check battery voltage, connector tightness, and controller settings. Cable wear or loose connections can cause buzzing or inconsistent assist; reseat connectors and inspect for damaged insulation. If you notice reduced range, recalibrate the battery management system or check wheel alignment and brake drag, which can drain power. For riders new to e-bike systems, keep spare fuses and zip ties handy for quick, safe fixes on the road. Regular inspection and a calm, methodical approach go a long way toward long-term reliability.
Tools & Materials
- Bicycle(Frame in good condition; suitable for accessory mounting)
- Conversion kit (motor, battery, controller, display)(Choose hub or mid-drive according to your bike)
- Battery charger(Stock charger included with kit or compatible charger)
- Torque arms (for hub motors)(Prevent wheel from driving into stays)
- Wrench set (metric)(For frame and motor mounts)
- Allen keys/hex wrenches(Common sizes: 4,5,6mm)
- Screwdrivers(Phillips and flat-head)
- Electrical tape or heat shrink tubing(Insulate exposed connections)
- Wire cutters/strippers(Neatly trim and prepare wires)
- Multimeter or continuity tester(Check wiring safety and voltage)
- Zip ties and cable guides(Keep wiring tidy and secure)
- Bike stand or work stand(Makes installation easier)
- Safety gear (gloves, eye protection)(Personal safety during installation)
Steps
Estimated time: 4-6 hours
- 1
Plan and verify compatibility
Assess your bike’s frame, fork clearance, brake type, and wheel size. Choose a kit that matches these specs and your riding goals. Confirm that the frame can handle the added torque and weight.
Tip: Double-check maximum torque ratings and spoke strength before purchase. - 2
Prepare the bike and remove obstacles
Secure the bike on a stand and remove components that could obstruct mounting, such as the front derailleur or cable housings if needed. Clean the frame surface to ensure clean mounting points for brackets.
Tip: Keep bolts organized in labeled containers to avoid mix-ups. - 3
Mount the motor and wheel or crank
Install the hub motor in the wheel or attach the mid-drive unit near the crank, following the kit’s mounting template. Align the motor with the frame and ensure proper clearance with brakes and chainstay.
Tip: Use thread locker on bolts and torque to specification. - 4
Attach the battery and secure the mount
Mount the battery on the frame or a carrier, ensuring the center of gravity stays low. Route power cables away from hot components and moving parts. Connect the battery to the controller with clean, secure connectors.
Tip: Avoid pulling cables during mounting to prevent pinched wires. - 5
Route wiring and install controls
Neatly route all cables along the frame; use protective sleeves and zip ties. Install the display, throttle or pedal-assist sensor where you can reach it comfortably, and connect to the controller.
Tip: Test reach and accessibility before final tightening. - 6
Power up and calibrate
Power the system, check for proper voltage, and ensure the motor responds to input from the throttle or pedals. Calibrate the pedal-assist sensor if required by your kit and adjust assist levels.
Tip: Check for heat buildup after a short test ride. - 7
Test ride and finalize tweaks
Take a cautious test ride in a safe area. Verify braking, steering, and stability with the added weight. Make final belt/chain tension and alignment adjustments as needed for smooth operation.
Tip: Keep an emergency disconnect handy during the first ride.
People Also Ask
Do I need a special frame to convert my bike to electric?
Most bikes can be converted with the right kit, but frame integrity, brake type, and clearance matter. If the frame is cracked or the brakes are incompatible with a higher weight, conversion may not be advisable. Always verify mounting points and frame strength before purchasing a kit.
Most bikes can be converted if the frame is strong and mounting points exist. Check brakes and clearances first.
What are the main types of conversion kits?
The two main types are hub motor kits and mid-drive kits. Hub motors place the motor in the wheel, offering simple installation. Mid-drive kits mount near the crank and use the bike’s gears for efficiency on varied terrain.
Hub motors are easier to install; mid-drive kits are efficient on hills.
Is it legal to ride an electric bicycle on public roads?
Legality varies by location. Most regions regulate motor power, top speed, and where e-bikes can be ridden. Check your local laws and confirm with authorities before riding in regulated areas.
Local laws vary; check power limits and where e-bikes are allowed.
How long does a battery last on a conversion kit?
Battery life depends on capacity, riding style, and terrain. A higher amp-hour rating generally provides longer range, while aggressive riding consumes more power. Plan for charging needs on typical routes.
Range depends on battery size, terrain, and how you ride.
Can I convert a bike with a derailleur?
Yes, many mid-drive kits work well with geared systems, though some kits are optimized for single-gear setups. Expect slight adjustments to chain and derailleur alignment.
Derailleur bikes can be converted; some tuning may be needed.
What maintenance is needed after conversion?
Regular checks include battery health, cable insulation, brake performance, and wheel alignment. Inspect connections after rides, especially in wet or dusty conditions.
Regular checks keep the system reliable, especially after rides.
Watch Video
Quick Summary
- Plan kit choice around bike compatibility and riding style
- Securely mount motor and battery to maintain balance
- Route wiring cleanly and protect connections
- Calibrate and test in a safe area before regular rides
- Adhere to local regulations and safety guidelines