Bicycle to Generate Electricity: A Practical Guide
Learn practical pedal-powered electricity concepts, build safe bike generator setups, and charge devices on the go with this BicycleCost guide.

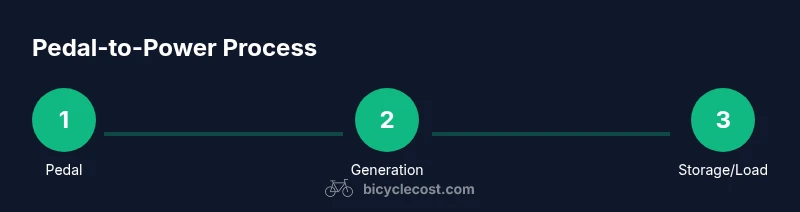
A bicycle to generate electricity is a pedal-powered energy system that converts human pedaling into electrical energy using a generator or dynamo connected to the drivetrain. The setup typically includes a generator, a regulator or charge controller, a battery for storage, wiring, and safety fittings. This guide explains practical methods, best practices, and safety tips for reliable off-grid charging.
What is a bicycle-based electricity generator?
A bicycle-based electricity generator is a compact, pedal-powered energy system that converts human effort into electrical energy. By attaching a generator to a bicycle—typically a hub dynamo, a frame-mounted alternator, or a small DC motor used as a generator—you can produce electricity as you ride. The generated power can charge batteries, run USB devices, or light LED fixtures, making it a practical option for camping, emergency power, or extended bike tours. According to BicycleCost, with a thoughtful setup you can create a safe, portable charging solution that minimizes drag and preserves ride quality. When designed well, these systems integrate with your bike without compromising handling or reliability and provide a reliable learning path into off-grid energy concepts.
How pedal power is converted to usable electricity
Pedal power becomes electricity primarily through rotating magnets and copper windings. A hub dynamo sits inside the wheel and generates a small, steady voltage as the wheel turns. Frame-mounted alternators operate similarly but are driven by a belt or chain; external motors can also be repurposed as generators. However, not all wheel setups produce the same voltage, so most builders incorporate a regulator or charge controller to produce a stable 3.7V–12V DC suitable for batteries and USB devices. To maximize efficiency, choose high-quality magnets, low-friction bearings, and short, direct wiring, and avoid adding excessive drag that makes pedaling uncomfortable. The design should balance energy output with ride quality; higher output often means more resistance and faster wear. BicycleCost emphasizes a practical approach: start simple, then progressively upgrade as you learn how to manage energy flow and storage.
Core components you’ll need
To build a safe and functional pedal-powered charging system, assemble these core components:
- Generator (hub dynamo or frame-mounted alternative)
- Regulator or charge controller
- Battery pack for storage (e.g., Li-ion or LiFePO4)
- DC-DC converter or buck/boost regulator for USB or 12V loads
- Wiring harness with waterproof connectors
- Torque arms and mounting hardware
- Fuses and a protective enclosures or heat sinks
- Multimeter for voltage checks
- Basic tools (Allen wrenches, screwdrivers, pliers)
- Insulation tape and zip ties
Choosing quality components reduces performance loss and improves safety. This block lays the groundwork for a safe, upgradeable setup.
Design options: direct charging vs battery storage
Direct charging to a device (like a USB battery pack) is the simplest path, delivering power on the go but with limited storage. A regulated output (often 5V USB) can charge phones, lights, or low-wattage gadgets when you pedal steadily. For longer rides or off-grid camping, a dedicated battery bank stores power for later use and smooths out pulses from pedaling. A charge controller or MPPT regulator helps optimize energy flow, while a buck/boost converter ensures the output matches device requirements. If you plan to run higher-draw devices, include an inverter to convert DC to AC, but remember that this adds weight and complexity. In all cases, design for safe disconnection, proper heat dissipation, and protection against short circuits.
Wiring, safety, and connectors
Wire routing should minimize drag and keep cables away from moving parts. Use gauge appropriate for expected current (simplified for typical USB charging voltages), and protect joints with heat-shrink and waterproof housings. Install a fuse near the power source to prevent overheating and fire risk. Use weatherproof connectors for outdoor use and label all polarity to prevent reverse charging. When possible, mount regulators and batteries in a frame-friendly enclosure to shield them from rain, dust, and impacts. Proper strain relief is essential; avoid sharp bends that can fatigue cables over time.
Efficiency and practical expectations
Pedal-powered electricity generation depends on rider effort, gearing, and the efficiency of the generator and regulators. Real-world outputs are modest; expect energy to accumulate slowly, especially at lower speeds. The goal is to provide reliable charging for small devices, lights, and emergency power rather than running high-wattage appliances. Using a battery buffer helps translate intermittent pedaling into usable energy, enabling charging during breaks or after rides. This section emphasizes practicality: a simple, well-integrated system is more useful than a complex setup that offers marginal gains but adds risk and weight.
Real-world use cases: camping, commuting, emergency power
For campers, a bicycle generator can recharge USB batteries, headlamps, or small lanterns during the day. Commuters can top up phones and navigation devices on the fly, provided the bike’s drivetrain remains comfortable and safe. In emergencies, pedal power can supplement solar or generator backups, offering a last-resort power source for essential devices. Each use case benefits from an energy buffer and a simple control scheme that prioritizes safety and reliability over maximum watts.
Safety considerations and best practices
Prioritizing safety reduces the risk of shorts, overheating, and drag-related fatigue. Never plug a live generator directly into household circuits; use proper regulators and storage. Keep batteries away from heat sources and ensure good ventilation during charging. Regularly inspect cables, connectors, and mounting hardware for wear. If you are unsure about wiring, consult a qualified technician. This approach supports long-term reliability and protects riders.
Common mistakes and troubleshooting
Common mistakes include overloading the system, skimping on a proper fuse, choosing incompatible regulators, and routing wires near moving parts. If charging is inconsistent, check connections, verify polarity, measure voltage at the load, and inspect battery health. Troubleshooting should start with a dry-run on the stand (no ride) to confirm voltage behavior before attempting real-world use.
How to size your setup and plan future upgrades
Begin with a conservative setup that targets USB charging and a small battery pack. As you gain experience, upgrade the regulator efficiency, increase storage capacity, or organize modular components for easy maintenance. Consider the space on your bike, weight you’re willing to carry, and climate exposure. A scalable approach lets you add more capacity or switch to a more efficient generator without replacing the entire system.
Tools & Materials
- Generator (hub dynamo or frame-mounted)(Choose a unit rated for low drag and compatible with your bike frame)
- Charge controller / regulator(Prefer a unit with over-voltage and short-circuit protection)
- Battery pack (Li-ion or LiFePO4)(Include a BMS for safety and longevity)
- DC-DC converter (buck/boost)(Match output to USB 5V or system voltage)
- Wiring harness and waterproof connectors(Use waterproof, polarized connectors where possible)
- Torque arms and mounting hardware(Prevent wheel torque from damaging frame attachments)
- Fuses and holders(Place close to the power source)
- Multimeter(For voltage and continuity checks)
- Insulation tape / heat shrink tubing(Secure and insulate connections)
- Basic tools (Allen keys, screwdriver, pliers)(Essential for mounting and wiring)
Steps
Estimated time: 60-120 minutes
- 1
Decide on generator type
Evaluate your loads and riding style to choose a hub dynamo, frame-mounted generator, or external option. Consider drag, weight, and compatibility with your bike.
Tip: Start simple with a hub dynamo for minimal drag and ease of mounting. - 2
Gather components
Collect all parts listed in Tools & Materials, verify compatibility, and plan cable routing before disassembly.
Tip: Check battery chemistry and BMS support early to avoid mismatches. - 3
Mount generator securely
Attach the generator to the wheel or frame per manufacturer instructions. Install a torque arm to absorb rider torque and prevent frame stress.
Tip: Tighten fasteners firmly, but avoid over-torquing metal components. - 4
Connect regulator and battery
Run wiring to the regulator, then to the battery or storage pack. Use proper fusing and observe polarities to prevent damage.
Tip: Keep wires short and direct to minimize resistance. - 5
Test with a small load
On a stationary setup or low-speed ride, verify voltage output and charge controller response with a multimeter and USB tester.
Tip: Gradually increase load to avoid sudden surges. - 6
Tune and document
Record outputs, adjust gearing or regulator settings for desired charging rate, and label connections for future maintenance.
Tip: Create a simple maintenance log for future upgrades.
People Also Ask
What loads can I realistically power with a pedal-powered generator?
You can reliably charge phones, LED lights, and small USB devices. High-wattage appliances will require larger, heavier energy storage and advanced cooling considerations.
You can charge phones and small USB devices; high-wattage appliances aren’t practical with a compact bike setup.
Do hub dynamos work for charging batteries?
Hub dynamos are great for bike lighting and light charging, but usually need a battery or regulator to store energy and provide stable charging for devices.
Hub dynamos can charge small devices when paired with a regulator and battery.
Is it safe to ride while charging?
Riding while charging is generally safe when wiring is secure and the setup is properly insulated. Avoid loose connections and ensure the battery is mounted securely to prevent movement.
Yes, as long as the wiring is secure and the battery is firmly mounted.
What kind of battery should I use?
Lithium-ion or LiFePO4 packs with a Battery Management System (BMS) are common choices for bike setups. They offer good energy density and safety when managed properly.
Most bike setups use lithium batteries with a BMS to stay safe and efficient.
Can I generate electricity without pedaling?
Pedal-powered systems rely on motion; without pedaling, generation stops unless you have alternative sources like wind-up devices or solar backups.
No, pedaling is the primary energy source for these systems.
How efficient is pedal-powered generation?
Efficiency depends on generator design, regulator quality, and how smoothly energy is stored. Expect modest, incremental gains rather than large power jumps.
Efficiency varies with setup; expect gradual gains rather than big power boosts.
Watch Video
Quick Summary
- Pedal power can charge small devices with the right regulator and storage.
- Storage buffers energy for stable use beyond real-time pedaling.
- Choose a safe, scalable setup to grow over time.
- Prioritize safety and proper wiring to prevent faults.