Why Do Bicycle Tires Lose Air? Troubleshooting Guide
An urgent, practical troubleshooting guide to diagnose why bicycle tires lose air, covering punctures, valve leaks, bead seating, rim tape issues, tubeless vs tubed setups, and prevention tips.

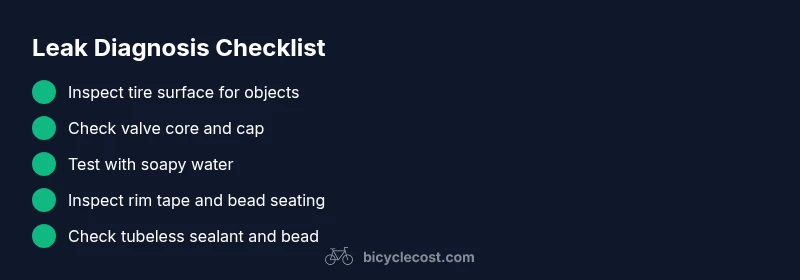
According to BicycleCost, the most common reasons why bicycle tires lose air are punctures and valve leaks. Start by visually inspecting the tire for embedded objects, then check the valve core and stem for leaks, and finally verify that the bead seats properly on the rim. If you can't locate the culprit, perform a soapy-water leak test to pinpoint the source.
Why bicycle tires lose air: the core idea
If you’re wondering why do bicycle tires lose air, the short answer is that tiny punctures, slow leaks from the valve, or mis-seated beads are the usual culprits. The BicycleCost team has found that most flats stem from punctures caused by thorns or glass, combined with valve-related leaks that go unnoticed until the pressure drops. In practice, the quickest way to diagnose is a visual inspection, followed by a few simple leak tests. By understanding these common failure modes, you can prioritize checks and reduce roadside flats. Regular checks help you catch issues before a long ride, keeping you rolling and safe.
Quick checks you can do before you disassemble
Before you reach for tools, run through a fast checklist:
- Check the tire surface for embedded objects or glass. If you find a thorn, it’s usually the main puncture source.
- Press the tire bead around the rim and listen for hissing or feel for air leakage as you press.
- Tap the valve stem gently to see if air escapes; wiggle the valve core with a valve tool if available.
- Compare the pump gauge reading with the recommended tire pressure label on the sidewall. If the pressure drops quickly, there’s a leak that needs closer inspection.
Tip: If you’re not sure, take a moment to switch to a bright light; a slow leak is easier to spot when you can see the bead and sidewalls clearly.
Punctures and slow leaks: how to tell them apart
Punctures usually show a quick loss of air after a single pinch or sharp object, while slow leaks creep away over hours or days. If you notice a consistent, gradual drop, you may be dealing with a slow puncture, a valve leak, or an improper bead seal. The key is to isolate the source: first rule out the valve, then inspect the tire for objects, and finally check the rim area for sharp edges that could abrade the tube or bead. This approach aligns with BicycleCost analysis, which emphasizes methodical testing over guesswork.
Valve issues: core, stem, and caps
Valve problems are a frequent but overlooked cause of air loss. A loose or damaged valve core can leak air around the valve stem. Replace or reseat the core with a multi-tool valve tool if you have one. Ensure the valve cap is not cross-threaded and that the cap itself seals properly; sometimes a missing or damaged cap is the only sign you need to fix. If the leak persists, you may need to replace the valve stem or tube.
Rim tape, rim strip, and bead seating: hidden culprits
Rim tape or rim strip that’s not properly aligned can expose spoke holes or sharp edges, causing slow leaks along the inside of the tube. Inspect the rim tape for tears or misalignment, and replace it if needed. Bead seating matters too: if the tire bead isn’t fully seated on the rim, air leaks around the bead. Re-seat the tire by deflating, pushing the bead evenly onto the rim, and reinflating gradually. For tubeless setups, inspect the bead area and sealant distribution for proper sealing.
Tubeless vs tubed: differences in leakage behavior
Tubeless systems can leak at the bead or through punctures in the tire that seal with sealant, whereas traditional tubed tires tend to leak through punctures in the tube itself. Tubeless tires require proper sealing around the rim and an effective bead. If you’re troubleshooting a tubeless setup, check the sealant level; re-seal or replace the rim tape if you notice air escaping around the rim. Your approach to diagnosing leaks should reflect whether you’re dealing with tubed or tubeless configurations.
Locating leaks with simple at-home tests
A straightforward method is the soap-bubble test: apply soapy water around the tire, valve, and rim joints, then spin the wheel slowly. Look for rising bubbles indicating air escaping. Repeat at different points to pinpoint the exact source. This test can differentiate between a puncture, a loose valve, a bead seal issue, or a rim-tape problem. Note that slow leaks may require several minutes of observation to confirm.
Maintenance habits that prevent frequent flats
Preventing tire air loss starts with routine maintenance. Check tire pressure weekly or before long rides, inspect tires for embedded objects after every ride, and replace compromised tubes or tires promptly. Keep a compact repair kit with patches, tire levers, spare tubes, and a small pump. For tubeless setups, refresh sealant every few months and inspect the rim tape regularly. A proactive routine reduces the risk of roadside flats and ensures you stay confident on the road.
When to replace rather than patch or reseat
If the tire shows large cuts, sidewall damage, or multiple punctures in a short period, replacement is often the safer choice. A compromised bead seating area or a damaged rim tape warrants replacement too. Patching a tire with deep tread cuts can be unreliable, and a loose valve stem that cannot be tightened is a sign to replace the inner tube or tire. When in doubt, replacing the tire or inner tube is the safest option for reliable performance.
Steps
Estimated time: 45-75 minutes
- 1
Inspect tire surface for objects
Carefully examine the entire tire surface for embedded glass, thorns, or nails. Remove any object found and assess the damage to decide if the tube must be replaced or the tire patched. If no object is present, move to the next step.
Tip: Use a bright light and rotate the wheel to spot hidden objects. - 2
Check the valve core and stem
Gently press the valve core with a valve tool to test for leaks. Replace the core if it spins or leaks. Reinstall the cap and ensure it threads on cleanly; a loose cap can masquerade as a leak.
Tip: Do not overtighten the valve cap; just snug. - 3
Test with soapy water
Apply a soapy solution around the valve, bead, and rim joints. Slowly spin the wheel and look for bubbles indicating the source of air loss. Mark the source with chalk for easier re-check.
Tip: If bubbles appear at multiple points, suspect a rim-tape misalignment. - 4
Assess bead seating on tubed vs tubeless tires
For tubed tires, ensure the tube is evenly seated and not pinched. For tubeless, verify the bead is evenly seated and the sealant is distributing properly around the rim.
Tip: If the bead won’t seat, deflate and try again with a helper to push the bead evenly. - 5
Check rim tape integrity
Inspect the rim tape for tears, gaps, or exposed spoke holes. Replace if damaged. Misaligned rim tape can cause slow leaks that are hard to detect.
Tip: Rotate the wheel and inspect both sides of the rim for alignment. - 6
Decide on repair vs replacement
If the puncture is in the middle of the tire or there's extensive sidewall damage, replacement is safer. Patch the tube if the puncture is small and the patch is secure, or replace the tube.
Tip: When in doubt, replace the tire or tube to ensure safety.
Diagnosis: Tire loses air over days or hours
Possible Causes
- highPuncture or cut in tire or inner tube
- highValve core or stem leak
- lowDamaged rim tape or improper rim strip
- lowBead not seating properly (especially tubeless)
Fixes
- easyInspect tire for embedded objects; patch or replace tube as needed
- easyTighten or replace valve core; reseat valve
- mediumInspect rim tape alignment; replace if damaged
- easyRe-seat bead, ensure proper tubeless sealant distribution
People Also Ask
Why do bicycle tires lose air overnight?
Most overnight air loss is caused by a small puncture, a valve leak, or a bead seating issue. A quick check of the tire surface, valve, and rim can reveal the culprit. If the leak persists after these checks, further inspection or professional help may be needed.
Most overnight leaks come from a small puncture or valve issue. Check the tire, valve, and rim to locate the source, and consider professional help if unresolved.
Can tubeless tires lose air even when sealed?
Yes. Tubeless tires can lose air through the bead seat or through punctures that seal with sealant. Check bead seating and sealant levels, and reseat the bead if necessary. A poor bead seal is a common source of leaks in tubeless setups.
Tubeless tires can leak at the bead or through punctures that seal with sealant. Check bead seating and sealant, and reseat if needed.
How often should I check tire pressure?
Aim to check tire pressure at least once a week and before long rides. If you ride aggressively or in extreme temperatures, check more frequently as air pressure changes with temperature and riding style.
Check pressure at least weekly or before long rides; hotter or colder days can affect pressure.
What should I carry for punctures on the road?
Carry spare tubes, tire levers, patches, a patch kit, and a compact pump or CO2 inflator. Having the right tools lets you fix most flats quickly and safely on the roadside.
Spare tubes, patches, tire levers, and a small pump are essential for road punctures.
How do I fix a slow leak?
Locate the source with a soapy-water test, reseat the bead or valve, and replace the tube if the puncture is large or the valve cannot be tightened. For tubeless tires, refresh sealant and ensure bead seating.
Slow leaks are usually fixed by reseating the bead or replacing the tube, and resealing tubeless beads if needed.
Is it safe to ride with a tire that leaks slowly?
Riding with a slow leak is not recommended because it can worsen punctures or bead leaks. Inflate to the recommended pressure before riding and fix the leak as soon as possible.
If the leak is slow, don’t ride long distances. Inflate to the right pressure and fix it promptly.
Watch Video
Quick Summary
- Inspect tires for embedded objects first
- Use soapy water to locate leaks quickly
- Know tubed vs tubeless differences for leaks
- Maintain regular pressure to prevent flats