Why Did the Bicycle Collapse? Urgent Troubleshooting Guide
Urgent troubleshooting guide to diagnose why a bicycle collapsed, identify common causes, and safely inspect, repair, and prevent future failures on the road.

Most bicycle collapses start with a loose or damaged component. The quickest fix is to stop riding, inspect the frame, fork, wheels, and quick-release skewers, tighten or replace what's visibly worn, and take the bike to a shop if you hear creaks or see cracks. If you can't identify a cause, seek professional help immediately.
Understanding What Causes a Collapse
The question why did the bicycle collapse is alarming, but most failures are the result of cumulative wear or a single high-stress incident that exposed a hidden fault. According to BicycleCost, the most common triggers begin with a loose component or a structural weakness. Before you panic, stay calm and focus on safety. The BicycleCost team emphasizes a safety-first mindset: stop riding at once if you suspect trouble, then inspect the most critical zones. Regular inspection and timely component replacement can prevent many collapses. Look for cracks in the frame, a compromised fork, loose headset bearings, and faulty quick-release mechanisms. External factors like heavy loads, potholes, and improper torque at joints can speed up deterioration. The goal of this guide is to help you quickly identify root causes and restore safety for you and others on the road.
Immediate Safety Steps When You Experience a Collapse
If you experience a collapse, your first priority is safety. Dismount calmly and move away from traffic. If you are injured, call for help. Do not ride the bike again until it has been inspected by a qualified mechanic. If you must move the bike, lower it gently to the ground and transport it off the roadway using a safe bike rack or a helper. Keep a basic repair kit on hand for brief, non-destructive checks, such as a multitool and flashlight. After a collapse, consider a tow to the nearest shop rather than attempting risky at-home fixes. Remember the safety rule: any sign of frame or fork damage means do not ride.
Visual Clues: What to Inspect Right Now
Start with the most obvious signs of trouble. Check the frame for cracks, dents, or rust around welds. Inspect the fork for bending or creases near the steerer tube. Look at the wheel rim for cracks or significant trueing issues, and inspect spokes for breaks or loose tension. Examine the headset and handlebar stem for play or movement. Check the quick-release skewers and axle nuts to ensure they are fully tightened according to the manufacturer specification. If anything looks questionable, stop and seek professional assessment. Quick, visual checks can save you from a catastrophic failure on the road.
Common Mechanical Failures That Lead to Collapse
Understanding the typical failure modes helps you diagnose quickly. Common issues include frame cracks or fatigue at welds, fork or steerer tube failures, and wheel problems like a collapsed rim or broken spokes. Loose or damaged headset bearings can cause instability, while a faulty quick-release mechanism can allow the wheel to detach unexpectedly. Improper torque on bolts at the stem, handlebars, or brake mounts can also lead to sudden structural weakness. High stresses from hard impacts or overloading are frequent accomplices. Safety comes from catching these signs early and deprioritizing risky rides before a total failure occurs.
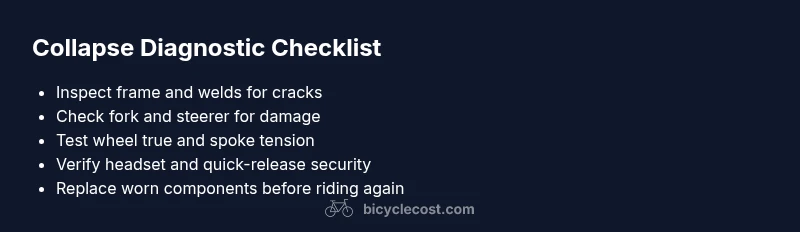
Diagnostic Checklist (Visual & Basic Tests)
Use a systematic visual and tactile inspection to identify issues. Start with the obvious: are there cracks in the frame or fork, or is there unusual movement in the headset? Test the wheel for wobble by spinning it and watching for side-to-side movement. Feel for any looseness in the stem or handlebars. Verify that the quick-release or thru-axle is correctly tightened and that the brakes do not rub or bind. If you discover any cracks, excessive play, or obvious damage, do not ride the bike. Document what you find and prepare to bring the bike to a shop for a professional assessment.
Step-by-step Fixes for the Most Common Causes
- Tighten and secure all safety-critical fasteners: headset, stem bolts, brake mounts, and quick-release skewers. 2) Inspect the wheel for true and repair or replace damaged spokes or the rim. 3) Check the fork and frame for visible cracks; mark the location and avoid riding until a professional inspects. 4) If the quick-release or axle is compromised, replace it and re-check torque specs. 5) If bearings feel rough or gritty, replace them or reseat the bearing race. 6) After fixes, perform a slow, controlled test ride in a safe area and recheck tightness. 7) Keep a maintenance log to track wear and upcoming service.
Prevention: How to Reduce Future Risk
Prevention begins with a proactive maintenance routine. Schedule regular inspections of the frame, fork, headset, wheel integrity, and drive train. Use a torque wrench to ensure bolts are tightened to spec and replace worn components before they fail. Beware of riding over obstacles that can cause fractures or sudden stress and avoid overloading the bike with heavier payloads than it is designed to carry. Invest in a quality repair kit and learn basic checks you can perform between professional services. A conservative approach to maintenance keeps your bike safer and more reliable over time.
When to Seek Professional Help and Warranties
Structural concerns require professional evaluation. If there is any doubt about frame or fork integrity, do not ride the bicycle. Take the bike to a certified shop where a trained mechanic can assess welds, heat treatment, and material fatigue. If the bike is under warranty, contact the manufacturer or authorized service center to avoid voiding coverage. Document all findings with photos and notes; these are helpful for warranty claims or service records. The sooner a qualified mechanic inspects the bike after a collapse, the better the chance of a safe and reliable repair.
Steps
Estimated time: 60-90 minutes
- 1
Stop riding and ensure safety
Slowly bring the bike to a stop in a safe area and dismount. Check for injuries and call for help if needed. Do not continue riding if you suspect any structural issue.
Tip: Keep your repair kit accessible and wear gloves for inspection. - 2
Secure the bike and inspect visually
Place the bike on a stand or upside-down to inspect frame, fork, and wheels. Look for cracks, dents, or bending. Check the headset for any play.
Tip: Use a flashlight to spot hairline cracks you might miss in daylight. - 3
Check fasteners and quick-release
Tighten all visible bolts to manufacturer torque specs. Verify the quick-release or thru-axle is fully engaged and secure.
Tip: If you suspect a damaged skewer or axle, do not ride; replace it. - 4
Assess wheels and tires
Spin the wheel to look for lateral wobble. Check spokes for looseness or breaks and inspect the rim for cracks or dents.
Tip: If spokes are loose, avoid riding until repaired by a professional. - 5
Evaluate frame and fork integrity
Look for visible cracks around welds, bends, or unusual deformations in the frame or fork. Any doubt means do not ride.
Tip: Document with photos for warranty or repair records. - 6
Decide on next steps
If no obvious damage is found and the bike feels solid, consider a cautious test ride in a controlled area. If anything feels off, arrange professional service.
Tip: When in doubt, err on the side of safety and seek expert help. - 7
Plan a professional inspection
Book a service with a certified shop to confirm structural integrity and component condition. Ask for a full safety check and a written report.
Tip: Keep receipts and maintenance logs for future reference.
Diagnosis: Bicycle suddenly becomes unstable or collapses while riding
Possible Causes
- highLoose or cracked frame welds or structural fatigue
- highFork or steerer tube failure
- highWheel integrity issue (collapsed rim, broken spokes)
- mediumLoose or damaged headset bearings
- mediumFaulty quick-release or axle mounting
- lowOverloading or impact damage from a crash
Fixes
- easyImmediate safety: stop riding, dismount, and move to a safe area
- easyTighten or replace spoiled fasteners, bearings, and quick-release components as needed
- mediumInspect wheel for true, replace damaged spokes or rim; reseat wheel if needed
- hardAssess frame and fork for cracks; do not ride if structural damage is suspected; transport to shop
- hardConsult a professional for weld repairs or component replacements, especially if under warranty
People Also Ask
What are the first signs that a bicycle frame might fail?
Look for cracks in paint, visible weld flaws, creaking sounds, and wobble in the frame. If you notice any of these, stop riding and seek professional inspection.
Watch for cracks, welds that look stressed, creaking, or frame wobble. Stop riding and get a professional check.
Can I fix a collapse at home safely?
Some non-structural issues can be addressed at home if you have the right tools and knowledge. Structural problems, especially with the frame or fork, require a professional.
You can handle basic fixes if you have the tools, but do not attempt frame or fork repairs yourself.
What should I check first after a collapse?
First, stop riding and inspect for obvious frame, fork, wheel, or headset damage. Then verify fasteners and quick-release safety. If anything seems off, get a professional assessment.
Stop, inspect for obvious damage, check fasteners, and seek a pro if unsure.
How can I prevent collapses in the future?
Follow a regular maintenance schedule, replace worn parts before failure, and use torque specs. Avoid overloading the bike and riding on severely damaged components.
Maintain a routine, replace worn parts, and don’t ride damaged bikes.
How should I transport a bike after a collapse?
If the bike is unsafe to ride, transport it on a car rack or trailer to the nearest bike shop. Do not attempt long-distance rides with suspected damage.
Use a proper rack or trailer to move the bike to a shop; don’t ride it.
Watch Video
Quick Summary
- Inspect safety-critical areas after a collapse
- Do not ride with potential frame or fork damage
- Regular maintenance reduces collapse risk
- Seek professional help for structural issues