How to Take Bicycle Pedals Off: A Complete Guide
Learn how to safely remove bicycle pedals with basic tools. This step-by-step guide covers right and left pedals, common problems, and reassembly tips for cyclists.

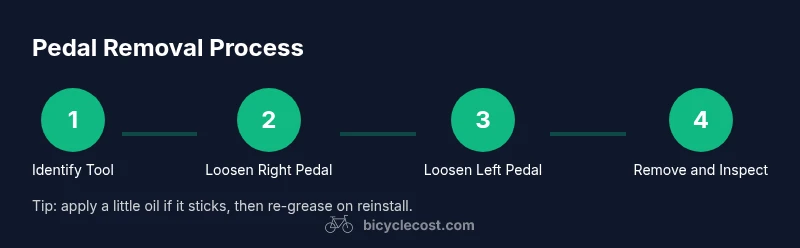
Removing bicycle pedals is a routine maintenance task you can do with a few common tools. To begin, identify pedal type and have a pedal wrench or hex key ready. On the right side, turn counterclockwise to loosen; on the left side, turn clockwise (reverse-threaded). Then unscrew fully by hand. This steps-guide covers everything in detail.
Understanding pedal types and safety
When you ask how to take bicycle pedals off, the first step is to identify what kind of pedals you have and how they attach to the crank. Most common designs fall into three broad categories: platform (flat) pedals, clipless pedals, and pedals with toe cages. Platform pedals usually present flats on the axle that a pedal wrench fits, or an inside hex on the crank-side that accepts an Allen key. Clipless systems use retention mechanisms that may require an Allen key or a small cone wrench to loosen binding parts before the pedal is separated from the crank. Toe-cage pedals are effectively standard pedals with an external cage and typically still use a pedal wrench for the flats or an Allen key for internal interfaces.
A critical safety note: keep a firm stance and control the crank to avoid wheel motion while loosening pedals. If the chain catches the chainring while you apply force, stop and reposition. Left pedals are typically reverse-threaded on most bicycles, so you must turn them in the opposite direction of the right pedal when viewed from the corresponding crank side. Understanding this prevents cross-threading and reduces the risk of damaging the crank arm or pedal axle. Before you start, inspect the threads for any corrosion or damage; if you see stripped threads or a swollen axle, stop and seek professional help. For difficult pedals, penetrating oil can help; apply it to the threads and wait a few minutes before attempting to loosen again.
As you prepare to remove pedals, confirm the orientation of the left and right pedals and plan your tool choice. If you’re unsure about the exact interface on your pedals, check the user manual or look for markings on the pedal body. Depending on design, you may need a 15mm pedal wrench for flats, a 9/16" spanner, or hex keys (6mm or 8mm) inserted from the inside end of the spindle. The more you understand the interface, the smoother the process will be when you remove pedals for maintenance or replacement. Throughout the process, avoid using excessive force, and ensure you have a stable grip to prevent slips. Keep a rag handy to wipe away grease after removing pedals so you don’t inadvertently transfer grease to the chain.
Tips: Always consider the direction of removal and safety. Left pedals use reverse threading; right pedals use standard threading. If you encounter stubborn pedals, apply oil, wait, and then reattempt with a longer lever while keeping the crank stable.
Tools & Materials
- Pedal wrench (15mm) or appropriate hex keys (6mm/8mm)(Choose based on pedal flats or hex socket from inside the crank arm)
- Adjustable wrench or Allen key set(Optional backup if your pedals use non-standard interfaces)
- Penetrating oil (optional)(Use sparingly on stubborn threads; avoid excessive soaking)
- Rag or shop towel(For wiping grease and protecting your hands)
- Grease or anti-seize compound(Lightly grease threads on reassembly to ease future removal)
- Bike stand or secure work surface(Helpful for stability; not strictly required)
Steps
Estimated time: 15-30 minutes
- 1
Position and secure the bicycle
Place the bike on a stable surface or stand so both pedals are accessible. Stand on the non-drive side to keep balance, and rotate the crank so the pedals are easy to reach. This setup minimizes strain on your back and wrists while you work.
Tip: If you don’t have a stand, lean the bike against a solid surface and use a support under the crank arm to stop movement. - 2
Identify the correct tool for each pedal
Inspect the pedal body to determine whether it uses a standard flats wrench (often 15mm) or an internal hex (6mm/8mm) from the inside end. Match your tool to the interface so you can apply even torque without slipping. If you’re unsure, try the hex key first from the inside end and then switch to a pedal wrench if needed.
Tip: Start with the simplest tool; forcing a pedal with the wrong tool can strip the flats or threads. - 3
Prepare the threads and apply lubricant if needed
Wipe the pedal axle and crank threads clean. If the pedal is stubborn, apply a small amount of penetrating oil to the threads and wait 5–10 minutes. The oil helps break the bond formed by aging grease and grime without forcing the parts.
Tip: Wipe away excess oil after waiting to prevent it from dripping onto the chain or frame. - 4
Loosen the right pedal (standard thread)
From the right side of the bike, apply the wrench and turn counterclockwise to loosen. Maintain steady pressure and keep your body over the tool to avoid slips. If you feel any chain interference, adjust your stance and try again.
Tip: Keep your foot on the ground for balance to avoid twisting your knee. - 5
Loosen the left pedal (reverse thread)
From the left side, turn clockwise to loosen the left pedal due to the reverse thread. Mirror the grip and stance used for the right pedal, but reverse the direction. If the pedal refuses to budge, pause and reapply lubricant or switch to a longer lever carefully.
Tip: Confirm you’re on the correct side; the left pedal is on the opposite side of the bike from the right and uses reverse threading. - 6
Remove the pedals by hand after loosening
Once loose, continue to unscrew by hand until the pedals separate from the crank arms. Take care not to push the wrench into the crank or onto the chainring. Removing by hand minimizes the risk of thread damage and ensures you still feel any resistance.
Tip: If you feel rough resistance, stop and reassess the thread condition before applying more torque. - 7
Inspect threads and clean before reinstall
Check both the pedal axle threads and the crank arm threads for burrs, corrosion, or wear. Clean with a dry cloth and re-grease the male threads lightly before reinstalling. This preserves thread life and makes future maintenance easier.
Tip: Always wipe away old grease and reapply a light film to avoid seizing on reinstallation.
People Also Ask
What tool should I use for standard pedals?
Most standard pedals use a 15mm pedal wrench or an internal hex key from the inside end. Check for flats on the axle or hex socket on the crank side.
Most pedals come with flats that fit a 15mm wrench, or an internal hex key from the inside end. Look for flats or a hex socket to choose the right tool.
Why is the left pedal reverse-threaded?
The left pedal uses a reverse thread to prevent it from loosening while riding. Always turn the left pedal clockwise to loosen when viewed from the left side.
The left pedal uses reverse threading, so you loosen it by turning clockwise when you're on the left side.
What if the pedal won’t budge after lubrication?
If lubrication doesn’t help, avoid forcing it. Check for cross-threading or damage, wait longer or try a different tool angle, and consider applying gentle heat or consulting a mechanic if it remains stuck.
If it won't budge after lubrication, don't force it. Recheck for damage and consider a mechanic if needed.
Should I grease pedals before reinstalling?
Yes, applying a light smear of grease to the pedal threads improves removal in the future and reduces corrosion. Wipe away excess grease after installation.
Yes, a light grease on threads helps future removals and prevents corrosion.
How do I know when I’m done reinstalling?
Reinstall until snug with a wrench, then give a final spin to ensure smooth rotation of the crank and a clean pedal seating. Do not overtighten, especially on aluminum cranks.
Tighten until snug and spin to confirm, but avoid overtightening.
Watch Video
Quick Summary
- Identify pedal type before starting
- Use the correct tool for safe removal
- Loosen right pedal counterclockwise and left pedal clockwise
- Inspect and grease threads on reinstall