How to Put a Bike in a Trainer: A Practical Guide
Learn how to safely mount your bicycle in a trainer with practical steps, tire tips, and safety checks from BicycleCost. Ideal for road, mountain, and hybrid bikes.

To put your bike in a trainer, first confirm trainer compatibility with your frame, then attach the rear wheel and secure the frame, front wheel on a block if needed, and tighten quick-release skewers or through-axles. Check alignment, tire type, and trainer clamps before you start pedaling. Also verify your cadence sensor if applicable.
Verify trainer compatibility and initial setup
Choosing the right trainer is the first step toward a smooth indoor riding experience. Not all trainers fit every frame, and even models with similar names can differ in dropout standards, axle compatibility, and sensor mounting. According to BicycleCost, start by confirming that your trainer supports your bike’s axle type (quick-release, through-axle, or adapters) and that the footprint matches your bike’s geometry. Once compatibility is confirmed, read the user manual for the recommended mounting method. If you have a road bike with a 700c wheel, ensure the trainer can accommodate that size or swap to an appropriate wheel block. For mountain bikes with wider tires, verify clearance between the frame, pedal crank, and trainer arms. In short, the compatibility check prevents misalignment and potential damage during the first test ride.
Gather tools and positioning essentials
Before you lift the bike, assemble the essential tools and check your workspace. You’ll need a dedicated trainer, the front-wheel block (or a stable stand) if your trainer requires it, a set of hex wrenches or an Allen key for any end-cap adapters, and a utility towel to catch sweat. If you ride a through-axle bike, have the correct adapter or spacing for your trainer. A smartphone or cadence sensor may stay connected for analytics, but it isn’t required for basic setup. Create a clean, non-slip mat under the trainer, and ensure there is ample space around you to avoid hitting walls or furniture during a test ride. This preparation minimizes last-minute adjustments mid-setup and keeps your bike protected.
Prepare the bike: drivetrain and wheel management
Begin with a quick drivetrain inspection: check that the rear derailleur is not bent, the chain runs smoothly, and your brake calipers aren’t loose. Decide whether you will remove the rear wheel (common with wheel-on trainers) or leave it in with the appropriate alignment. If removing, loosen the quick-release lever and carefully lift the wheel straight out, keeping the chain on the chainring. For bikes with through-axles, ensure the trainer’s axle adapter is firmly seated and snug. If your trainer uses a front-wheel riser, place the wheel on the block and tighten as per the manual. Safety note: never force parts; if anything resistance, stop and recheck.
Install the bike into the trainer: rear attachment and front support
Position the bike onto the trainer according to the model’s instructions. Attach the rear dropout to the trainer’s axle or mounting point, ensuring the skewer/through-axle is fully seated and tightened. If you removed the rear wheel, ensure the cassette is properly aligned with the trainer’s drive unit and that the chain length tension is appropriate. On wheel-on trainers, align the rear wheel with the trainer arm and fasten the quick release, then mount the front wheel on the wheel block or stand. This step locks the bike’s frame to the trainer and creates the baseline for a stable ride. A wobble-free mount prevents fatigue and improves pedal stroke accuracy.
Align the bike and tighten clamps for stability
With the bike attached, check alignment by pedaling slowly and observing that the chainline remains straight and the cassette engages smoothly. Use the trainer’s adjustment screws or clamps to center the wheel and tighten evenly. If your frame has unusual geometry, you may need to adjust the position of the rear mounting arms to avoid rubbing or tire clearance issues. Ensure the trainer’s contact surfaces are clean and free of grit. Recheck after a short test spin and adjust as needed. A precise alignment reduces unwanted flex and produces a more realistic feel.
Check tire compatibility and resistance impact
Most modern trainers advertise a compatibility range for tire width and type. If you use a legacy road tire or a high-roller MTB tire, consider switching to a trainer-specific tire or a slick, narrow tire to reduce resistance and heat build-up. Inflate tires to the recommended pressure for riding on the trainer if specified by the trainer manufacturer. Some direct-drive trainers do not require tire contact at all, but wheel-on units do. Keep an eye on heat buildup during longer sessions; if you notice excessive warmth or tire wear, pause and cool the setup, then reassess tire choice and air pressure. BicycleCost notes that tire choice can influence power accuracy and ride feel.
Safety checks and initial test ride
Begin with a short, low-resistance test ride of 2-3 minutes to verify stability, axis alignment, and pedal stroke synchronization. Stand behind the bike and watch for any side-to-side movement, cracks, or loose bolts. If you hear creaks or feel shake, stop immediately and re-inspect the mounts. When you’re confident in stability, gradually increase resistance and monitor how the bike behaves under load. Always wear a helmet and ensure the trainer’s frame is on a flat, level surface. A careful, gradual ramp-up prevents crank-bolt loosening and drivetrain misalignment.
Common issues and quick fixes
Slippage: recheck rear axle tightening and wheel alignment. Wheel wobble: adjust the front wheel block or re-seat the front axle. Uneven pedal stroke: verify chainline and access to the correct mounting points. Noise: inspect the cassette, chain, and trainer clamps to tighten and lubricate as needed. If you experience persistent problems, consult the trainer’s manual or contact customer support. Make notes of the model, serial number, and problem description to speed up support requests.
Maintenance and long-term care after trainer sessions
After every session, wipe down the bike and the trainer to remove sweat, dust, and moisture to prevent corrosion. Check the trainer’s resistance unit and mounting bolts for looseness and re-tighten if needed. Store adapters and wheel blocks in a dry place and keep spare parts finger-tight, not over-tightened. Periodically inspect the tire for flat spots or wear if you ride wheel-on; replace trainer tire if the tread shows wear. Regular lubrication of the chain and derailleur, as well as periodic calibration checks, helps maintain accuracy and safety across seasons. By keeping your trainer clean and well-maintained, you extend both bike and trainer life.
Tools & Materials
- Smart trainer or wheel-on trainer(Ensure model matches bike axle type and frame width)
- Front-wheel block or stand(Stabilizes the front wheel; compatible with trainer type)
- Hex wrenches / Allen keys(Common sizes: 4mm, 5mm; used for adapters and clamps)
- Torque wrench (optional)(Helps achieve precise clamping torque)
- Adapter spacers or through-axle adapters(Needed for non-standard through-axles or frames)
- Towel or mat(Catches sweat and protects floor)
- trainer-specific tire (optional)(Reduces wear and improves rolling resistance on wheel-on trainers)
- Smart device or bike computer (optional)(Tracks cadence, power, and metrics)
Steps
Estimated time: Estimated total time: 15-25 minutes
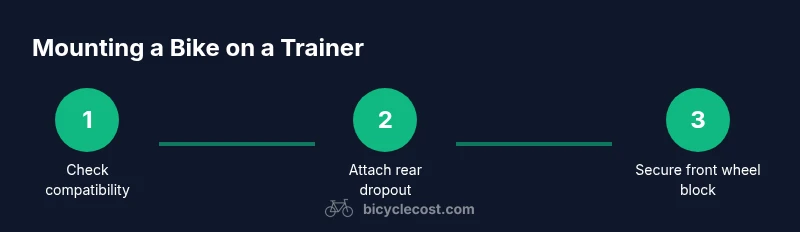
- 1
Check compatibility and prep workspace
Review your trainer’s manual and confirm compatibility with your bike’s axle type and frame width. Set up your workspace on a non-slip surface and gather tools so you’re not searching mid-setup. This initial check prevents mismatches that cause misalignment.
Tip: Always start with the model’s compatibility section to avoid later adjustments. - 2
Remove or prepare the rear wheel
If using a wheel-on trainer, you’ll typically remove the rear wheel. Open the quick-release, lift the wheel straight out, and keep the chain on the chainring. If your bike uses through-axles, ensure the axle is loosened per the trainer’s instructions and ready for mounting.
Tip: Keep the chain tame and out of the way during wheel removal to prevent tangling. - 3
Attach the rear to the trainer
Slide the rear dropout into the trainer’s mounting point and secure the skewer or axle adapter fully. Tighten gradually in a crisscross pattern if applicable and verify that the cassette aligns with the trainer’s drive unit. A firm, even pull avoids play and wobble.
Tip: Use a torque wrench if available to reach the manufacturer’s recommended torque. - 4
Install the front wheel on the block
Place the front wheel onto the wheel block or stand, ensuring it sits firmly and won’t roll or tip. If your trainer requires a small spacer or adapter for the front, install it now. Check that the front fork is straight and not rubbing any trainer arm.
Tip: Straighten the front wheel path to prevent binding during pedaling. - 5
Check alignment and tighten clamps
With the bike mounted, roll the pedals slowly to check for straight chainline and smooth engagement. Adjust the trainer’s clamps to center the wheel and secure all attachment points evenly. Confirm there is no frame contact or tire rubbing.
Tip: Take your time to center the setup—small misalignments compound under load. - 6
Assess tire choice and drive unit contact
For wheel-on, verify tire width and type meet the trainer’s recommendations. If using a trainer tire, install and inflate to recommended pressure. For direct-drive, confirm there’s no tire contact and that the drivetrain aligns with the drive unit.
Tip: Switch to a trainer-specific tire to minimize heat and wear. - 7
Perform a low-resistance test ride
Spin the pedals at a slow cadence for 2-3 minutes to test stability and alignment. Listen for noises and watch for any wobble. If anything feels off, stop and recheck the mounting points before increasing resistance.
Tip: Don’t push into high resistance on the first test; build gradually. - 8
Ramp up resistance and monitor
Gradually increase resistance in small steps to simulate real riding. Observe for wobble, slipping, or frame movement. If you notice any issues, pause, adjust, and re-test before continuing.
Tip: Keep a log of settings for future sessions. - 9
Document setup and routine checks
Record the trainer model, bike setup, tire type, and any notes about fit or feel. Schedule periodic checks of bolts, clamps, and drive unit alignment. Regular documentation saves time on future sessions.
Tip: A quick reference sheet speeds up setup next time.
People Also Ask
Do I need to remove the rear wheel for all trainers?
Most wheel-on trainers require rear-wheel removal, but some wheel-on models work with the wheel in place. Always check the trainer manual for your model and bike type.
Most trainers require removing the rear wheel, but some models allow riding with the wheel on. Check your manual for your setup.
What tire should I use on a wheel-on trainer?
Use a trainer-specific tire or a narrow, smooth tire to reduce wear and improve resistance accuracy. Avoid aggressive MTB tires on wheel-on units.
Choose a trainer-specific tire or a smooth, narrow tire to improve performance and wear.
How do I know if my trainer is compatible with my bike?
Consult the trainer’s compatibility chart for axle type, frame width, and tire requirements. If in doubt, contact customer support or refer to your bike’s manufacturer guidance.
Check the compatibility chart in the trainer manual or contact support if you’re unsure.
Can I use a direct-drive trainer with a through-axle bike?
Yes, most direct-drive trainers support through-axle setups with the correct adapter. Ensure you have the proper spacer and that the drive interface aligns with your chainline.
Direct-drive often works with through-axle bikes using the right adapter. Make sure the spacing matches.
Is it safe to ride at high resistance right away?
No. Start with low resistance to verify stability and gradually increase. Jumping to high resistance can reveal mounting faults and cause damage or injury.
Start low and gradually increase resistance after you’ve confirmed stability.
How often should I calibrate my trainer?
Follow the manufacturer’s guidance; many trainers benefit from periodic calibration or power accuracy checks, especially after changing tires or adapters.
Calibrate as recommended by the manufacturer, especially after changing tires or adapters.
Watch Video
Quick Summary
- Verify trainer compatibility before mounting
- Secure rear attachment first for stability
- Center the frame to minimize flex
- Use trainer-specific tires where possible
- Test at low resistance before heavy workouts