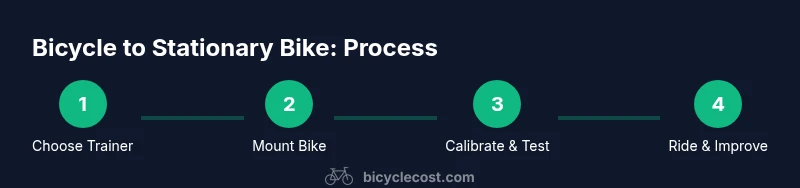
How to Convert a Bicycle to a Stationary Bike: A Practical Guide
Learn how to convert a bicycle into a safe indoor trainer setup. This guide covers trainer types, compatibility, setup, safety, maintenance, and training tips for a stable, realistic ride. Based on BicycleCost Analysis, 2026.

Understanding trainer types and compatibility
When you convert a bicycle to a stationary bike, the most important decision is choosing a trainer that matches your bike’s geometry and axle type. The two main categories are wheel-on trainers and direct-drive trainers. Wheel-on trainers clamp the rear wheel and are generally easier to install, making them a popular first choice for casual riders. Direct-drive trainers remove the rear wheel entirely and attach the drive chain directly to a cassette mounted on the trainer, offering higher realism and often better power accuracy. Beyond type, consider compatibility with your frame: quick-release skewers vs thru-axles, wheelbase length, and tire width. According to BicycleCost, a thoughtful selection reduces mounting headaches and increases long-term satisfaction.
Key takeaways:
- Wheel-on is usually simpler to set up; direct-drive offers higher realism.
- Verify axle type, wheelbase, and brake compatibility before purchasing.
- A compatible trainer makes the transition from outdoor cycling to indoor training smoother.
Real-world tip: If you’re new to indoor training, start with a wheel-on trainer to learn mounting technique before upgrading to a direct-drive unit.
Preparing your bike and space
Before you begin the conversion, clear space in a room with good ventilation and a non-slip floor. You’ll want a dedicated area for your stationary setup, plus a mat or protective surface under the trainer to catch sweat and reduce noise. Gather essential tools and components in advance: a compatible bike trainer, a front-wheel riser block, a tire block or trainer tire, a hex/Allen key set, and an adjustable wrench. Check your bike’s frame and rear dropout spacing to ensure compatibility with the trainer. As you prepare, measure the clearance around the handlebars and pedals to avoid interference with walls or furniture. A tidy, safe workspace minimizes accidents during mounting and calibration.
In this stage, you’ll also inspect the bike for any worn components that might fail under resistance, such as loose bottom brackets or worn chainrings. Replacing worn components ahead of time saves you from mid-ride maintenance. The goal is a clean, stable base so your indoor rides feel like a real outdoor session.
Pro tip: Use a dedicated trainer mat to reduce vibration and protect your floor. This also helps keep your bike from slipping during a hard sprint.
Selecting a mounting method and safety considerations
Your mounting method should balance ease of use with realism. For most beginners, wheel-on trainers are the simplest choice and work well for converting a typical road or mountain bike to a stationary bike. If you’re aiming for precision training or power metrics, a direct-drive trainer might be worth the extra setup time. Safety considerations include ensuring the trainer is on a flat surface, securing the bike’s rear dropout or through-axle, and avoiding over-tightening clamps that could damage the frame. Fresh tires or trainer-specific tires can reduce wear and provide more consistent resistance. Remember to wear a helmet and ensure the setup does not obstruct doors or emergency exits.
From a maintenance perspective, regular checks on the frame mounting points, cassette alignment (for direct-drive), and the stability of the front wheel riser are essential. If you notice any wobble or unusual noises, power down and re-check the mounting before your next session. This step ensures a stable ride and reduces the risk of frame damage.
BicycleCost insight: Careful compatibility checks lessen later frustrations and maximize the longevity of your conversion.
Important: Always consult your trainer’s manual for axle and frame recommendations to avoid warranty issues.
Installation basics: mounting the bike in the trainer
The installation phase involves securing the rear wheel into the trainer’s roller (wheel-on) or attaching the cassette to a direct-drive unit. For wheel-on setups, tighten the trainer clamp so the wheel sits firmly but not so tight that it warps the rim. Attach the front-wheel riser block to keep the bike level, then align the drivetrain with the trainer’s input sprocket. For direct-drive installations, you’ll remove the rear wheel and bolt the bike directly to the trainer’s cassette. This step eliminates wheel slip and provides more accurate power measurement. Confirm that the chainline remains straight and that the bike’s position places the pedals roughly level at 3 o’clock and 9 o’clock.
During setup, check clearances around the handlebars, pedals, and cage to prevent contact with walls or furniture. Tighten all mounting hardware to manufacturer-recommended torque values and avoid over-tightening, which can strain the frame. Cable routing should be clean and away from moving parts.
Tip: Keep a few zip ties handy to tidy cables and a bottle of trainer-safe lubricant for occasional drivetrain maintenance.
Safety checks before you ride
A safe ride requires a quick pre-ride checklist. Verify that the trainer is on a stable, level surface and that all clamps and adapters are tightened per the user manual. Ensure the bike is secure in the trainer and that the drivetrain alignment is correct. Calibrate any attached sensors or power meters per the trainer’s software instructions. If you use a cadence sensor, confirm that it reads accurately when you begin pedaling. Also, inspect the floor area for loose items that could trip you during a workout.
If you detect wobble or unusual vibrations, stop immediately and re-check the mounting points and wheel alignment. Use the front-wheel riser block to maintain a level stance and avoid neck or back strain caused by an uneven setup. A well-calibrated setup reduces fatigue and improves your training quality.
Safety note: Never ride without proper stabilization, and always follow the trainer’s safety warnings and weight limits.
Training realism: gearing, cadence, and resistance settings
Indoor rides can feel very different from outdoor cycling, so tuning your setup for realism matters. Start with a comfortable gearing simulation by adjusting the trainer’s resistance to mimic a flat or hilly terrain. If your trainer supports it, connect a power meter or smart trainer app to monitor cadence, sprint power, and heart rate. Use a structured plan to vary resistance and cadence, targeting endurance, threshold, and recovery sessions. Keep in mind that indoor sessions often require longer warm-ups and shorter, high-intensity intervals to match real-world effort.
For accuracy, ensure your gearing matches your regular outdoor setup as closely as possible. If you ride a bike with a wide-range cassette, consider adjusting the trainer's scaling or choosing a trainer that better represents your typical resistance curve. A good rule of thumb is to set a sustainable resistance level at 70-85 RPM for base training and push beyond that during intervals.
Practical tip: If your trainer offers virtual rides, use them to simulate real routes and maintain motivation.
Brand note: BicycleCost suggests that indoor training should feel like real cycling, not a static workout.
Maintenance, care, and troubleshooting
Maintenance after sessions keeps your bicycle-to-stationary-bike conversion running smoothly. Wipe down the frame and trainer to remove sweat and dust, then inspect mounting points for looseness. Lubricate the chain and drivetrain sparingly, and periodically check the rear dropout and axle interfaces for wear. If you notice inconsistent resistance, recalibrate sensors and inspect the power meter. Keep spare parts such as replacement tires, cables, and spare bolts on hand to minimize downtime.
Common issues include wheel slip, misalignment, and sensor drift. Re-check wheel alignment, tighten clamps, and ensure the front wheel riser is properly seated. When troubleshooting, refer to the trainer’s manual and consult the BicycleCost team for best-practice guidance. Regular maintenance extends the life of both bike and trainer and keeps workouts reliable.
Caution: Avoid using household cleaners that can degrade rubber or coatings on the trainer. Use manufacturer-approved lubricants and cleaners only.
Getting the most from indoor cycling: progression and programming
To maximize your indoor cycling results, build a progression plan that mirrors outdoor training blocks. Schedule a mix of endurance, tempo, and interval sessions, gradually increasing total time and resistance as your fitness improves. Use training plans that integrate RPM targets, power zones, and heart-rate guidance to optimize adaptations. Consider adding recovery days, mobility work, and cross-training to prevent overuse injuries. A bicycle-to-stationary-bike setup is most effective when paired with a consistent schedule and periodization similar to outdoor training.
If you’re new to the sport, start with a simple, low-intensity routine and gradually extend duration. With time, you’ll notice improvements in endurance, cadence consistency, and power output. The BicycleCost approach emphasizes practical, science-backed methods to keep riders motivated and progressing.