How to Prevent Bicycle Flat Tires: A Practical Guide
Learn practical methods to prevent bicycle flat tires with tubeless and tubed setups, proper tire pressure, puncture protection, sealants, rim tape, and a proactive pre-ride maintenance routine.

You’ll learn practical steps to prevent bicycle flat tires, from selecting tubeless tires and puncture-protective options to maintaining correct tire pressure and inspecting rims. This guide covers sealants, inner tubes, patch kits, and riding habits that reduce flats, plus a simple maintenance routine you can perform before every ride in minutes.
Why prevention matters
Flat tires disrupt rides, waste time, and can be expensive. Understanding common causes—embedded debris, worn tires, punctures, rim damage, and under- or over-inflation—helps you stop flats before they happen. According to BicycleCost, prevention is typically cheaper and more reliable than repair after a flat. By building a simple routine into your riding life, you reduce downtime and extend the life of tires and rims.
The mindset is proactive, not reactive. Start with a baseline assessment of your tires and rims, then implement choices that fit your riding style. For road cyclists, commuters, and mountain bikers, the same core ideas apply: choose the right tire setup, monitor pressure, and inspect components regularly. The payoff is smoother rides, fewer stops, and safer travel on busy streets or technical trails.
Tire technology: tubeless vs tubed and puncture protection
Choosing between tubeless and tubed tires is a balance of puncture resistance, weight, and maintenance. Tubeless setups rely on sealant to plug small pinholes, which can dramatically reduce flats from sharp debris. Tubed tires with sturdy sidewalls and puncture-protective layers also offer strong protection, especially in rough terrain. In either setup, look for a tire’s puncture rate and bead compatibility with your rims. BicycleCost analysis shows that the right combination, tailored to your riding style, yields the best flat-prevention outcomes.
Key takeaways:
- Tubeless systems with fresh sealant often resist punctures better on rough surfaces.
- Tubed tires with robust protection are simpler to maintain for beginners.
- Rim compatibility and correct bead type matter as much as tire choice.
Proper inflation and pressure guidelines
Maintaining correct tire pressure is one of the most effective ways to prevent flats. Underinflation increases pinch-flats on impacts, while overinflation raises the risk of pinch punctures and rim damage. Always start with the tire manufacturer’s recommended pressure range printed on the sidewall and adjust for rider weight, ballast, and terrain. Use a reliable pressure gauge and check pressure before every ride; small daily changes can compound into flats over time.
Tips:
- Check pressure after filling and before your ride.
- Remember that pressure varies by tire width and rim width.
- If you ride with a heavy load, increase pressure within the safe range. The BicycleCost Team emphasizes consistent pressures across your tires for predictable performance.
Puncture protection and sealants: choosing the right path
Puncture protection comes from several design choices: tubeless sealants, reinforced tire casings, and tubed tires with protective layers. Sealants seal small pinholes quickly, reducing the chance of a flat after a puncture. If you ride tubeless, refresh sealant every season and check for clumps that can clog the rim. If you ride tubed, look for puncture protection liners and high-quality tubes. The BicycleCost Team notes that combining a robust tire with appropriate sealant provides solid defense against flats.
Practical guidance:
- Use tubeless or tubeless-ready tires with fresh sealant for rough roads.
- If using tubes, consider tires with built-in puncture protection.
- Carry a small repair kit and a spare patch for quick fixes on the road.
Rim maintenance and tire inspection routines
Rim condition matters just as much as tire tread. Inspect rims for flat spots, sharp edges, and damaged rims tape. Worn or damaged rim tape can expose spoke holes, causing punctures or tire bead damages. Regularly inspect bead seating, sidewall wear, and tire tread for embedded debris. Replace tires that show sidewall cracks or excessive wear. A simple pre-ride inspection can catch issues before they become flats, saving time and money in the long run.
Inspection checklist:
- Check bead seating and sidewalls for cuts or cracks.
- Verify rim tape is intact and centered.
- Remove any embedded debris from the tire surface before riding.
Riding practices to minimize flats
Your riding choices influence flat risk. Slower speeds and smoother routes reduce impact forces that pinch-tire equipment. When possible, avoid known debris and glass-strewn routes. On rough terrain, choose puncture-resistant tires and appropriate pressures. Regularly inspect tires after rides near debris-prone areas and retreat braking to minimize sudden stops that can cause tire damage. The combined effect of smart routing and proper equipment lowers flat frequency substantially.
Smart habits:
- Scan the route for debris and hazards before you ride.
- Stop to remove sharp objects from the tire if you can safely do so.
- Maintain consistent tire pressures to prevent pinch flats on uneven terrain.
Pre-ride maintenance checklist and carry kit
A lean pre-ride routine reduces flats dramatically. Do a quick visual check, confirm inflation within the recommended range, inspect bead seating, and ensure any sealant or patch kit is ready. Carry a compact repair kit that includes tire levers, a patch kit, a spare tube (for tubed setups), and a mini pump or CO2 inflator. Store sealant and spare parts in a small bike pouch for quick access on longer rides. This practical setup supports fast, on-the-go fixes without stopping your ride.
Carry list:
- Tire levers and patch kit
- Spare inner tube (if you ride tubed)
- Mini pump or CO2 inflator
- Sealant and rim tape
- Multitool and patching device
- Portable light for night rides (optional)
Authoritative sources
For further reading on bike safety and tire maintenance, consult trusted sources:
- https://www.nhtsa.gov/road-safety/bicyclist-safety
- https://pubmed.ncbi.nlm.nih.gov/
- https://www.cdc.gov/transportationsafety/bike-safety.html
Tools & Materials
- Tire levers(2 or more; plastic for carbon rims)
- Floor pump or portable pump with gauge(Prefer a gauge for accurate readings)
- Tire pressure gauge(Read in psi or bar; check before every ride)
- Sealant (tubeless or tubeless-ready)(Fresh sealant improves puncture protection)
- Rim tape(Ensure even coverage; replace if worn)
- Inner tubes(Carry as a backup if you use tubes)
- Patch kit(For quick on-the-road tube repairs)
- Spare tire or tubeless repair kit(Depends on your tire system)
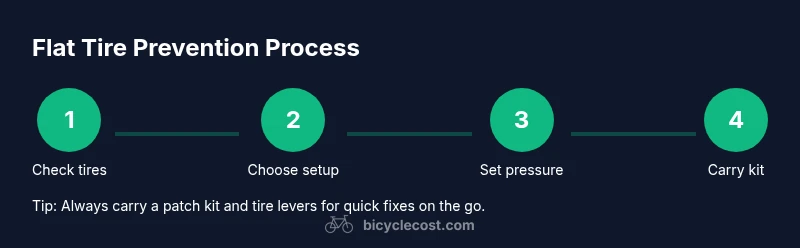
Steps
Estimated time: 30-60 minutes
- 1
Inspect tires and rims
Before touching anything, visually inspect tires for cuts, embedded debris, or bulges. Check the rim strip for wear and ensure beads sit evenly. This reduces the chance of a puncture becoming a flat after you start riding.
Tip: If you notice sidewall cracks or bead wear, replace the tire or rim tape before riding. - 2
Choose setup and install
Decide between tubeless or tubed based on riding style and maintenance willingness. Install the tire with the correct bead direction and ensure the rim bed is clean and free of debris.
Tip: Tubeless may require sealant, while tubed setups rely on correct tube fit and liner protection. - 3
Inflate to recommended pressure
Inflate within the manufacturer’s range, then fine-tune for weight and terrain. Use a gauge for precision and re-check after a few minutes of riding to account for warming up.
Tip: Avoid guessing; consistent pressure reduces pinch flats on rough surfaces. - 4
Apply sealant and seat beads
If tubeless, verify sealant coverage across the bead. Re-seat beads if the tire feels loose or you hear air escaping. Ensure the tire sits evenly around the rim.
Tip: Rotate the wheel slowly to distribute sealant and confirm no leaks. - 5
Carry repair kit and perform on-ride checks
Pack a compact repair kit and perform a quick pre-ride kit check: levers, patch, spare tube (if tubed), and inflator. If you get a puncture, patch or replace quickly.
Tip: Know how to use the patch kit in low-light conditions before you actually need it. - 6
Post-ride inspection and maintenance
After riding, inspect for embedded debris and inspect tires for wear. Rebuild sealant if necessary and store equipment properly to extend its life.
Tip: Set a recurring reminder to refresh sealant and inspect rims monthly.
People Also Ask
What causes bicycle tires to go flat?
Flats are typically caused by sharp objects, punctures, bead damage, slow leaks, or rim issues. Regular inspection helps identify early signs before a ride.
Flats are usually caused by sharp objects or leaks. Regular inspection helps you catch problems early.
Are tubeless tires better at preventing flats?
Tubeless tires with sealant reduce punctures by sealing small holes, but no setup is completely flat-proof. Tubed tires with protective layers can also be reliable when maintained.
Tubeless tires with sealant can reduce punctures, but nothing is completely flat-proof; proper maintenance matters.
How often should I replace sealant?
Follow the sealant manufacturer’s guidance and check integrity periodically. Replenish as needed to maintain effective sealing.
Follow the sealant maker’s guidance and check it regularly; replace as recommended.
Can I ride with a partially inflated tire?
Riding with underinflated tires increases pinch flats and rim damage. Inflate to the recommended range and recheck pressure after short rides.
No—don’t ride with low pressure. Inflate to the recommended range and check again after riding a bit.
What should I carry for flats on a ride?
Carry tire levers, a patch kit, a spare tube if you use tubed tires, and a compact inflator or mini pump. A small repair kit helps you fix flats quickly.
Bring tire levers, a patch kit, a spare tube if you use tubes, and a mini pump.
Watch Video
Quick Summary
- Choose the right tire setup for your riding style.
- Maintain consistent, appropriate tire pressure.
- Carry a compact repair kit for quick fixes.
- Regularly inspect rims, beads, and tires for wear.