How to Adjust Bicycle Brakes
Learn safe, reliable bicycle brake adjustments for rim and disc systems. This BicycleCost guide covers tools, alignment, wear, and maintenance to keep stopping power consistent.

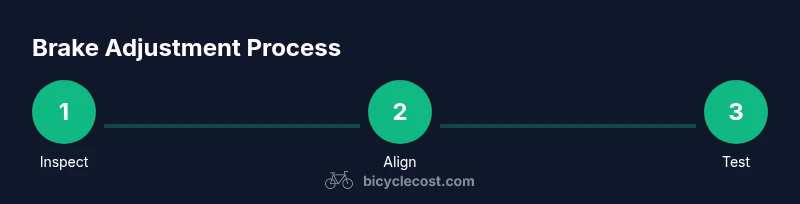
To adjust bicycle brakes, identify your brake type (rim or disc), inspect wear, and prepare tools. For rim brakes, center the calipers, adjust the cable tension with the barrel adjuster, and align pads so they toe-in slightly and don’t rub when spinning the wheel. For disc brakes, check caliper alignment and rotor rub, tighten mounting bolts, and replace pads if worn. Test lever pressure before riding.
Understanding Brake Systems
Bicycle brakes come in two primary families: rim brakes and disc brakes. Rim brakes press pads against the wheel rim to slow you down; disc brakes clamp onto a rotor mounted near the hub for stopping power. Within each family there are variations (caliper, V-brake, cantilever for rims; hydraulic and mechanical for discs). According to BicycleCost, choosing the right system for your riding style and maintenance routine is the foundation of safe braking. Regular inspection of pads, rotors, cables, and housings helps prevent surprises on the road. This guide explains how to adjust both rim and disc brakes, what wear looks like, and how to test your setup before riding on pavement or trails. For many riders, the first step is recognizing the difference between pad material (sintered vs resin) and how that affects wear and braking in wet weather.
Safety First: Pre-Adjustment Check
Before you touch any brake components, secure the bike so it cannot move. Use a stable stand or prop the frame on a solid surface and strap the front wheel to prevent spin. Wear eye protection and gloves if you’re cleaning exposed parts. Check the bike’s brake levers: they should return smoothly and not feel spongy. If you find obvious damage, frayed cables, or missing pads, address those issues before attempting adjustments. The goal is a safe baseline: clean contact surfaces, intact mounts, and clearances that prevent rubbing during rotation. This approach aligns with BicycleCost’s emphasis on proactive safety checks before any brake work.
Rim Brakes: Adjustment Basics
Rim brakes use pads that press on the wheel rim. Typical adjustments focus on pad alignment, toe-in, and cable tension. Start by inspecting pad wear; replace pads if the material is less than 2-3 mm thick. Center the calipers so both pads contact the rim evenly when you pull the lever. If one pad rubs, shift the caliper body or rear the brake arm slightly to center it. Use the barrel adjuster to increase or decrease cable tension; small turns have a big effect, so make incremental adjustments and test after each turn. When properly adjusted, the lever should feel firm with minimal travel before braking. Keep wear patterns balanced to avoid pulling the lever to one side.
Disc Brakes: Adjustment Basics
Disc brakes provide strong stopping power in wet conditions, but disc systems require careful alignment. Mechanical disc brakes use a cable, while hydraulic discs rely on fluid pressure. Start by checking pad wear and rotor condition; replace pads if they are worn unevenly or the rotor shows deep grooves or hotspots. Loosen the caliper mounting bolts slightly, then realign the caliper so the pads touch the rotor evenly. Tighten bolts in a criss-cross pattern to avoid skewing. For mechanical discs, adjust lever reach with the cable tension and barrel adjuster; for hydraulic discs, bleeding should be performed only by trained technicians. Always test spin and lever feel before riding.
Caliper Centering and Pad Alignment
Caliper centering ensures equal pad contact and predictable braking. With rim brakes, center the caliper over the rim so both pads contact simultaneously. For discs, align the caliper so that the pads touch the rotor evenly at 12 o’clock and 6 o’clock positions; tiny rotor rub indicates misalignment. Then adjust toe-in by fine-tuning pad angle so the leading edge touches first, reducing chatter. Inspect pad wear again after alignment; replace pads if necessary. Finally, retighten mounting bolts to factory torque specs and double-check lever action.
Maintenance and Wear: When to Replace Pads or Rotors
Pad material wears down over time and must be replaced to maintain stopping power. Rim brake pads typically last longer on dry roads but wear faster in wet weather; inspect the pad thickness and replace when under 2-3 mm. Disc brake rotors wear as pads deposit metal particles; replace rotors if they are warped or deeply grooved. Cables and housings should be checked for fraying and stiffness; lubricate cables where appropriate. Clean braking surfaces with isopropyl alcohol and a microfiber cloth to remove oil and debris. Regular inspections help prevent surprise failure on the road. This proactive approach is endorsed by BicycleCost’s maintenance philosophy.
Common Issues and Troubleshooting
If you notice rubbing, uneven braking, or a soft lever, recheck pad alignment and cable tension. A rubbing rotor may indicate rotor true or caliper misalignment; true the wheel or adjust the caliper position. A soft lever can indicate air in hydraulic lines or worn pads; do not attempt a full bleed unless you’re trained. Noise like squeal or grind can be addressed by cleaning or replacing pads, sanding pad surfaces or adjusting pad angle. Keep the braking surfaces clean and free of oil. If you ride in wet weather, check for reduced stopping power and adjust accordingly. Regular checks help you recognize wear early and plan replacements.
Maintenance Routine: Staying on Top of Brakes
Set a monthly check for pad wear, rotor condition, cable routing, and lever feel. Before every ride, perform a quick brake test in a safe area and do a light stop from walking pace to confirm crisp engagement. After heavy riding, mud, or rain, inspect more often for glazing, rust, or grit that can impair braking. Keeping simple notes of adjustments makes future maintenance faster and easier. The BicycleCost team recommends making brake checks a fixed part of your ride preparation to sustain braking performance and rider safety.
Tools & Materials
- Allen wrenches (4mm, 5mm)(Common sizes for brake mounting bolts)
- Cable cutters(For replacing housing or cables)
- Needle-nose pliers(Level, precise grip for small components)
- Phillips screwdriver(Optional for some brake models)
- Clean rags and isopropyl alcohol(Surface cleaning to remove oil and debris)
- Replacement brake pads (rim brakes)(Select type compatible with your brake model)
- Light bicycle lubricant(Used on cables, not on pads or rotors)
- Torque wrench (optional)(Helps apply correct torque on bolts)
- Bike stand or repair stand(Stability while working is highly recommended)
Steps
Estimated time: 45-75 minutes
- 1
Prepare the bike and workspace
Set up a stable work area with a bike stand or supported frame. Remove wheels if needed for wheel-off inspection. Release any quick-release skewer and secure the bike so it won’t roll. Gather your tools and a clean workspace.
Tip: Having a dedicated small tray for small parts prevents misplacement. - 2
Inspect brake components and wear
Check pads for thickness, inspect rims or rotors for wear, and look for frayed cables. Note any rubbing, noise, or lever softness. Decide if pads or rotors need replacement before proceeding.
Tip: Take photos of your setup before changing anything to reference later. - 3
Loosen the caliper mounting bolts
Loosen the caliper mounting bolts just enough to allow slight movement. Do not loosen so much that the caliper falls away. This helps center the caliper over the wheel before tightening.
Tip: Only loosen the minimum necessary to free movement; overtightening can misalign components. - 4
Center the caliper over the rim/rotor
Gently adjust the caliper so the pads sit evenly relative to the rim or rotor. Spin the wheel to check for rubbing and re-center if needed. Ensure equal pad contact on both sides.
Tip: Small adjustments matter—iterate and test after each micro-adjustment. - 5
Adjust cable tension with the barrel adjuster
Turn the barrel adjuster in small increments to tighten or loosen the cable. Check lever feel: it should engage with a crisp bite and minimal lever travel.
Tip: Always return to a baseline before increasing tension if you’re unsure. - 6
Align pads and toe-in
For rim brakes, toe-in the front edge of pads slightly to prevent chatter. For discs, ensure the pads contact the rotor evenly; adjust caliper position if needed.
Tip: Pad angle can dramatically affect noise and bite; tiny changes matter. - 7
Tighten bolts and re-check clearance
Crank the mounting bolts to the specified torque, then re-spin the wheel and re-check that there’s no contact when the brake lever is released.
Tip: Torque specs vary by model—consult manufacturer guidelines. - 8
Test ride and fine-tune
Take a slow test ride in a safe area. Apply braking progressively and listen for rub or squeal. If needed, repeat alignment and tension adjustments.
Tip: Start with gentle braking to avoid skidding on slippery surfaces. - 9
For hydraulic discs: assess the need for bleeding
If lever travel remains soft after adjustments, bleeding may be required. Bleeding hydraulic brakes should only be done by trained technicians.
Tip: Do not attempt a bleed if you’re uncertain—seek professional help.
People Also Ask
What tools do I need to adjust brakes?
Most rim brake adjustments require hex wrenches, a barrel adjuster, and pliers. You may also replace pads and clean surfaces. Start simple and add tools as you progress.
Most adjustments use common tools like hex wrenches and pliers; replace pads as needed.
Can I adjust brakes at home without a stand?
A stable surface or wall supports the bike during adjustment. A stand makes the job easier, but you can work with careful, steady support if a stand isn’t available.
You can adjust at home with a stable setup; a stand helps a lot.
How do I know when pads need replacement?
Check pad thickness regularly; replace when the material is under 2-3 mm. Uneven wear or glazing also indicates replacement is needed.
Check thickness and wear; replace pads when they’re thin or uneven.
Why is my lever spongy after adjustments?
A spongy lever can indicate air in hydraulic lines, worn pads, or contaminants on rotors. Do not bleed unless trained; seek professional help if needed.
A soft lever may mean air in hydraulic lines or worn pads; consult a pro if unsure.
Is it safe to ride after adjustment?
Yes, but test at low speed in a safe area before road use. If braking feels inconsistent, recheck alignment and tension.
Test brakes at low speed first; ensure consistent, reliable stopping before regular riding.
Watch Video
Quick Summary
- Identify rim vs disc brakes before adjusting.
- Center calipers and ensure proper pad alignment.
- Test lever feel and wheel clearance before riding.
- Replace pads or rotors when wear thresholds are reached.