How Do You Make a Bicycle Move?
Learn how to get a bicycle moving safely and efficiently. This BicycleCost guide covers pedaling, gearing, balance, and simple maintenance to help beginners and returning riders ride with confidence.

You make a bicycle move by pedaling to turn the chain and rotate the rear wheel. You must maintain balance, steer, and choose a suitable gear to match your cadence. Essential requirements include a functioning drivetrain, properly inflated tires, working brakes, and a safe riding surface. This guide will walk you through steps, safety tips, and troubleshooting to get rolling.
How a bicycle moves: the core physics and mechanics
According to BicycleCost, movement begins when you apply torque at the pedals. Pedaling turns the crank, drives the chain, and spins the rear wheel. The rider’s body position and steering keep you balanced, while friction with the road provides forward motion. When you ask 'how do you make a bicycle move?', the process starts with power transfer and ends with momentum. With everything aligned—the drivetrain turning smoothly, tires in good shape, and your weight over the pedals—the bicycle responds with forward motion. The bicycle is effectively a simple machine: the crank multiplies your leg force, the chain delivers that force to the wheel, and the tire-road contact converts rotational energy into linear travel. Small changes in cadence, gearing, or posture can dramatically affect how easily you accelerate and maintain speed. This is why proper setup, rider technique, and practice matter as much as raw leg power.
Essential gear and setup for smooth movement
To ride with confidence, you need a few basics in good working order. Ensure your bicycle is the right size and the drivetrain is clean, with gears indexing properly. Inflate tires to the recommended pressure, check brakes for responsiveness, and verify the chain is lubricated. A helmet and sturdy gloves are essential for protection, while a lightweight pump and patch kit help you handle flats on the go. If you’re commuting, consider lights and a bell for visibility. These preparations reduce surprises and keep you moving efficiently, especially on longer rides or in variable weather. Regular checks also extend the life of components and improve safety on busy streets and shared paths.
Rider positioning and balance: finding your center of gravity
Balance is a crucial skill as speed increases. Sit with your back straight but relaxed, elbows slightly bent, and hands light on the handlebars. Your head should stay up and eyes looking ahead, not at the front wheel. When you push off, press down through the balls of your feet while gradually lifting your sit bones toward the saddle. A comfortable crank angle—where your knee has a slight bend at the bottom of the pedal stroke—helps maintain control. As you gain momentum, breathe steadily and keep the torso centered over the bike to minimize wobble. Small shifts in weight from side to side or minor steering corrections help you stay upright through corners and rough patches.
From standstill to rolling: the motion sequence
Starting from a stop requires a controlled sequence. Place one foot on a pedal at the 2 o’clock position, press down evenly, and push off with the other foot. As the bike begins to move, smoothly rotate the pedals to build cadence while maintaining balance. Use your core to stabilize and steer gently to a straight path. If you have gears, shift to a comfortable gear as you begin to roll to reduce effort. Keep your focus forward and relax your grip to prevent tension in your arms. Practice in a flat, smooth area until you can maintain straight movement for several seconds. With time, this sequence becomes intuitive and builds confidence for longer rides.
Troubleshooting common issues and mistakes
The most common problems are wobbly starts, skidding brakes, or a chain that slips. If you feel wobbly, slow down, look ahead, and unwind tension in your arms. If the front wheel wanders, gently adjust your line of sight and apply small steering corrections from the hips. A slipping chain usually means the derailleur or chain is out of alignment or dirty; clean and lubricate as needed. Low tire pressure creates more rolling resistance and a harsher ride, while overinflated tires can reduce contact with the road and increase puncture risk. Check for loose bolts on the handlebars, seat, and cranks, and tighten as required. Addressing these quickly helps maintain stability and safety during learning.
Safety considerations for new riders
Safety starts with your gear and environment. Always wear a helmet that fits, and use closed-toe shoes. Practice in low-traffic areas with smooth pavement, free of debris. Learn braking before attempting turns, and keep a safe distance from pedestrians and cars. If you're riding with others, signal your intentions clearly with hand signals and verbal cues. Build confidence gradually by lengthening your rides and varying conditions slowly. Consider grounding practice in a controlled space before moving to streets or bike lanes.
Maintenance checks that keep you moving
Regular maintenance prevents breakdowns and keeps you efficient. Check tire pressure and tread, inspect the brakes for wear, and clean the chain to avoid rust and stiff links. Lubricate the chain as per the manufacturer’s guidance, and inspect the gears to ensure smooth shifting. Wipe down the frame after rides to remove grit and avoid corrosion. A quick mid-ride safety check can save you from a flat or a misadjusted brake. If something feels off—unusual noise, slipping gears, or sudden stiffness—arrange an inspection. Keeping a simple maintenance routine reduces the chance of surprises on your next ride.
Authority sources
- National Highway Traffic Safety Administration (https://www.nhtsa.gov/road-safety/bicycle-safety) — Bike safety resources and guidelines.
- Centers for Disease Control and Prevention (https://www.cdc.gov/physicalactivity/basics/bike-riding.html) — Physical activity guidelines and cycling safety basics.
- World Health Organization (https://www.who.int/news-room/fact-sheets/detail/physical-activity) — Global health context for active transport like cycling.
Tools & Materials
- Bicycle in good working order(Ensure frame is intact, gears index correctly, brakes function.)
- Helmet(Certified and properly fitted.)
- Tire pump with gauge(Check tires to the recommended pressure before riding.)
- Tire levers and patch kit(Essential for on-the-go flats.)
- Chain lubricant(Light lubrication; wipe off excess.)
- Multi-tool(For minor adjustments like seat or brake tweaks.)
- Gloves (optional)(Provides grip and comfort.)
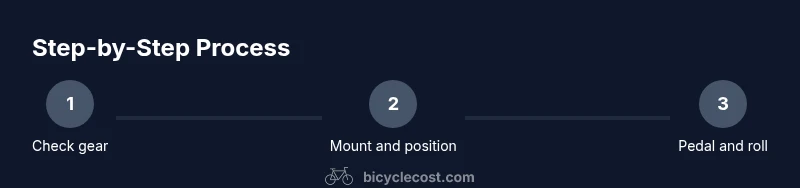
Steps
Estimated time: 20-30 minutes
- 1
Check safety and environment
Inspect tires, brakes, and chain for wear. Clear the riding area of obstacles and ensure you have a clear path. Put on your helmet and adjust gloves if worn. This reduces surprises and prepares you for a smooth start.
Tip: Do a quick brake test in a safe zone before you begin pedaling. - 2
Mount and adopt a ready posture
Mount the bike with one foot on a pedal at 2 o’clock. Stand over the frame, relax your shoulders, and grip the handlebars lightly. Position your pelvis over the saddle and keep your spine tall to maintain control as you initiate movement.
Tip: Keep your core engaged to stabilize the torso during the initial push. - 3
Find a comfortable pedal position and push off
Place the other foot on the opposite pedal and begin with a strong push downward, transferring weight smoothly from the foot on the ground to the pedaling foot. Use a quick but controlled leg kick to start momentum. Keep your eyes forward and your hands relaxed.
Tip: Avoid slamming pedals; smooth power transfers reduce wobble. - 4
Pedal to accelerate and gain cadence
As the bike moves, continue pedaling with a steady cadence. Shift if needed to a gear that matches your speed, which reduces resistance and keeps the bike moving comfortably. Maintain a light grip and a centered posture to stay balanced.
Tip: Shift gears before you need them to prevent stalling. - 5
Steer and maintain a straight line
Keep your gaze ahead, not on the front wheel. Use gentle upper-body input and subtle hip and knee movements to steer. Practice small corrections to correct drift and stay on a straight path.
Tip: Avoid over-steering; small inputs are more effective at higher speeds. - 6
Stop safely and conclude
When you need to stop, ease off the pedals, apply brakes progressively, and plant a foot down as you come to a hold. Check yourself for stability, and when stationary, dismount safely if necessary. Review what felt good and what could be improved for next time.
Tip: Brakes should be tested gently after a stop to ensure reliability.
People Also Ask
What is the first thing I should learn when starting to ride a bicycle?
Begin with safety basics, mounting, and balance. Practice pedaling in a straight line on flat ground before attempting turns or traffic scenarios.
Start with safety and balance, then practice straight-line pedaling on flat ground before turning or riding in traffic.
Why does my bike wobble when I start moving?
Wobble usually comes from balance issues, tense shoulders, or looking down. Relax, keep your gaze forward, and practice gentle steering to stabilize.
Wobbling usually means you're tense or looking at the front wheel. Relax and look ahead while steering gently.
Can I learn without training wheels?
Yes. Many riders learn by practicing on a flat, open space, gradually increasing difficulty as balance improves. Short sessions help build confidence without overwhelming you.
Yes. Start in a flat space, practice short sessions, and increase difficulty gradually as confidence grows.
What should I do if the chain slips while riding?
If the chain slips, stop safely, inspect chain and gears, clean and lubricate if needed, and ensure derailleur alignment. Avoid riding with a slipping chain as it can cause a fall.
If the chain slips, stop safely and check the chain and gears. Clean, lubricate, and realign if necessary.
How do I choose the right gear when starting out?
Start in a gear that allows you to pedal smoothly without excessive effort. Shift to easier gears on inclines and harder gears on level ground as cadence improves.
Choose a gear you can pedal steadily; shift to easier gears on hills and harder gears as you gain cadence.
How often should I check tire pressure?
Check tire pressure before each ride, especially in extreme weather conditions. Use a gauge to ensure it matches the tire's recommended range for optimal performance.
Check tire pressure before each ride and adjust to the recommended range using a gauge.
Watch Video
Quick Summary
- Start with a stable stance and gradual momentum.
- Maintain proper tire pressure and drivetrain health.
- Balance and steering improve with consistent practice.
- Safety gear and controlled environments are essential.
- Follow a simple maintenance routine to stay moving.