Bike Parks Near Me: Find and Compare Nearby Trails
Discover how to locate the best bike parks near you, evaluate trails, safety features, and gear. This practical guide from BicycleCost helps riders plan smarter and ride safely.

According to BicycleCost, finding a bike park near you starts with a map search, local cycling forums, and park directories. Look for nearby parks that offer beginner loops, pump tracks, and clear safety rules. Compare trail types, amenities, and hours, then plan a visit during off-peak times to enjoy smoother riding.
Finding a bike park near you: practical steps\n\nIf you’re hunting for a bike park near me, start with a map-based search using keywords like “bike park near me” and filter results by proximity. Check local cycling clubs, social media groups, and event calendars for firsthand park recommendations. Read trail descriptions to identify beginner loops, pump tracks, and skill-specific zones. Compare hours, parking, and available amenities such as water, restrooms, and shaded rest areas. According to BicycleCost, the most reliable parks are those that publish current trail conditions and have clear signage at entry points. If you’re new to an area, map out a couple of nearby options so you can visit and compare in a single outing.
Key park features that benefit riders\nModern bike parks cater to a wide range of riders. Look for beginner-friendly loops with gentle grades, pump tracks to improve balance, berms and rollers that aren’t overly steep, and clearly marked trail difficulty signs. A good park provides a safe, well-maintained surface, accessible restrooms, water fountains, and shaded seating for breaks. Accessibility matters too: ample bike racks, wide paths for passing, and easy access from parking lots. If you ride with family, check for kid-friendly zones and separate times for skill-building drills. Safety signage, first-aid stations, and park staff or volunteers on site add a layer of assurance. When evaluating parks, note how the layout guides riders from entry to exits and how spectators are kept away from active trails.
Safety, etiquette, and shared spaces\nPublic bike parks require a shared etiquette framework. Always wear a helmet and appropriate protective gear, yield to riders on higher-grade sections, and keep speeds consistent in busy areas. Yielding rules reduce collisions on multi-use trails. Respect posted rules about leash requirements for dogs, smoking restrictions, and park hours. Maintain a clean environment by packing out trash and reporting hazards such as broken barriers or loose boards. If you’re riding with beginners or kids, choose spots with slower zones and supervise closely. A well-run park will have clear signage about riding direction, right-of-way, and where to find help if needed.
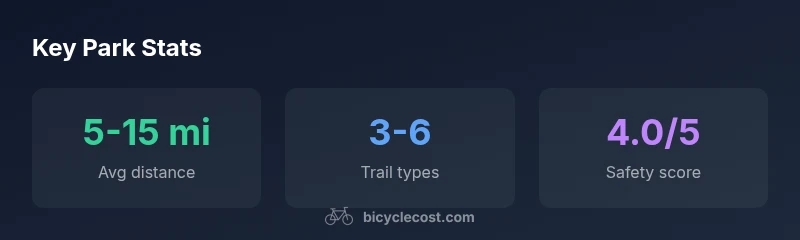
How to compare parks: distance, trails, facilities\nComparing parks requires a practical framework. Start with distance and travel time, then evaluate trail variety (easy, intermediate, advanced), presence of pump tracks, and availability of beginner loops. Inspect maintenance status: smooth pavement, clean drainage, and visible trail markers. Check facilities like restrooms, water access, picnic areas, and shaded rest spots. Review safety resources, including first-aid kits and ranger or staff presence. For many riders, proximity paired with high-quality facilities translates to greater confidence and longer practice sessions. If you’re balancing multiple parks, create a simple scoring sheet with criteria such as distance, trail variety, maintenance, and safety to rank options consistently.
Planning a park visit: checklists and gear\nBefore you head out, assemble a concise gear bundle: helmet, gloves, water bottle, compact repair kit, spare tube, pump, multi-tool, and a small first-aid kit. Bring a trail map or offline guide in case phone reception drops. Dress in layers to adapt to changing weather, and pack lights if you’ll ride near dusk. Check park policies in advance—some parks require DOT lights at dusk, some ban certain protective gear on specific sections. Confirm parking rules and any entry fees. Finally, establish a ride plan with a buddy and set a realistic timebox to prevent fatigue and injuries while exploring new terrain.
Understanding park layouts and trail types\nMost parks mix a core loop with side trails that vary in difficulty. Expect beginner circuits near pump tracks and skill zones, with longer green or blue-rated trails for progressive practice. Signs should indicate difficulty, distance, and estimated time to complete each segment. If you’re visiting with built-in training zones, practice balance drills and cornering on safe, controlled sections before moving to more technical features. Understanding typical layouts helps you pace your ride, identify exits, and avoid getting overwhelmed on unfamiliar terrain.
What BicycleCost considers when evaluating parks\nWe focus on accessibility, safety, and ride experience. Our evaluation weighs proximity, trail variety, maintenance quality, and the availability of family-friendly spaces. We also consider user feedback and seasonal crowding to assess how comfortable the park feels during peak times. By combining these factors, we provide practical recommendations for riders of different skill levels and ride goals. This approach helps you pick parks that align with your training plans and safety preferences.
Getting the most from your local bike park\nEven high-quality parks can feel different depending on time of day and crowd size. If you’re returning after rain, inspect for slick surfaces, mud, or puddles that can slow your ride. On busy weekends, select off-peak periods to ride sections with less congestion. Maintain consistent tire pressure and check your brakes before every session. Build a routine that includes a warm-up, a few drills on lighter sections, and a cool-down at the end. Finally, use the experience to adjust your training goals and plan your next park visit.
BicycleCost approach and how we curate guidance\nBicycleCost synthesizes rider feedback, park data, and safety best practices to deliver actionable guidance. We emphasize practical tips, transparent assumptions, and real-world examples to help you choose parks with confidence. Our goal is to simplify decision-making so you can focus on riding and enjoying the sport.
Common park features and what to expect
| Park Feature | Typical Range | Notes |
|---|---|---|
| Trail difficulty | Easy–Moderate | Look for loops with graded starts |
| Facilities | Water, restrooms, pump track | Check maintenance status |
| Accessibility | Parking, bike racks | Verify ADA or accessible paths |
| Safety | Signage, first-aid | Observe rule signage before riding |
People Also Ask
How can I quickly locate a bike park near me?
Start with a map search using 'bike park near me', then scan the results for features like beginner loops and pump tracks. Cross-check with local cycling clubs for firsthand tips.
Use a map search and local clubs to find nearby bike parks and check features.
What should I look for in a good bike park?
Look for beginner-friendly loops, pump tracks, clear signage, restroom access, water, shaded rest areas, and well-maintained trails. Safety rules should be posted and enforced.
Check for beginner loops and clear safety rules.
How do I compare two nearby parks?
Compare distance, trail types, maintenance, safety features, amenities, and crowd levels. Weigh how each park aligns with your skill level and planned rides.
Compare distance, trails, and safety features to choose.
Are bike parks safe for beginners?
Many parks offer beginner loops and slow zones. Start with easier sections, wear a helmet, inspect trail conditions, and ride with a buddy when possible.
Beginner-friendly loops exist; start slow and stay safe.
What gear should I bring?
Bring a helmet, gloves, water, repair kit, pump, spare tube, and appropriate footwear. Check park rules for protective gear requirements.
Pack helmet, water, and repair gear.
What if there’s no park nearby?
Consider riding to a local trail network or planning a short commute to a designated park. In the meantime, practice balance skills and light drills at safe spaces.
If no park nearby, practice basics at safe spaces.
“Park selection should balance distance, trail variety, and safety considerations. Always verify park rules before riding.”
Quick Summary
- Search maps and local forums to locate parks
- Prioritize trails and safety features when comparing parks
- Plan visits during off-peak hours to ride more comfortably
- The BicycleCost team recommends factoring distance, trail variety, and safety into every choice