What to grease on a bicycle: A practical guide for cyclists
Learn exactly what to grease on a bicycle and why. This practical guide covers key lubrication points, timing, and safety tips for smooth, reliable rides.

According to BicycleCost, mastering bike lubrication starts with knowing what to grease on a bicycle. This quick guide confirms the essential points: chain, bearings and pivots, cables, headset and bottom bracket, plus exterior contact surfaces. You will learn a safe, repeatable routine to keep components moving smoothly and extend service life. It also covers choosing the right lubricant and applying it without attracting dirt.
What to grease on a bicycle and why lubrication matters
In the world of cycling, understanding what to grease on a bicycle is the foundation of reliable performance. Lubrication reduces friction, minimizes wear, and protects metal surfaces from corrosion, especially in challenging weather or dusty road conditions. According to BicycleCost, a consistent lubrication routine isn’t just about making gears turn more quietly—it’s about extending the life of components and preserving efficiency over thousands of miles. For most riders, the core principle is to keep moving parts protected with a light, even film rather than heavy gloops that trap dirt. When you know where to apply lubricant, you can ride farther between tune-ups and avoid costly repairs. A simple rule of thumb is to lubricate only what moves and to wipe away excess immediately after application to prevent dirt accumulation. This approach also helps you monitor wear as you inspect your bike regularly and keep records of maintenance intervals.
Core lubrication points and recommended actions
The chain sits at the center of most lubrication decisions. Apply a thin coat to the inner sides of the chain while backpedaling to ensure even distribution. Pivots on derailleurs, brakes, and linkages deserve attention, especially after a wet ride when moving parts are most susceptible to corrosion. Headset bearings and bottom bracket bearings are critical for precision steering and efficient pedaling; if you hear creaks, it’s often a sign those bearings need a light, targeted amount of grease. Cables and housing—whether derailleur or brake cables—should be lubricated with a light, penetrating oil or bike-specific lubrication to reduce stiffness. Finally, exterior contact points such as the seat post, seat clamp bolts, and quick-release skewers can benefit from a light grease on metal-to-metal contact surfaces to ease adjustment and prevent seizure in adverse conditions.
Lubricants: choosing grease vs oil and environment
Lubricants come in several forms, and choosing the right one depends on the ride conditions and the component. Chain lubricant can be dry or wet; dry lube is ideal for dusty environments, while wet lube performs better in rain but attracts more dirt. For bearings and pivots, use bicycle grease rather than household lubricants, which can be too thin or corrosive. In dry climates, a light grease or wax-based product can keep parts moving without creating a sticky residue. In wet climates, a slightly heavier, water-resistant grease provides longer-lasting protection. Always avoid applying spray oil directly to braking surfaces or to the rim sidewalls, and never mix lubricants on the same surface without cleaning first. Understanding the right product type for each component helps you tailor a responsive lubrication plan that matches cycling style and terrain.
Prep and cleaning before lubrication
Before you apply any grease, take time to clean the drivetrain and surrounding surfaces. Remove dirt with a soft brush and a degreaser, then rinse and dry thoroughly. A clean base ensures the lubricant adheres to the intended surfaces and doesn’t trap grit. Wipe down the chain, pulleys, and derailleur cages until they look dry and free of old residue. If you detect rust or heavy wear on any part, address it before lubricating; a worn part can require replacement rather than lubrication. For carbon frames or sensitive components, consult the manufacturer’s guidance to avoid inappropriate products. A clean start makes the lubrication process faster and more effective in the long run.
Building a simple maintenance routine you can follow every ride
Consistency beats intensity when it comes to lubrication. Create a quick post-ride check: wipe down the drivetrain, inspect for grit, and reapply lubricant where necessary. During longer rides or after exposure to rain, perform a deeper cleanup and re-lubrication every few weeks or as needed. If you ride daily in wet conditions, consider a slightly more frequent schedule. Keeping a small maintenance kit in your bike bag—rag, degreaser, chain lubricant, and a light grease—lets you perform a quick touch-up during breaks in your ride. With practice, you’ll recognize the sounds of squeaks and clunks early, which signals you to re-lubricate specific points before wear accelerates.
Common mistakes and troubleshooting tips
One common mistake is over-lubricating, which attracts dirt and creates sticky buildup that slows performance. Another pitfall is applying lubricant to braking surfaces, which can reduce braking efficiency and cause contamination. Neglecting cleaning before applying grease is a frequent error that leads to poor adhesion and uneven wear. If you hear creaks after lubrication, you may have applied grease in the wrong spot or used a product that’s incompatible with the component material. If squeaks persist after basic lubrication, inspect bearings for wear or play and consider replacing worn parts rather than simply re-lubricating. By following a disciplined routine and using appropriate products, you’ll minimize maintenance headaches and keep riding smoothly.
Safety, tools, and maintenance mindset
Lubrication is a safety-related task because poorly maintained components can fail in the middle of a ride. Wear protective gloves to keep hands clean and avoid contact with solvents. Use the correct tools: a clean rag, a can of bike-specific lube, a brush for hard-to-reach spots, and a degreaser for stubborn grime. Finally, train yourself to perform lubrication in a well-ventilated area away from heat sources. A calm, methodical approach reduces mistakes and builds confidence over time. As you become more proficient, set aside a regular maintenance window and track your results to refine your routine based on riding conditions and component wear.
Tools & Materials
- Bike-specific chain lubricant (dry or wet)(Choose based on climate: dry for dusty conditions, wet for rain.)
- Bike-specific grease(Lithium-based or synthetic; apply sparingly to bearings.)
- Degreaser(For drivetrain cleaning before lubrication.)
- Rags or lint-free cloths(Wipe away excess and dry surfaces.)
- Soft brush or old toothbrush(Loosen grit on chainrings and pulleys.)
- Gloves (optional)(Keep hands clean and protected.)
- Allen keys or appropriate wrenches(Use for adjusting components before lubing.)
Steps
Estimated time: 60-90 minutes
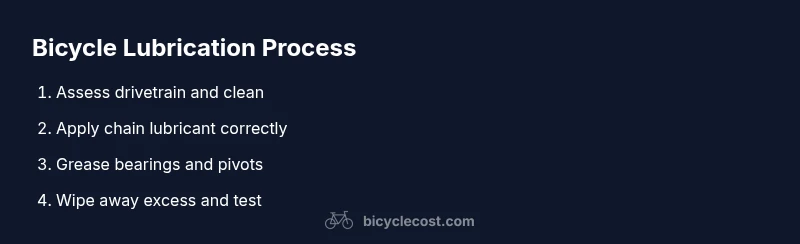
- 1
Assess and prepare the drivetrain
Begin by inspecting the chain, chainrings, cassette, pulleys, derailleurs, and cables. If they are dirty, wipe them clean with a rag and degreaser. Backpedal slowly to identify any stiff links or squeaks, noting which parts need lubrication. This upfront check prevents applying lube to components that won’t move freely, which could trap grime.
Tip: Take a photo of current setup to reference later if you adjust cable tension. - 2
Clean thoroughly before applying lube
Dampen a rag with degreaser and wipe the chain and gears until free of old lubricant and grit. Allow components to dry completely before moving to lubricants. A clean surface ensures the lubricant reaches the intended contact points and provides consistent performance over time.
Tip: Avoid soaking bearings; you’re aiming for surface cleanliness, not saturated soaking. - 3
Apply chain lubricant precisely
Backpedal the chain while applying a light, even stream of lubricant to the inner side of each link. Let the chain move to distribute the lube; wipe off any excess with a clean rag after a few seconds. Excess lube collects dirt and can cause chain skip or rust if not removed.
Tip: Apply in short bursts rather than a long pour to prevent over-lubing. - 4
Grease bearings and pivot points
Apply a small dab of grease to headset bearings, bottom bracket interfaces, and derailleur pivots if you notice play or rough movement. Use just enough to lightly coat the surface; avoid overflowing into moving surfaces where it can attract dirt.
Tip: For sealed bearings, rely on factory-specified maintenance intervals; avoid over-lubing sealed systems. - 5
Lubricate cables and housing selectively
Apply a light lubricant to exposed cable sections and the inner walls if you’re comfortable performing the disassembly. Do not saturate the cable housing; if cables feel gritty, consider replacement rather than continued lubrication to prevent clicks and stiff shifting.
Tip: If you’re unsure about disassembly, skip full cable lubrication and opt for external surfaces instead. - 6
Finish with exterior contact lubrication
Apply a light coat to exterior surfaces that rub against metal, such as the seat post contact and quick-release interfaces. Wipe away extra to prevent dirt pickup. Re-check the drivetrain for quiet operation before you ride.
Tip: After insertion, verify the seat post is not grease-drifted into the frame and that the clamp holds firmly.
People Also Ask
What parts of a bicycle should be greased?
Grease the bearings and pivots (headset, bottom bracket, hub), lubricate the drivetrain components (chain, derailleur pins), and lightly grease exterior contact surfaces (seat post, quick-release clamps). Cables may require internal lubrication if accessible. Avoid grinding or over-lubing braking surfaces.
Lubricate bearings, pivots, chain, derailleurs, cables, and exterior contact points. Avoid braking surfaces.
How often should I lubricate my bike?
Frequency depends on rider conditions: dry climates require less frequent chain lube but more regular inspection, while wet conditions call for more frequent lubrication and cleaning. Inspect after every ride in harsh weather and follow a routine schedule based on mileage and ride type.
Check after wet rides and set a routine based on riding conditions.
Can I use motor oil on bicycle chains?
Motor oil is not recommended for bicycle chains. Use bike-specific chain lubricants designed for the load and speed of bicycle chains. Oil designed for engines can attract dirt and may degrade seals.
No—stick to bike-specific lubricants for chains.
What’s the difference between grease and oil for bikes?
Grease protects bearings and pivot points with a thicker film, while oil is lighter and better for chains in some conditions. Use appropriate products per component and environment, and avoid mixing lubricants on the same surface.
Grease for bearings/pivots; oil or dry wax for chains depending on conditions.
How can I tell if I’ve over-lubed?
Excess lubricant traps dirt, creates a gummy residue, and can cause squeaks or chain slip. If you notice new grit, stickiness, or a greasy drivetrain after cleaning, reduce the amount next time and wipe more thoroughly.
If it’s sticky and attracts dirt, you’ve likely over-lubed.
Is it safe to ride immediately after lubrication?
Yes, but avoid heavy spinning until the lubricant has settled on moving surfaces. A quick check ride in a safe area helps confirm smooth operation before longer trips.
You can ride after a short settle time; test gently first.
Watch Video
Quick Summary
- Identify all moving parts to grease, not every surface.
- Apply sparingly and wipe excess to avoid dirt buildup.
- Choose lubricant type by climate and environment.
- Cleanliness before lubrication yields the best results.
- Regular checks prevent major driveline failures.