What to Do for Bike: A Practical Maintenance Guide
A thorough, step-by-step guide on what to do for bike maintenance, sizing, and safety. Learn baseline checks, routine care, and pro tips to keep your bike reliable and safe on every ride.

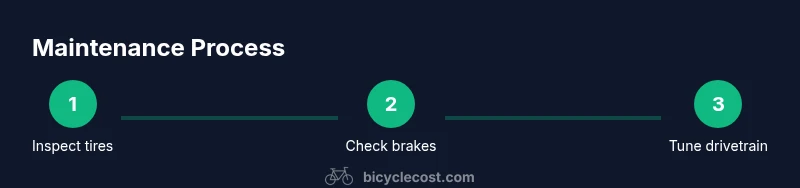
By following this guide, you’ll know what to do for bike maintenance and safety: a practical, step-by-step path to baseline checks, routine care, and simple repairs. You’ll learn how to inspect tires, brakes, and the drivetrain, perform a basic tune-up, and decide when to seek professional help. Use the included tools and steps to ride with confidence.
What to Do for Bike: Baseline Checks
Knowing what to do for bike starts with a simple baseline checklist you perform before every ride or service. According to BicycleCost, the most critical checks focus on safety-critical components: tires, brakes, drivetrain, and quick-release or axle security. A quick, repeatable routine helps you catch problems early and reduces the risk of flats, slips, or brake fade. In this initial section, we outline a thorough baseline you can perform in under 15 minutes if you stay organized. Use this baseline to guide deeper maintenance tasks and to document observed issues for future service.
- Inspect tire condition and tread or sidewall wear
- Confirm correct tire pressure using a gauge
- Test brake response at safe speeds
- Ensure wheel is true and spokes are intact
- Check chain for slack and rust, and verify drivetrain cleanliness
Routine Maintenance Schedule
A predictable maintenance cadence keeps your bike dependable. For everyday riders, allocate roughly 15-20 minutes weekly for quick checks, 30-60 minutes monthly for a deeper clean and drivetrain oiling, and a full tune-up every 6-12 months or after heavy use or exposure to harsh conditions. BicycleCost analysis shows that a regular schedule reduces the likelihood of sudden failures and extends component life. Adjust the cadence to your riding environment—city commuting, gravel, or mountain biking will demand more frequent attention. Keeping a simple log of what you checked and when helps you notice trends, such as recurring wear on brake pads or chains.
Cleaning and Lubrication Essentials
Cleaning and lubrication are a core part of what to do for bike maintenance. Start with a light brushing to remove surface dirt, then apply a bike-safe degreaser to the chain, cassette, and derailleur pulleys. Wipe clean and dry before applying a thin coat of lubricant to the chain, pivot points, and any moving metal-on-metal surfaces. Avoid over-lubrication, which attracts grime. Regular cleaning reduces rust, prolongs drivetrain life, and keeps gears shifting smoothly. A clean bike is safer and more enjoyable to ride.
A Pocket Tool Kit: What to Carry
Being prepared for minor fixes on the road is part of responsible bike ownership. A compact toolkit should include: a set of metric hex wrenches, tire levers, a mini pump with a gauge, a patch kit, a chain tool or quick link, a small multitool, a clean rag, and a bottle of degreaser. Optional items include a torque wrench for critical bolts and spare tubes. Keeping these items in a saddlebag or backpack lets you address common issues without needing a shop visit.
Sizing, Fit, and Safety Checks
Riding comfort and safety begin with proper sizing and fit. Ensure seat height allows a slight bend in the knee at pedal bottom, adjust the saddle position for a comfortable reach to the handlebars, and verify that the handlebar stem length suits your torso. Check for proper reach, clearness of the cockpit, and secure quick-release skewers. Correct fit not only reduces fatigue but also improves control and braking response, helping you ride with confidence across different terrains.
Seasonal and Weather Considerations
Seasonal changes affect how you care for your bike. In wet seasons, inspect brake performance more frequently and clean the chain to prevent rust. After winter storage, re-check tire condition, lubrication, and drivetrain alignment before heavy use. In hot, dusty conditions, plan more frequent cleaning and apply lubricant sparingly to avoid attracting grit. Proper storage away from extreme temperatures and moisture also extends component life and keeps components performing consistently.
Troubleshooting Common Issues
Common issues include brake rub, shifting hesitate, chain skipped gears, and unusual creaks. Start with the simplest cause: loose bolts, misaligned brakes, or dirty chains. Cleaning the chain and lubricating it can resolve many problems. If noises persist after a basic wipe-down and lube, inspect the braking surfaces, derailleur alignment, and wheel true. Document any recurring symptoms to guide future maintenance or professional service.
When to Seek Professional Help
Some tasks require specialized tools or expertise. If you notice a crack in the frame, rough bearing play, creaking from the bottom bracket, or persistent brake issues after a tune-up, seek a professional bike mechanic. Regular tune-ups can be done at home, but advanced tasks like headset adjustment, bottom bracket service, or wheel truing may need shop equipment and experience. The BicycleCost team recommends erring on the side of caution for potentially dangerous issues.
Tools & Materials
- Allen/Hex wrenches (metric)(Include sizes 4, 5, and 6 mm for most components)
- Tire levers(Quality levers reduce pinch flats)
- Bike pump with gauge(Ensure gauge is accurate)
- Patch kit or tubeless repair kit(Carry spares for on-road flats)
- Chain tool or quick link(Needed for chain breaks or repairs)
- Chain lubricant(Choose wax or oil as appropriate for conditions)
- Degreaser and cleaning brushes(Use bike-specific degreaser)
- Rags or microfiber towels(For wiping and finishing)
- Torque wrench (optional)(Critical bolts at higher torque specs)
- Cable cutters (optional)(For replacing cables and housings)
Steps
Estimated time: 60-90 minutes
- 1
Inspect tires and wheels
Check tire surfaces for cuts, embedded debris, and wear. Spin the wheels to observe any wobbly run or a side-to-side hop that indicates a loose spoke or a damaged rim.
Tip: Use a flashlight to spot cracks along sidewalls. - 2
Check air pressure and tire wear
Verify pressure against the manufacturer’s recommended range on the tire sidewall. Inflate or deflate to suit riding conditions, and replace tires showing excessive wear or bulges.
Tip: Maintain stable pressure to prevent pinch flats and improve rolling efficiency. - 3
Inspect brakes
Examine brake pads for thickness and alignment with the rim or rotor. Test lever feel and ensure there’s no excessive travel or rubbing when the wheel spins.
Tip: If you hear rubbing, re-align calipers or check for foreign debris. - 4
Inspect drivetrain and chain wear
Look for stretched or rusted links. Clean the chain and lubricate after drying completely to reduce wear on the cassette and chainring.
Tip: A clean chain shifts better and lasts longer. - 5
Check shifting and gears
Shift through all gears and listen for hesitations or slip. Adjust derailleur limits if gears don’t align cleanly with the cassette.
Tip: Avoid cross-chaining by keeping the chain in a comfortable gear range. - 6
Check bolts and frame security
Tighten all critical bolts to the manufacturer’s torque spec. Inspect the frame for cracks or creaking sounds that may indicate structural issues.
Tip: If you’re unsure about torque specs, consult the owner’s manual. - 7
Clean and lubricate chain
Degrease the chain thoroughly, rinse, dry, then apply a light coat of lubricant to all moving links.
Tip: Wipe off excess lube to prevent dirt buildup. - 8
Inspect cables and housings
Check for fraying or stiffness in cables; replace worn housings for smooth operation.
Tip: Replace cables if you feel sluggish shifting or braking. - 9
Test ride and adjust
Take a short test ride in a safe area to confirm that braking, shifting, and handling feel right. Make final adjustments as needed.
Tip: Take it slow the first few blocks after adjustments. - 10
Document maintenance schedule
Record the date and tasks performed. Schedule the next check based on riding frequency and conditions to maintain reliability.
Tip: Keep a simple log in a notebook or bike app.
People Also Ask
What is the baseline pre-ride check for a bike?
Perform a quick check of tires, brakes, drivetrain, and wheel security before riding. Look for wear, loose bolts, and any rubbing noises. This proactive step helps prevent common safety issues.
Do a quick pre-ride check of tires, brakes, and drivetrain to catch problems early.
Chain lubrication frequency
Lubricate the chain after cleaning or every few rides in dry conditions. In wet or dirty environments, clean and re-lubricate more often to prevent rust and stiff links.
Lubricate after cleaning or more often in wet conditions.
Can I service at home?
Basic maintenance can be done at home with the right tools and instructions. For tasks like headset or bottom bracket work, a professional shop is recommended.
Yes, you can do many tasks at home, but some jobs are best left to a shop.
Tools for a basic tune-up
You need hex wrenches, a chain tool or quick link, a patch kit, a pump, degreaser, brushes, and lubrication. A torque wrench is optional but helpful for high-torque bolts.
A few essential tools cover most basic tune-ups.
When to replace brake pads?
Replace pads when their material is worn down to the indicator line or when braking performance diminishes noticeably.
If braking feels weak or you can see pad wear, replace them.
Riding with a creaking frame?
A creak may indicate a loose bolt or a structural issue. Do not ride until you diagnose and fix it; inspect joints and seek professional help if unsure.
Don't ride if you hear a frame creak; diagnose before riding again.
Watch Video
Quick Summary
- Perform a baseline check before every ride.
- Keep a compact toolkit for quick fixes.
- Schedule tune-ups based on usage and environment.
- Know when to seek professional help for complex tasks.