What to Do Before Cycling: A Practical Pre-Ride Checklist
Follow this practical pre-ride checklist to inspect tires, brakes, drivetrain, and safety gear, plan your route, and ride confidently every time before cycling.

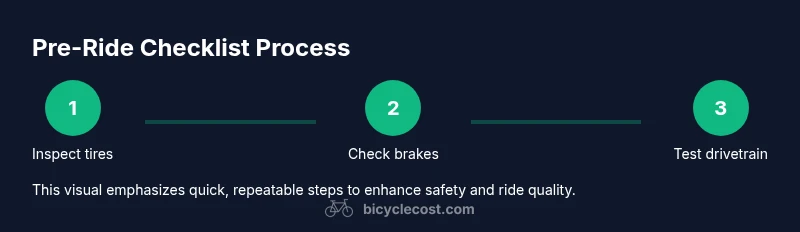
Before cycling, complete a quick pre-ride check to boost safety and enjoyment. Inspect tires for wear and proper inflation, test brakes, lube the chain, and ensure the gears shift smoothly. Verify your fit (saddle height and handlebar reach), pack essentials, and check weather and route. A consistent pre-ride routine reduces flats, skips, and surprises on the road.
What to do before cycling
The question of what to do before cycling often boils down to consistency and safety. A well-practiced pre-ride routine helps you catch issues before you ride and keeps you out of avoidable trouble. In this guide, we cover the core checks, how to tailor them to your bike type, and how to build a routine you can repeat before every ride. The phrase what to do before cycling is not just about equipment; it’s about mindset, preparation, and predictable habits that translate into safer, smoother miles. By treating this as part of your cycling discipline, you’ll experience fewer flats, fewer mechanical surprises, and more confidence on every route you take.
Pre-ride mindset and safety
A successful pre-ride starts with a calm, methodical approach. Give yourself a few minutes to run through a mental checklist: is the bike safe to ride, are you visible, and do you know your route and weather conditions? Mindset matters because hesitation can lead to rushed, unsafe decisions. A steady routine reduces decision fatigue and lets you focus on riding well, not fixing preventable problems mid-ride.
Tires and brakes: the first line of defense
Tires and brakes are the most critical safety components. Start by inspecting tire tread and sidewalls for wear, cuts, or embedded objects. Check tire pressure with a gauge and inflate to the recommended range on the sidewall, adjusting for rider weight and terrain. Test the brakes in a safe area: squeeze with even pressure, listen for grinding, and ensure braking power is smooth across both wheels. If you notice hard spots, rubbing, or delayed engagement, address them before you ride.
Drivetrain and gear function
A healthy drivetrain translates to efficient pedaling and reliable shifting. Wipe down the chain, check for stiff links, and lubricate according to your riding conditions. Shift through all gears while stationary to confirm smooth transitions. If the derailleur alignment looks off or gears stall, plan for a quick adjustment or service before embarking on a longer ride.
Fit, comfort, and rider positioning
Bike fit influences control, fatigue, and injury risk. Verify saddle height, saddle fore-aft position, and handlebar reach. A quick test ride in a safe space should reveal any discomfort or awkward posture. If you notice knee pain, shoulder strain, or wrist tension, reassess your setup or consider a temporary spacer or different saddle.
Weather and lighting prep
Check the weather forecast and adjust your plan accordingly. If rain or strong sun is expected, consider sealing gear and choosing a route with safer surfaces or more shade. Ensure your lighting and visibility gear is ready—bright front and rear lights, reflective clothing, and properly functioning blinkers if you ride at dawn or dusk.
Essentials and packing light
Carry only what you need while keeping items lightweight. A compact repair kit, spare inner tube or patch kit, pump, lube, tire levers, multi-tool, and a first-aid item cover most contingencies. Add a small snack and a phone with emergency contacts. Store these in a saddlebag or jersey pockets for easy access during the ride.
Final quick check and mindfully starting your ride
Do a final sweep: wheels spin true, quick-release skewers are secure, and no loose parts rattle. Put on protective gear and gloves, check your helmet strap, and confirm you’ve set your ride plan and estimated duration. Begin slowly to test responsiveness before you commit to traffic or longer climbs.
Tools & Materials
- Bike pump with built-in pressure gauge(Inflate tires to the recommended pressure printed on the tire sidewall)
- Digital tire pressure gauge(Measure accurately when tires are cold)
- Bike multi-tool with hex wrenches and chain tool(Carry for quick adjustments)
- Spare inner tube or patch kit(Flat repair kit for on-the-go fixes)
- Chain lubricant(Apply after cleaning the chain and wipe excess)
- Tire levers(Assist in tire removal for patching or tube replacement)
- Front and rear lights(Vital for low light conditions or dawn/dusk rides)
Steps
Estimated time: 30-45 minutes
- 1
Inspect tires and inflation
Check tires for wear, cuts, or embedded debris. Use the gauge to confirm pressure is within the recommended range for your weight and terrain. Adjust pressure if you’re riding on rough roads or hills to optimize grip and rolling resistance.
Tip: Always inflate when tires are cold for accuracy; check again after a few minutes of riding. - 2
Test brakes and wheel condition
Squeeze both brakes firmly and evenly to ensure stopping power. Spin each wheel to listen for rubbing and to confirm true rotation. If you feel a soft lever or strange noise, address the issue before leaving.
Tip: If you hear squeaking, inspect pads and rims; replace worn pads if necessary. - 3
Check drivetrain and lubrication
Wipe the chain to remove dirt, then apply a light coat of lubricant. Wipe off excess to avoid attracting more grime. Run through all gears to confirm smooth shifting and avoid mid-ride surprises.
Tip: Lubricate after cleaning to maximize chain longevity. - 4
Confirm bike fit and rider position
Check saddle height and fore-aft position, then verify handlebar reach. A quick test ride in a safe area should reveal any discomfort or misalignment. Adjust as needed for a natural pedal stroke.
Tip: Small changes can make a big difference in comfort over long rides. - 5
Verify safety gear and visibility
Ensure your helmet fits correctly and straps secure. Check that lights, reflectors, and high-visibility clothing are ready if you ride in low light. Prepare rain gear if weather calls for it.
Tip: Replace cracked helmets or worn straps promptly for safety. - 6
Plan route and check weather
Review your planned route and any potential hazards. Check the forecast for rain, wind, or heat and adjust your plan accordingly. Share your route with a friend if riding alone.
Tip: Weather can change quickly; carry a lightweight layer or rain shell. - 7
Pack essential tools and supplies
Assemble a compact repair kit, patch kit or spare tube, tire levers, and a small snack. Store in a saddlebag or jersey pocket for quick access during the ride.
Tip: Keep items in a weatherproof bag to protect from moisture. - 8
Final pre-ride check
Do a final sweep: wheels spin true, quick releases secure, and no rattling parts. Confirm you have your phone, ID, and emergency contacts. Take a deep breath and begin with a gentle warm-up.
Tip: Rushing increases risk; take a moment to settle into your rhythm.
People Also Ask
How often should I check tire pressure before cycling?
Check tire pressure before each ride, especially if you ride daily or switch between road and off-road surfaces. Use a gauge for accuracy and adjust to the recommended range on the tire sidewall. Seasonal changes or temperature shifts can affect pressure, so re-check when starting a ride after parking for a while.
Check your tire pressure before every ride, using a gauge for accuracy and adjusting to the recommended range.
What should be in a basic pre-ride toolkit?
A basic toolkit includes a pump or CO2 inflator, tire levers, patch kit or spare tube, chain lube, a small multi-tool, and lights. Add a patch of waterproof tape and a spare battery for lights if needed. Keep it compact and organized for quick access.
Your basic kit should have a pump, levers, patches, chain lube, a multi-tool, and lights. Keep it compact and organized.
Is a pre-ride safety check different for road vs mountain bikes?
The core checks are the same, but tire choice, brake type, and drivetrain wear differ. Road bikes prioritize smooth braking and narrow tires, while mountain bikes emphasize tire grip and suspension checks. Tailor inflation, brake pad depth, and chain condition to terrain.
Core checks are the same, but you tailor tire pressure, brake pads, and chain condition for road or mountain riding.
Can I rely on automatic bike computers for pre-ride checks?
Automated devices can help track ride metrics, but they cannot replace manual safety checks. Always verify tires, brakes, and the drivetrain yourself. Use devices as supplementary data rather than a substitute for physical inspection.
Automated devices help with data, but you still must perform manual safety checks.
What are signs of worn brakes I should act on before cycling?
Look for reduced braking power, squealing, rubbing, or soft lever feel. Check pad depth and rotor or rim wear. If you notice any of these, service the brakes before riding to ensure reliable stopping power.
If brakes feel soft or squeal, inspect pads and rotors and service as needed before riding.
How can I make pre-ride checks quicker without missing steps?
Create a 5- or 7-step routine that you perform in the same order every time. Use a checklist kept on your phone or printed and visible in your bike bag. Practice helps you complete the routine faster over time.
Use a fixed 5–7 step checklist you run through every time to speed up the process.
Watch Video
Quick Summary
- Check tires and brakes before every ride
- Verify bike fit for comfort and control
- Pack essentials and plan your route
- Review weather and daylight before cycling