How to Tell If Bicycle Wheel Bearings Are Bad: Quick Diagnostics and Fixes
An urgent, practical troubleshooting guide to diagnose and fix bad bicycle wheel bearings. Learn quick tests, home fixes, and prevention tips to ride safer.

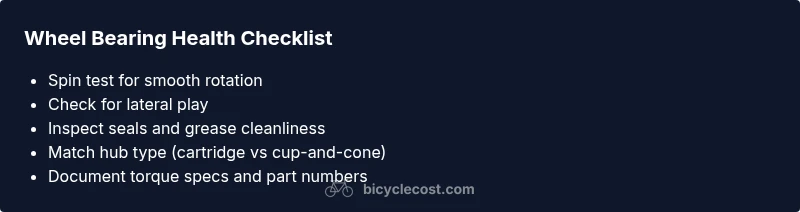
Identify a bad wheel bearing by testing play, roughness, noise, and heat. With the bike supported, spin the wheel slowly and feel for drag; apply gentle pressure at the hub to detect looseness; compare with the opposite side. If you sense play or grinding, follow the diagnostic flow for fixes.
How wheel bearings affect safety and performance
If you want to know how to tell if bicycle wheel bearings are bad, start with the basics: worn bearings let the wheel wobble, increase rolling resistance, and can cause abrupt hub failure. According to BicycleCost, failing bearings can silently degrade handling and braking — especially in wet or muddy conditions. In this section we outline what to look for, how bearings fail, and why timely testing matters for safety and cost savings. The most common signs are subtle at first: slight roughness when spinning, a small amount of play felt at the hub, and occasional grinding noises under load. As bearings deteriorate, these symptoms intensify, creating more drag and heat that can affect wheel alignment and tire wear. Recognizing these cues early helps you avoid sudden loss of control and expensive repairs. This is why the BicycleCost team emphasizes a proactive approach to wheel maintenance and bearing health.
Inspect the hub, axle, end caps, and seals for play and binding
Begin by removing the wheel and inspecting the hub assembly. Look for lateral play by holding the rim and gently rocking the wheel side to side. Spin the hub to feel for roughness or gritty resistance that isn’t present on a healthy wheel. Check the end caps or cones for looseness and listen for any clunk when you wiggle the axle. If you notice any looseness, grinding, or binding within the bearing path, the bearing clearance is likely out of spec and needs adjustment or replacement. Remember that dirt intrusion and water ingress are leading causes of premature bearing wear, so inspect seals and goopy grease as part of the assessment. A clean, well-lubricated hub typically spins freely with minimal audible noise. This step also gives you a baseline to compare with the other wheel.
Signs that you may be dealing with worn bearings: play, roughness, noise, and heat
Common symptoms point to bearing issues. Lateral play at the hub indicates clearance loss. Roughness or gritty feel while spinning suggests worn races or damaged balls. Grinding noises under load point to damaged bearing surfaces. Heat buildup around the hub during rides signals excessive friction from worn components. All these signs merit deeper inspection and possible maintenance. Document symptoms with a quick note on when they occur (flat road, hills, wet weather) to help decide whether a full bearing replacement or hub service is required. This catalog of symptoms helps you distinguish a bearing problem from other wheel faults like a bent rim or loose spokes. Remember, early recognition reduces risk and cost over time.
Safe at-home tests you can perform now to gauge bearing health
Start with a spin test: rotate the wheel slowly and listen for any grinding or grinding-like noises. Next, perform a play test: grab the wheel at 3 and 9 o’clock and feel for any side-to-side movement. If movement exceeds what you observed on the opposite wheel, bearings may be worn. Remove the axle end caps (if present) and inspect for pitting, scoring, or discoloration on races and balls. Clean the area and re-lubricate lightly to see if noise reduces; if it doesn’t, the bearings likely need replacement. Use a magnet or your finger to check for trapped metal particles in the grease, which indicate wear. If you notice heat after a short ride, stop and inspect; overheating can indicate excessive friction from worn bearings. If any test yields ambiguous results, proceed to a full inspection or seek professional help.
Bearing types and how failure differs: cartridge vs cup-and-cone
Two common hub designs affect repair paths. Cartridge bearings are sealed units that typically require replacement as a unit when worn. Cup-and-cone hubs expose individual bearings and races; these can sometimes be repacked and adjusted, extending life if the cups and cones aren’t severely damaged. When cartridge bearings fail, you’ll usually replace the entire cartridge; with cup-and-cone designs, you may replace individual balls or adjust races, often at lower cost but with more precision required. Understanding your hub type helps you choose the correct maintenance approach and parts, and reduces the likelihood of misdiagnosis. The right choice depends on bike use, hub design, and availability of service parts.
Repair paths: service, replace, or seek professional help
If bearings are only slightly worn, a careful service—clean, re-grease, reassemble, and adjust—can restore performance. For seized or deeply worn components, replacement is the safer option. Cartridge hubs may require a full unit swap, while cup-and-cone hubs may need bearing re-seating,Race resurfacing, or end-cap replacement. When in doubt, consult a knowledgeable shop or follow manufacturer torque specs and service intervals. Avoid riding with suspected bearing issues for long periods; continued use can damage the wheel, frame, or brake surfaces. This is where timing and proper diagnosis matter most for safety and value.
Preventive maintenance to extend bearing life: a proactive routine
Regular cleaning and lubrication reduce dirt intrusion. Check seals for wear and replace them when they show cracks or gaps. After every thorough cleaning, inspect for rust or discolored grease, which signals contamination. Keep wheel hubs dry, rotate the wheel to distribute grease, and check for play periodically. A quick comparison with the other wheel helps you notice subtle changes over time. The BicycleCost team emphasizes consistent maintenance as the best defense against premature bearing failure. By integrating simple checks into your routine, you can ride longer with fewer unexpected repairs.
Tools you’ll need and how to source replacement parts
Equip yourself with a set of cone wrenches, a torque wrench, bearing grease, and appropriate replacement bearings for your hub model. Keep spare end caps and seals on hand in case of damage during disassembly. When selecting parts, refer to your hub’s model and year; cross-compatibility varies. If you’re not sure about part compatibility, bring samples to a shop or check the manufacturer’s online catalog. Properly matched parts ensure smooth operation and prolong bearing life.
The verdict: decisive steps you can take today
If you suspect bad wheel bearings, prioritize a methodical check, clean, lubricate as needed, and follow the diagnostic flow. For many riders, a quick service is enough to restore performance, while some cases require bearing replacement. The goal is to restore smooth rotation, minimize play, and prevent heat buildup. The BicycleCost team recommends documenting symptoms, parts used, and torque settings for future maintenance. A clear maintenance plan reduces downtime and helps you ride with confidence.
Steps
Estimated time: 60-120 minutes
- 1
Prepare and secure the bike
Park the bike on a stable stand or safe surface. Gather tools, wear eye protection, and ensure the area is clean. This reduces the risk of dropping parts and makes inspection easier.
Tip: Keep a small tray for tiny components like ball bearings to avoid misplacing them. - 2
Remove the wheel and inspect the hub end caps
Detach the wheel, then inspect end caps, cones, and seals for looseness or damage. Note any corrosion or dirt pockets that could trap debris. This step reveals the hub’s baseline condition.
Tip: Take photos during disassembly to reference orientation during reassembly. - 3
Check for lateral play and roughness by hand
With the wheel secured, gently rock the axle to detect side-to-side movement. Spin the hub slowly and feel for grinding or gritty resistance.
Tip: If you feel play, the bearings or races are suspect. - 4
Disassemble enough to inspect bearings and races
Carefully remove the bearings, grease, and seals. Inspect balls, races, and cages for pitting or deep scoring. Replace any worn parts and clean all components before reassembly.
Tip: Keep bearings in order to avoid mixing matches from different hubs. - 5
Reassemble with correct lubrication and torque
Reinstall bearings, seals, and end caps using the manufacturer’s recommended grease and torque specs. Spin the wheel to confirm smooth rotation and minimal play.
Tip: Use light, even grease; avoid over-greasing, which can attract dirt. - 6
Test ride and re-check
Take a short ride to confirm improvement. Re-check for play after a few minutes of riding as bearings settle.
Tip: If play returns, consider replacement rather than further adjustment. - 7
Document and set a maintenance plan
Record parts used, torque values, and maintenance intervals. Schedule future checks to prevent sudden failures.
Tip: Set a reminder for periodic hub inspections every few months depending on riding conditions.
Diagnosis: Wheel feels gritty or has play when rotating or under load
Possible Causes
- highWorn or pitted bearings
- mediumLoose hub bearings or loose cone/locknut
- lowDamaged races or seals due to impact
Fixes
- hardReplace internal bearings or entire cartridge hub unit
- easyRe-tension or adjust hub bearings if adjustable
- easyReplace seals and re-lubricate
People Also Ask
What is the first sign that wheel bearings are wearing out?
The earliest signs are slight play in the hub, roughness when spinning, and occasional noises under load. These cues merit closer inspection and possibly professional service if they persist.
Look for play in the hub and rough spinning as early signs; these mean bearings may be wearing out and need attention.
Can I ride with loose or grinding bearings?
Riding with suspected bearing issues is risky. It can cause wheel collapse or brake misalignment. Stop riding and diagnose or repair as soon as possible.
Don’t ride with grinding bearings—stop and inspect or repair to avoid a dangerous failure.
How do I check for loose bearings on cartridge vs cup-and-cone hubs?
Cartridge bearings are replaced as a unit when worn. Cup-and-cone hubs can sometimes be adjusted or repacked if gaps aren’t excessive. Knowing your hub type guides the correct repair path.
Know your hub type: cartridge is usually a replacement unit, cup-and-cone can sometimes be adjusted or repacked.
How long do wheel bearings last under normal riding?
Bearing life varies with riding conditions, maintenance, and hub design. Regular cleaning and lubrication extend life, but there is no fixed lifespan. Check for signs of wear periodically.
There isn’t a fixed lifetime; check regularly and maintain to extend bearing life.
Should I service bearings myself or go to a professional?
If you have the right tools and follow manufacturer specs, you can service or replace bearings at home. For complex hubs or sealed cartridges, a shop may be the safer option to ensure proper alignment and torque.
DIY is possible for simple hubs, but professional help is wise for complex cartridges or uncertain repairs.
Watch Video
Quick Summary
- Test wheel movement and feel for play before riding
- Different hub designs require different repair paths
- Replace worn cartridges or reseat cups only if within spec
- Prevent failures with regular cleaning, lubrication, and seal checks