How to Protect Your Bike from Rain
Learn practical steps to shield your bike from rain, keep components dry, and extend life with smart storage and post-rain maintenance tips.

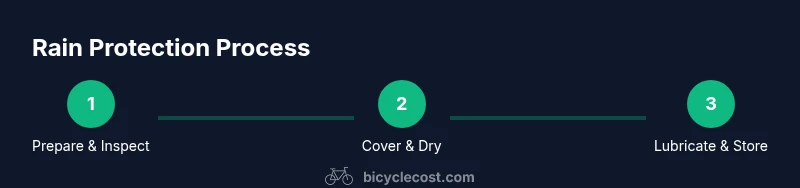
Protecting your bike from rain starts with a reliable outdoor or indoor cover, a dry storage space, and a simple post-rain care routine. Gather a weatherproof cover, microfiber cloths, and a light all-weather lubricant. This guide gives you practical steps to cover, dry, lubricate, and store your bike after wet rides.
Why Protecting Your Bike from Rain Matters
Rain isn't just water; it's a potent mix of moisture, dirt, and road salt that accelerates corrosion and wears components. According to BicycleCost, moisture exposure can increase the risk of rust on steel parts, corrosion on fasteners, seals, and bearings, and subtle damage to brake rotors and cables. Even after a ride, tiny droplets can linger in pivots, chain links, and derailleur housings, inviting wear over time. Protecting your bike from rain isn’t only about staying dry; it's about preserving the drivetrain, braking reliability, and the bike’s resale value. In this section, we’ll cover why rain protection matters, and how consistent habits—covering, drying, and storing properly—translate into real-world benefits like smoother shifts, longer component life, and lower maintenance costs. BicycleCost’s team emphasizes that small, regular protective steps reduce the cumulative damage rain can cause, especially in humid climates or coastal regions where salt spray is common. Start with a plan: protect the frame and moving parts, then make drying and storage part of your routine. Even modest investments in protection can yield meaningful improvements over seasons of riding.
Essential gear to shield your bike from rain
The right gear makes rain protection practical. Start with a weatherproof cover that fits snugly around the frame and wheels. Look for a cover with wind vents and a soft underside to avoid chafing paint. A sheltered storage area or a wall-mounted rack reduces exposure to wind-driven spray and helps air circulate, which speeds drying after wet rides. Mudguards or fenders cut up-spray by as much as half, protecting cables, rotors, and the lower frame. For indoor protection, a compact bike shelter or stand keeps the bike off damp concrete and away from splash zones. Optional but helpful: water-repellent spray for the frame, a soft brush for cleaning dirt, and a small towel kit to wipe moisture after rides. If you frequently ride in rain, consider tires with better grip and braking performance in wet conditions, and remember to check that the gearing remains clean after exposure. Using purpose-built rain protection not only shields your bike but also makes maintenance easier by reducing mud and moisture on critical components.
Pre-rain prep and post-rain care
Pre-rain prep helps your bike survive showers with less wear. Check tires, brakes, and the drivetrain; ensure nothing is loose or overly dirty. If rain is expected, apply a light, all-weather chain lubricant and lubricate the pivot points; avoid heavy lubrication that attracts dirt. After rain, wipe the bike down with microfiber to remove water, inspect for rust, and dry components before storage. Regular post-rain care reduces corrosion risk and extends the life of bearings and cables. Remember to air-dry brakes and rotors to prevent uneven wear. This routine minimizes downtime and keeps components performing reliably when you ride again.
During rain: riding and protection tips
Riding in the rain requires different tactics. Use mudguards and wider tires if possible to reduce spray. Increase visibility with bright lights and reflective gear. Keep your brakes gentle and smooth to avoid wheel lockups on wet rims. If water seeps into the drivetrain or cables, stop and dry things before continuing. After a ride in heavy rain, wipe down the chain and lubricate once dry. A cautious approach—slower speeds, longer braking distances, and deliberate cornering—helps protect both you and your bike in wet conditions.
Drying, inspection, and storage after rain
After exposure to rain, the priority is drying and inspection. Remove the bike cover and dry all metal surfaces with a microfiber cloth. Look for any signs of rust on chain, derailleur, and bolts. Re-lubricate the chain and pivot points, then store in a dry, ventilated space; avoid damp basements or concrete floors that keep moisture around. If you can't store indoors, add a silica gel pack to the storage area and consider a dehumidifier during humid seasons. A brief, regular post-rain routine can significantly extend the life of cables, seals, and bearings by reducing moisture exposure.
Common mistakes to avoid
Common mistakes include leaving wet bikes outside without protection, using heat to dry components, or neglecting post-rain lubrication. Another pitfall is over-lubing the chain after rain, which can attract dirt and create a sticky residue. Instead, dry properly, apply a light lubricant, and ensure proper airflow to speed up drying. Don’t skip a post-ride wipe-down; moisture hidden under gears and in pivots can lead to hidden rust and stiff movement later. Finally, avoid storing a dirty bike; a quick clean helps protect finishes and reduces abrasive wear.
Tools & Materials
- Weatherproof bike cover(Choose size to fully cover frame, handlebars, and wheels; outdoor use preferred)
- Indoor bike shelter or wall-mounted rack(Keeps bike off damp surfaces and allows air circulation)
- Microfiber cloths (2–3)(For quick drying and wipe-downs)
- Water-repellent spray (optional)(Test on a small area first; protects frame finish)
- Chain lubricant (all-weather or wet)(Apply after drying to minimize moisture impact)
- Rust inhibitor or frame wax (optional)(Light application on exposed hardware only)
- Soft brush or old toothbrush(For removing caked dirt in nooks)
Steps
Estimated time: 40-60 minutes
- 1
Gather and prep a dry workspace
Choose a dry, shaded area and lay out a clean mat. Collect your cover, cloths, lubricant, and any rust-prevention products. Having everything ready prevents you from leaving components exposed to the rain for longer than necessary.
Tip: If possible, perform this indoors or in a garage to minimize wind-driven spray. - 2
Inspect for moisture and corrosion
Wipe the bike with a microfiber cloth to remove surface moisture. Check the chain, derailleur, cables, and bolts for rust or water ingress. Address any obvious corrosion before covering or drying.
Tip: Pay attention to the rear cassette and bottom bracket areas where water tends to pool. - 3
Apply protective coverage
Place the weatherproof cover over the frame, ensuring the handlebars and wheels are fully enclosed. If indoors, ensure the area remains well-ventilated to avoid condensation buildup.
Tip: Secure the cover with wind-resistant fasteners or clips to prevent flapping in breeze. - 4
Lubricate and protect moving parts
Wipe the chain and apply a light coat of all-weather lubricant. Lubricate pivot points and derailleur joints if they’re exposed to rain; avoid over-lubing which collects dirt.
Tip: Do lubrication after the bike has dried to reduce moisture on new lubrication. - 5
Dry and inspect after exposure
If you’ve had a ride in rain, remove the cover and dry all metal surfaces. Inspect for new rust, and re-lubricate as needed. Ensure brakes are dry before any future ride.
Tip: Let brakes and rotors air-dry for a few minutes before riding again. - 6
Store in a dry, ventilated space
Place the bike on a stand or wall rack in a location with good airflow. Use silica gel packs in storage areas to reduce humidity and raise the bike off damp concrete if possible.
Tip: If you must store outdoors, periodically check the cover for wear and replace it as needed. - 7
Schedule regular post-rain checks
Set a recurring reminder to inspect the bike after periods of rain. Re-lubricate as needed and adjust components if you notice rust or stiffness developing.
Tip: A quick weekly check during the rainy season prevents small issues from becoming costly repairs.
People Also Ask
What is the best cover for outdoor bikes?
A breathable, waterproof cover that fits well and covers handlebars and wheels is ideal for outdoor use. Avoid cheap plastics that trap moisture. Always ensure vents are present to reduce condensation.
Use a breathable, waterproof cover that fits your bike; it helps prevent moisture from staying on metal parts.
Should I ride in light rain when protecting the bike?
Riding in light rain is generally fine if you ride cautiously, maintain longer braking distances, and dry the bike afterward. If conditions worsen, seek shelter and reassess the bike’s condition before continuing.
Yes, with caution. Slow down, stay visible, and dry the bike after riding in rain.
How soon should I dry my bike after rain?
Dry and inspect as soon as possible after exposure. Wipe metal surfaces and re-lubricate parts that show moisture; this minimizes rust formation and keeps moving parts smooth.
Dry and inspect soon after rain to prevent rust and stiffness.
Can I use wax on the frame to protect against rain?
Wax can provide a water-repellent layer on the frame, but it should not replace cleaning or lubrication of moving parts. Reapply as needed based on weather exposure.
Wax can help, but don’t rely on it alone for protection.
What about disc brakes in rain?
Disc brakes perform well in rain, though initial braking feel may be softer. Dry the rotors after heavy rain and check pad wear regularly.
Brakes work in wet weather; give them a moment to warm up and dry after rain.
Is indoor storage enough protection?
Indoor storage is best, but humidity can still affect metal parts. Use a cover and consider a dehumidifier or silica gel to minimize moisture.
Indoor storage helps, but humidity still matters—add protection where possible.
Watch Video
Quick Summary
- Choose weatherproof protection that fits your bike.
- Dry, clean, and lubricate after rain to prevent rust.
- Store in a dry, ventilated space to extend frame life.
- Regular inspections catch corrosion early.
- Plan rain protection as part of routine bike care.