How to Get Bicycle Grips Off: A Practical Step-by-Step Guide
Learn how to remove bicycle grips safely, whether slip-on or lock-on. This guide covers tools, step-by-step methods, heat and solvent techniques, and post-removal care to protect your handlebars.

To get bicycle grips off safely, identify your grip type, gather the right tools, and follow a careful, step-by-step process. This guide covers slip-on and lock-on grips, safe heating or solvent methods, and techniques that minimize damage to the handlebar. You’ll also inspect the bars and install new grips with confidence.
Identifying grip types and why it matters for how to get bicycle grips off
Identifying your grip type is the crucial first step in successfully removing bicycle grips. Whether you ride a road, mountain, or commuter bike, the grip you have affects the removal method and the risk of bar damage. According to BicycleCost, start by inspecting the exterior: is the grip slip-on, foam, rubber, or a locking clamp? Note the inner diameter and whether you see a set-screw at the end. Lock-on grips typically use a small hex bolt that must be loosened; slip-on grips rely on friction and adhesive or a simple squeeze to remove. Understanding these differences helps you choose the safest technique and reduces the chance of tearing the grip or scratching the bar. A quick check near the bar ends will also reveal any end caps or plugs that must be removed first. As you prepare, consider the material of the handlebar itself—aluminum, steel, or carbon—and the finish, to prevent marring the surface. This step sets the tone for a smooth, damage-free removal. This planning stage is often overlooked but saves time and avoids costly repairs later.
Safety and prep before removing grips
Before you start, create a clean, well-lit workspace. Protect the frame with painter’s tape or a soft cloth to catch drips and prevent scratches. Wear gloves to improve grip and protect your hands when prying or handling sharp edges. Mark the grip orientation so you reinstall it correctly. If you’re working on delicate carbon bars, avoid aggressive leverage; instead, use gradual, even pressure. Read instructions from BicycleCost: prep and safety reduce the risk of scuffs or gouges and help you evaluate grip type before choosing a method. Keep a trash bag handy for small parts and a cloth to wipe away solvents. A focused, careful approach lowers the chance of permanent damage and keeps your handlebars in top condition.
Non-destructive removal methods for slip-on grips
Slip-on grips are typically held on by friction or light adhesive. Start with a solvent like isopropyl alcohol or a dedicated grip solvent; apply generously under the grip and rotate it to allow the solvent to wick in. Gently twist the grip back and forth while applying steady, even pressure. If the grip resists, apply heat with a hair dryer for 1–2 minutes to soften the adhesive, then retry twisting. Avoid forcing grips too hard; the goal is a gradual release. Keep a rag handy to wipe away excess solvent and prevent drips onto components. By using solvent and heat in combination, you minimize the risk of tearing the grip or damaging the bar.
Using heat and prying gently for stubborn slip-ons
When heat and solvent aren’t enough, apply targeted heat along the length of the grip, not just at the edges, to soften the adhesive evenly. Work a thin, non-marring shim (e.g., a plastic card or putty knife) between the grip and bar, advancing slowly as the grip loosens. Pause frequently to check for any resistance, then continue with small, controlled prying motions. Do not twist abruptly or pry from the top, which can bend the bar. If you have a locking ring or clamp, this is typically not the method for those; see the lock-on section instead. Be mindful of the bar end and any cables to avoid damage during leverage.
Removing lock-on grips: bolts, clamps, and careful sliding
Lock-on grips are secured with a small hex bolt or two that clamp the grip to the bar. Start by locating and loosening the set screws with the correct size hex key—often 2.5–4 mm. Loosen only until the grip feels free to slide, then twist and pull the grip off the bar. If the grip sticks, rotate as you pull and re-tighten slightly to reposition leverage, then try again. Remove the end caps if present to relieve any pressure from the clamp. Keep the bolts in a labeled dish so you don’t lose them. This method preserves grip integrity and minimizes harm to the bar surface.
Dealing with stubborn or damaged grips: safe removal strategies
Some grips are stubborn due to adhesive or wear. For slip-ons, revisit the solvent and heat approach but increase dwell time slightly, and consider a softer prying tool to ease the grip away from the bar. If the grip is torn or the adhesive leaves residue, resist tearing further; use isopropyl alcohol, a plastic scraper, or a dedicated grip-removal tool to lift the edge. For damaged grips, you may choose to cut the grip lengthwise with a utility blade, then roll it off in sections, carefully avoiding the handlebar. After removal, inspect the bar for scratches, corrosion, or embedded adhesive and address any issues before installing new grips.
Cleaning and inspecting bars after removal
With the grip removed, wipe the bar to remove solvent residue and adhesive. Inspect the bar for scratches, burrs, or corrosion; lightly roughen any glossy areas with a clean cloth if needed, then wipe again. If you ride a carbon bar, avoid metal abrasives and harsh solvents that can degrade resin. Check the inner diameter to confirm it matches your new grip’s size, and verify there are no end-cap remnants that could compromise grip fit. A clean, smooth surface ensures the new grips slide on easily and seat evenly.
Choosing and installing new grips: fit, texture, and safety considerations
Selecting new grips requires matching inner diameter, texture, and material to your riding style. Common road and mountain bike bars use roughly 22.2 mm inner diameter, but measure yours to be sure. Decide between slip-on or lock-on grips, considering your riding conditions and maintenance philosophy. For slip-ons, consider a light grip adhesive or simply rely on friction if you prefer a tape-free setup. For lock-ons, align the clamp with the bar’s spine and loosely install the set screws before fully tightening to avoid misalignment. When installing, twist the grip to seat it evenly, wipe away any excess solvent, and allow it to dry before riding. If you’re installing lock-ons, ensure end caps are seated correctly to prevent bolt loosening.
Maintenance and final checks after grip replacement
After installing new grips, test for secure fit by applying firm but controlled pressure in all directions. Ensure there is no play at the ends and that the clamps or friction grip are holding evenly. Take a short test ride indoors or on a quiet street to confirm the grips stay in place during shaking or braking. Periodically check the grips during subsequent rides, especially after long-distance or high-impact sessions. Regularly inspect end caps for damage and replace them if needed.
Tools & Materials
- Hex key set (Allen wrenches)(Sizes commonly 2.5–4 mm; check your grip's bolts)
- Hair dryer or heat gun(Essential for softening adhesive on slip-on grips)
- Isopropyl alcohol or grip solvent(At least 70% concentration; used to loosen adhesives)
- Protective tape or soft cloth(Covers frame and cleans solvent drips)
- Soft rag or microfiber cloth(Wipes residue and dries surfaces)
- Utility knife or thin plastic scraper(Optional for stubborn adhesive (use with caution))
- New grips(Choose slip-on or lock-on based on your needs)
- Bolt lubricant or anti-seize (optional)(Helps prevent seized bolts on lock-on grips)
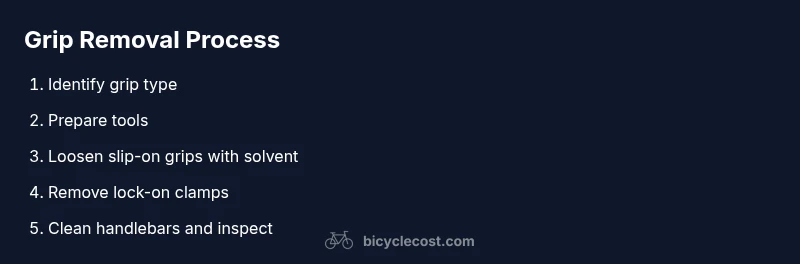
Steps
Estimated time: 30-60 minutes
- 1
Identify grip type
Examine the ends of the bars to determine if the grips are slip-on, foam, rubber, or lock-on. Look for set screws and end caps. Knowing the type guides your method and reduces the risk of damage.
Tip: If unsure, photograph the grip from multiple angles before starting. - 2
Gather tools and prep workspace
Lay out hex keys, solvent, cloths, and a heat source. Protect the frame with tape and arrange a clean area to work. Having everything within reach prevents interruptions that could cause mistakes.
Tip: Keep a container for small parts to avoid losing screws. - 3
Remove slip-on grips with solvent
Apply solvent under the grip and work it in by rotating the grip. Use heat if needed to speed softening, then gently twist and pull until the grip slides free.
Tip: Avoid pulling hard; let the solvent and heat do the work first. - 4
Loosen lock-on grips
For lock-on grips, loosen the hex bolts just enough to free the grip, then slide it off. Remove any end caps and store bolts safely.
Tip: Loosen bolts evenly to prevent bar distortion. - 5
Handlebar inspection and cleanup
Wipe away adhesive residue and inspect for scratches or burrs. Ensure the bar surface is clean and dry before installing new grips.
Tip: Carbon bars require extra care; avoid aggressive scrubbing. - 6
Install new grips
Choose the grip type, dry the surface, and slide the grip on. For slip-ons, ensure even seating; for lock-ons, tighten evenly in a star pattern to avoid misalignment.
Tip: Test fit without fully tightening; adjust if needed.
People Also Ask
What is the easiest way to remove slip-on grips?
Heat the grip gently to soften the adhesive, then apply solvent and twist back and forth until it slides off. Avoid pulling hard to prevent bar damage.
Heat and twist the grip with a bit of solvent until it releases. Avoid forceful pulling.
How can I tell if my grips are lock-on vs. slip-on?
Lock-on grips have a small hex bolt or clamp; slip-on grips rely on friction or adhesive. Look for bolts near the end caps to identify a lock-on.
Check for a small bolt or clamp; that means lock-on.
Do I need special tools to remove locks on grips?
Typically a hex key is enough to loosen lock-on bolts. You may also need end-cap tools to remove end caps gently.
A hex key is usually all you need for lock-ons.
Can I reuse old grips after removal?
Most old slip-on grips lose their grip quality after removal. It’s generally better to install new grips for optimal control and comfort.
Usually, it’s best to install new grips.
What should I do if residue remains after removal?
Apply isopropyl alcohol or grip solvent and wipe with a soft cloth. For stubborn residue, repeat the process or use a plastic scraper carefully.
Wash away residue with solvent and a soft cloth.
Is it safe to lubricate the handlebar for easier install?
A light amount of rubbing alcohol can help slips go on, but avoid oil-based lubricants that can attract dirt or affect braking.
Just a tiny amount of alcohol to help slide the grip.
Watch Video
Quick Summary
- Identify grip type before attempting removal.
- Use heat or solvent cautiously to soften adhesives.
- Loosen lock-on bolts before pulling grips.
- Inspect bars for damage after removal.
- Choose and install new grips with proper fit.