How to Fix Bicycle Wheel Wobble: A Practical Guide
Learn to diagnose and repair bicycle wheel wobble with a step-by-step approach, essential tools, safety tips, and verification checks from BicycleCost.

By the end, you'll know exactly how to fix bicycle wheel wobble, including diagnosing whether the wobble is in the rim, spokes, or hub, and performing safe truing adjustments. You'll learn how to prepare the bike, gather the right tools, tighten or loosen spokes precisely, and verify alignment with a simple test ride to restore smooth, safe riding.
Understanding Wheel Wobble and Common Causes
Wheel wobble isn't always the same issue, and a quick diagnosis saves time. The wobble you feel when you ride can be lateral (side-to-side), vertical (up-and-down), or a hop at a certain rotation. Most wobble originates from rim run-out, imbalanced spoke tension, or worn hub bearings. According to BicycleCost, rim and spoke issues are the most frequent culprits, while hub play adds a subtle, persistent wobble. Start by identifying whether wobble is constant across all speeds or only under heavy load; this distinction helps narrow down the source. Visual checks plus a simple spin test on a bike stand or wall will reveal obvious misalignment. Keep safety in mind: stop immediately if you notice cracks, dents, or loose nipples.
Tools and Setup You’ll Need
Preparing the right tools before you begin saves time and reduces risk. A stable bike repair stand is ideal, but a solid workbench with clamps works too. You’ll want a spoke wrench set that covers common nipple sizes, a way to check spoke tension (a tension meter is ideal), a few Allen keys, and a soft cloth for cleanup. If you have a truing stand, great; if not, a well-supported frame or fork will do for rough centering. Optional items include a hub bearing tool and thread-locking fluid for stubborn nipples. Always wear eye protection when working near rotating parts and gears. Having a mirror or smartphone to inspect both sides helps catch asymmetries you might miss by eye alone.
Diagnosing the Source of Wobble
Before you tighten anything, confirm where the wobble originates. Check rim run-out by mounting the wheel and spinning it slowly; observe where the rim deviates the most from a straight line. If the rim appears bent or non-round, the rim itself may be the culprit. If run-out is minimal but nipples feel loose or tight in one area, the issue is likely spoke tension imbalance. Finally, if you hear roughness or feel play when spinning with the axle, hub bearings or the axle could be the cause. Document which sections of the wheel move most; this guides precise adjustments and prevents overcorrection.
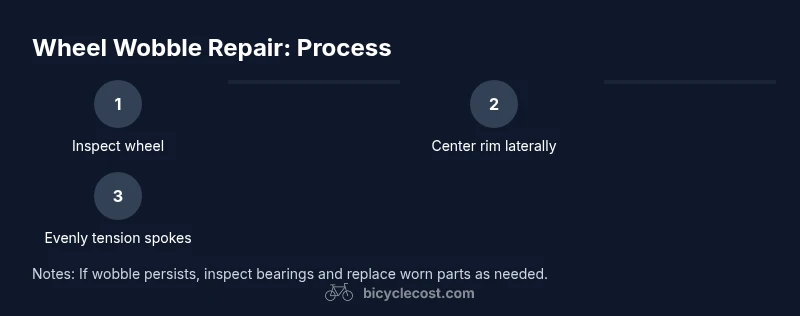
Step-by-Step Overview for Safe Truing
This overview summarizes the general approach: first center the rim laterally, then fine-tune vertical wobble, and finally verify with a spin test and ride-walk. Use small, incremental spoke adjustments—typically 1/8 to 1/4 turn per nipple. Work symmetrically across the wheel to avoid creating new run-out. After each handful of turns, recheck the rim and spin the wheel again to assess progress. If the wheel is beyond your comfort zone, stop and seek help from a bike shop.
Safety Checks for Bearings and Hubs
Wobbles that persist after truing often point to worn bearings or loose hubs. Check for side-to-side play in the front wheel by lifting the bike and gently rocking the wheel; if movement is felt in the hub rather than the rim, bearings or the axle may require replacement or adjustment. Clean and relubricate the bearings if you can access them, and tighten any loose cone nuts or end caps according to manufacturer torque specs. If you hear grinding, feel rough spots, or see visible damage, stop and replace worn components before resuming adjustments.
Quick Verification Tests
Once you think the wheel is true, perform a series of checks: spin the wheel and watch for wobbles; perform a gentle test ride on a smooth surface to feel for asymmetries; and view the wheel in good light to spot any minute deviations. A properly true wheel should run smoothly without catching or rubbing on brake pads. If your brakes rub after a true, recheck spoke tension and rotor alignment if you have a disc brake. Remember to re-tighten nipples gradually and re-check the entire wheel before hitting the road.
Tools & Materials
- Bike repair stand(Stable support for wheel access)
- Spoke wrench set (common sizes)(Include sizes that match your nipples)
- Tension meter (optional)(Helps quantify even spoke tension)
- Allen keys (4mm, 5mm, 6mm)(Common fasteners on hubs and brakes)
- Rag and degreaser(Clean nipples and hubs before work)
- Lubricant for bearings (optional)(Light synthetic oil for serviceable bearings)
- Safety glasses(Protect eyes during adjustments)
Steps
Estimated time: 60-90 minutes
- 1
Remove wheel and inspect for obvious damage
If your bike has a quick-release or through-axle, release and remove the wheel. Inspect the rim for dents, cracks, or obvious bends; look for broken nipples and loose spokes. This step prevents wasted effort on a damaged wheel.
Tip: Take a photo of spoke nipple positions before adjusting. - 2
Mount wheel and check run-out visually
Mount in a stand or secure frame, spin slowly, and observe lateral deviation. Note where the deviation is greatest to guide spoke adjustments. If the rim appears truly bent, plan to replace rather than merely true the wheel.
Tip: Mark high spots with a felt-tip marker to track changes. - 3
Center the rim laterally with opposing spokes
Loosen the spokes on the high-side and tighten the opposing spokes by small amounts (about 1/8 turn) to pull the rim toward the center. Alternate across adjacent nipples to keep tension even and avoid over-correction.
Tip: Always pause after a few turns and re-check alignment. - 4
Address vertical run-out and rim seating
Adjust nipples to correct vertical wobble, ensuring the rim sits evenly between brake pads if you rely on rim brakes. Work in small increments and verify after each adjustment with another spin.
Tip: Do not overshoot; small corrections are safer and more predictable. - 5
Balance spoke tension across the wheel
If a tension meter is available, aim for consistent tension around the wheel within manufacturer range. Tighten any loose spokes gradually and re-check true as you go. Avoid creating tight spots that can cause future wobble.
Tip: Stop at the first signs of nipple rounding or spoke fatigue. - 6
Reinstall wheel and perform final verification
Mount the wheel back on the bike, spin to check, and take a short ride to confirm. If slight wobble remains, repeat adjustments in smaller increments and re-test until stable.
Tip: Record final tension pattern for easier future maintenance.
People Also Ask
What is wheel wobble and how can I tell where it comes from?
Wobble is a lateral, vertical, or mixed deviation of the wheel. Diagnose by testing rim run-out, spoke tension, and hub bearings to pinpoint the culprit.
Wobble usually comes from rim, spokes, or hub bearings.
Do I need special tools to fix wheel wobble?
A spoke wrench, a stand, and possibly a tension meter are essential. A bike shop can help if you don’t have these tools.
You’ll likely need a spoke wrench and a stand.
Why does wobble come back after a fix?
If underlying issues persist, such as uneven tension or bearing wear, wobble can recur. Re-check tension, alignment, and bearings after corrections.
Sometimes wobble returns if the underlying issue isn’t resolved.
Can rim wobble be repaired without replacing the rim?
Minor rim run-out can often be corrected, but significant bends or cracks may require rim replacement for safety and reliability.
If the rim is badly bent, replacement is usually best.
Is wheel truing safe for beginners?
Yes, with patience and proper tools. Start with small adjustments and use a stable stand to avoid damage.
Yes, with caution and proper tools.
Watch Video
Quick Summary
- Identify the wobble source before adjusting.
- Use proper tools and a stable setup.
- Adjust spokes in small increments and re-check.
- Verify true with a spin test and ride check.