How to Fix a Bicycle Horn: A Practical Guide
Learn how to diagnose and repair common bicycle horn issues, from dead batteries to loose connections, with a safe, practical, BicycleCost-guided approach.

You’ll learn how to diagnose and fix a bicycle horn that won’t sound, from mechanical bells to electronic Buzzers. Start by identifying the horn type, then check power, connections, and the sound mechanism. This step-by-step guide covers safe disassembly, testing, and reassembly so you can ride with a working horn again.
What this guide covers and why a horn fails
According to BicycleCost, the most common bicycle horn problems are power failures, loose connections, and mechanical wear. This guide breaks down both mechanical bells and electronic horns, explaining how to diagnose symptoms, identify the horn type, and perform safe fixes. You’ll learn how to test power, inspect wiring, check the diaphragm, and verify that the horn is properly mounted. By following the steps, you’ll avoid wasting time on guesswork and gain confidence to repair or replace parts as needed. The goal is a reliable horn that sounds clearly when you press the button, improving safety on every ride.
Identifying your horn type: mechanical vs electronic
Bicycle horns come in two broad families: mechanical bells that produce tone via a plunger and bell rope, and electronic horns that use a small speaker or diaphragm powered by a battery or a wired switch. Mechanical horns are usually simple, with fewer electrical parts and a diaphragm that can wear or seize. Electronic horns may be louder but rely on a battery and clean contact surfaces. Start by inspecting the horn housing for markings, counting screws, and listening to how it charges or chirps when pressed. If you hear no sound, it’s more likely a power or connection issue; if you hear a weak buzz or warble, the diaphragm or speaker may be worn. This distinction guides your repair path and the parts you’ll need.
Safety considerations before you begin
Always disconnect power before touching electrical components. If your horn is wired to the bike’s battery, remove the battery or disconnect the fuse to prevent shocks or short circuits. Work in a dry, well-lit area, and secure the bicycle so it won’t tip over. Wear eye protection if you’ll be prying or scraping connectors. Keep a clean workspace and avoid metal jewelry that could short terminals. When testing, position yourself away from traffic and use a safe, quiet area to produce sound without endangering pedestrians. A cautious approach minimizes risk and protects both you and your bike.
Tools and parts you may need
The repair process benefits from a small toolkit. Essential items include a Phillips head screwdriver (PH2) for most horn screws, a small flat-head screwdriver for stubborn mounts, electrical tape for securing wires, and contact cleaner to restore corroded terminals. If you’re dealing with an electronic horn, a multimeter helps verify power and continuity, while a spare diaphragm or replacement horn ensures you’re prepared for wear. Have wire strippers or scissors, needle-nose pliers, and a clean cloth for wipe-downs. Optional but useful: a soldering iron for clean, permanent connections and a tiny dab of light lubricant to free up a stuck plunger. Gather these before you start so you’re not searching mid-repair.
Diagnosing power and wiring issues
Start with the simplest checks: confirm the horn is mounted securely and the mounting bolt isn’t loose. For electronic horns, test the battery or power source by measuring voltage at the horn’s connector. If the reading is zero, inspect the fuse and battery, replacing as needed. Check the wiring for visible damage, fraying, or corrosion at the connectors. Clean contacts with isopropyl alcohol and reseal with electrical tape or shrink tubing. If you can hear a faint click from the horn when you press the button but no sound, the diaphragm or speaker may be damaged or misaligned. In that case, you’ll likely need a replacement part. Document what you find so you can decide whether a repair or replacement is more practical.
Fixing mechanical bells and diaphragm horns
Mechanical bells rely on the plunger and diaphragm to create sound. If the plunger sticks, gently work it free with a small tool and a drop of light lubricant on moving parts. Inspect the diaphragm for tears or holes; a damaged diaphragm will sound muffled or absent. Tighten any loose screws that anchor the horn to the handlebars or frame, ensuring the horn points away from your leg and toward open air. For stubborn fits, loosen and reposition the horn, then retighten using a torque that doesn’t deform the mounting bracket. After adjustments, test by pressing the horn button at low speed in a safe area to confirm the tone is clean and consistent.
Fixing electric horns: batteries, wiring, and switches
Electric horns depend on a reliable power path. Start by testing the battery with a multimeter; if voltage is low, replace or recharge the battery. Inspect the switch for carbon buildup or corrosion; clean with contact cleaner and verify actuation. Confirm that the common ground is secure and that any inline fuses are intact. If the horn still produces a weak sound, the driver transistor or amplifier inside the unit may be failing, requiring a replacement horn. When connecting new parts, match polarity and recheck all connections. A secure, well-insulated harness reduces the risk of shorts during wet rides.
Reassembly and testing your horn
With the parts confirmed, reassemble in the reverse order of disassembly. Keep wires away from moving parts and route them along cable guides to avoid pinching. Reattach the horn mount securely but without overtightening that could crack the bracket. Reconnect the battery or power supply and test the horn in a controlled environment. If your test area is quiet, you’ll hear a clear, crisp tone. If there’s any buzzing or stuttering, shut down immediately and re-inspect your connections and seals. A thorough post-assembly check helps ensure long-term reliability.
Maintenance tips to prevent future horn failures
- Regularly inspect the horn housing for cracks and water intrusion, especially after rain rides.
- Clean contacts periodically with isopropyl alcohol and reseal with dielectrical grease or silicone sealant where appropriate.
- Keep wires tucked away from spokes, brake cables, and moving parts that could rub or snag.
- If you rely on a battery-powered horn, establish a battery maintenance routine and replace batteries on schedule.
- Consider upgrading to a more robust waterproof horn if you ride in wet or muddy conditions.
- Document maintenance in a bike log so you know when the last service occurred and what parts were replaced.
When to replace vs repair your horn
Sometimes the most economical choice is a full replacement, especially if the horn is older, the diaphragm is torn, or the electronics have degraded beyond simple fixes. Weigh the cost of parts against the price of a new horn with similar loudness and reliability. If you plan to ride in traffic daily, selecting a unit with higher IP rating and a known warranty can save time and hassle. The BicycleCost team recommends evaluating the total effort and risk of a repair versus a replacement, factoring in your confidence level and available tools.
Tools & Materials
- Phillips screwdriver (PH2)(for screws on most bike horns)
- Small flat-head screwdriver(optional for stubborn mounts)
- Electrical tape(secure wires and seals)
- Contact cleaner (isopropyl alcohol)(clean corrosion from terminals)
- Multimeter(verify power and continuity)
- Replacement diaphragm or horn(on-hand for worn parts)
- Wire strippers/pliers(prep and terminate wires)
- Soldering iron and flux(for permanent connections)
- Light lubricant (trace amount)(free up moving parts)
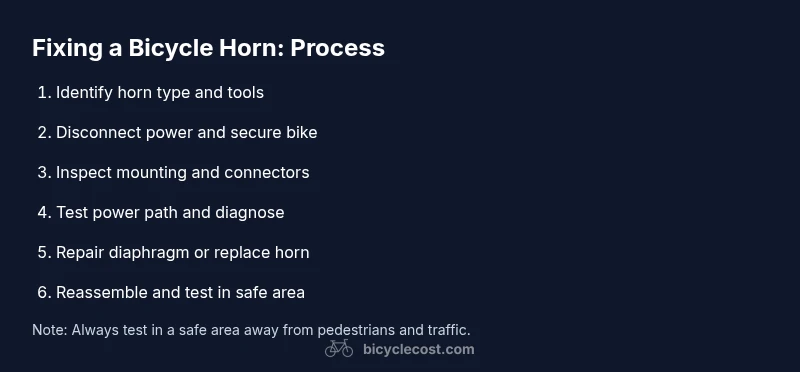
Steps
Estimated time: 45-60 minutes
- 1
Identify horn type
Examine the horn housing to determine if it is mechanical or electronic. This identification guides your next steps and the parts you’ll inspect first.
Tip: Pro tip: take a quick photo before disassembly so you can reassemble correctly. - 2
Disconnect power and secure the bike
If the horn is wired to the battery, disconnect power and remove the battery or fuse. Stabilize the bike so it won’t tip during handling.
Tip: Pro tip: use a workstand or prop the bike with a kickstand or wall to keep it steady. - 3
Inspect mounting and connectors
Check screws, brackets, and connectors for looseness or corrosion. Tighten where appropriate and replace damaged connectors if found.
Tip: Pro tip: clean connectors with isopropyl alcohol before reseating to ensure solid contact. - 4
Test power path with a meter
With the power off, connect a multimeter to the horn terminals and verify voltage when pressing the horn button. If voltage is present but no sound, the diaphragm or speaker may be damaged.
Tip: Pro tip: document voltage readings for future reference. - 5
Repair or replace diaphragm/speaker
If the diaphragm is torn or the speaker is weak, replace that component or swap the entire horn unit as needed.
Tip: Pro tip: keep spare diaphragms on hand for quick repairs. - 6
Reassemble and retest
Reinstall all parts in reverse order, route wires safely, and reattach the battery. Test the horn in a safe area to confirm a clear tone.
Tip: Pro tip: perform a soft test away from traffic to avoid startling pedestrians.
People Also Ask
What types of bicycle horns exist?
There are mainly mechanical bells and electronic horns. Mechanical horns use a diaphragm and plunger, while electronic horns rely on a speaker powered by a battery or wired switch. The repair approach differs based on type.
Bicycle horns come in two main types: mechanical bells and electronic horns. Mechanical ones use a diaphragm, electronic ones use a speaker powered by a battery.
Why won’t my horn sound after a battery replacement?
First verify the battery is properly connected and charged. Check fuses, power wiring, and the switch. If voltage reaches the horn but there’s no sound, the diaphragm or speaker may be damaged.
After changing the battery, check connections and fuses. If you still don’t hear anything, the diaphragm or speaker might be worn out.
Can I fix a horn without tools?
Many mechanical horn fixes can be done with common hand tools, but more reliable electronic repairs usually require basic electrical tools. Having at least a small screwdriver and cleaning supplies makes the process smoother.
You can fix some mechanical horns with basic hand tools, but electronic horns typically need simple electrical tools.
Is it safe to disassemble the horn?
Yes, if you disconnect power first and work in a dry, well-lit area. Avoid moisture and worn insulation to prevent shorts and shocks.
Yes, as long as you disconnect power and stay dry, disassembly is safe.
How do I test the horn after reinstallation?
Reconnect power and press the horn button in a controlled area. Listen for a clear, consistent tone and verify there’s no buzzing or stuttering.
After reinstalling, reconnect power and test in a safe area to ensure a clear tone.
Watch Video
Quick Summary
- Identify horn type before disassembly.
- Check power and wiring first to avoid unnecessary parts replacements.
- Test in a safe area after each fix to verify function.
- Consider replacement parts if the diaphragm or electronics are worn.