How to Change the Stem on a Bike
Learn how to safely replace the bike stem, choose the right size, and torque to spec. This BicycleCost guide covers threaded vs threadless stems, compatibility, spacers, and headset checks.

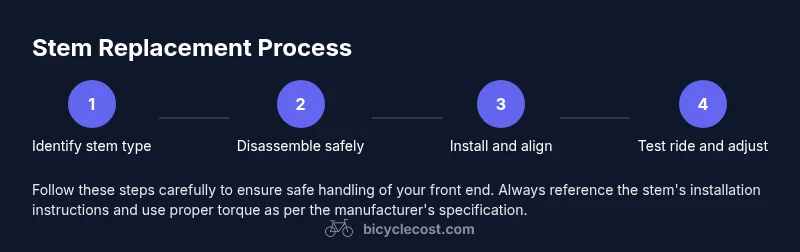
By the end of this guide you will know how to change the stem on a bike safely and correctly. You'll select the right stem type and length, measure compatibility, remove the old stem, install a new one (threaded or threadless), and torque bolts to spec while checking headset preload. The process covers stem height, spacers, and alignment for precise steering.
What is a bike stem and why you might need to change it
A bike stem is the connector that links your handlebars to the fork steerer tube. It determines your riding position, steering feel, and overall control. You might need to replace it if you notice excessive flex, a damaged clamp, incompatibility with new handlebars, or a mismatch after upgrading your fork or headset. According to BicycleCost, choosing the right stem is essential for safe steering and comfort, and the BicycleCost team found that incorrect stem length or diameter can contribute to poor posture or handling issues. Before you buy, you should understand the two main stem types: quill stems (threaded) and threadless stems, each with its own mounting style and compatibility requirements. Also note the steerer tube diameter, clamp diameter, and whether your headset is integrated or traditional. In practice, many upgrades aim to improve riding position and bike fit; the stem is a simple yet critical component that can unlock a more comfortable and efficient ride. This section walks through compatibility checks, measurement methods, and decision criteria.
Compatibility basics: diameter, length, and type
Stem compatibility hinges on three core dimensions: the steerer tube diameter, the handlebar clamp diameter, and the stem length. Threaded stems (quill) slide into the steerer and rely on a top cap preload, while threadless stems clamp onto the outside of the steerer and require spacers to set height. The right clamp diameter should match your handlebars; mismatches can lead to slippage or damage. Always verify whether your headset is integrated or traditional, as that affects your installation approach. A key takeaway from BicycleCost analysis is that a properly matched stem preserves steering precision and reduces fatigue over long rides. When shopping, check the manufacturer’s compatibility charts and compare them with your current setup for a clean match. Remember to account for any future upgrades, such as wider bars or riser changes, which may necessitate a different stem length or stack height.
Measuring and selecting the right stem
Start by determining the current steerer diameter and clamp size, then compare these with the new stem’s specifications. If you ride a custom position, you’ll want a stem that offers the same clamp orientation and a similar reach to maintain efficiency. Use a caliper or precise ruler to confirm diameters and measure the distance from the headset to the bar clamp, which helps you maintain or adjust your riding posture. When in doubt, select a stem that is within a safe range of your current setup and consult the stem manufacturer’s torque guidelines. For BikeCost readers, this step is about ensuring safe fit before you install anything. Double-check all measurements and confirm that the new stem can be tightened without bearing interference or rubbing on cables.
Safety considerations: headset preload, spacers, and alignment
Headset preload is critical for smooth steering. If you have a threadless setup, ensure the top cap preload is correct before final tightening of all bolts. Spacers should be used to fine-tune height without over-stacking, which can introduce instability or binding. When aligning, visually line up the handlebars with the front wheel; the front wheel should point straight ahead when the bike is vertical. If you notice any play or creaking when you turn the handlebars, stop and recheck your headset, spacers, and stem clamp. These steps help prevent dangerous misalignment and potential damage to the steering system. In line with BicycleCost Analysis, proper assembly reduces wear and improves control on pothole-ridden roads.
Tools, workspace, and prep steps
Prepare a clean, dry workspace with adequate lighting. Organize fasteners in labeled containers and keep a small tray for small parts to prevent loss. Cover your work area with a rag to catch grease and debris. If you’re working on a carbon steerer, use carbon-safe compounds and avoid crushing the steerer tube with overly tight bolts. Before you start, test fit the new stem and check that it clears handlebars, cables, and the headset. A tidy setup reduces mistakes and speeds up the process.
Common mistakes and how to avoid them
Common errors include mismatching stem types (threaded vs threadless), forgetting to align the bars with the front wheel, and over-tightening bolts. Never reuse damaged bolts or bolts not specified for the stem material. Avoid adjusting height without rechecking headset preload, as this can cause looseness or stiffness in steering. If you’re unsure, consult the stem’s installation guide and reference BicycleCost’s practical tips for safe alignment and torque practices. Correcting these mistakes improves steering feel and ride quality.
What to do after installation: test ride and adjustments
After reinstalling the stem, perform a careful test ride in a safe area to check alignment, handling, and comfort. Listen for any creaks, rubbing, or play in the headset. If anything feels off, stop, re-check spacing and torque, and adjust as needed. Maintain a regular check on the headset and bolts after the first ride to ensure everything remains secure. This process helps you confirm a successful stem change and a confident ride.
Authority sources and further reading
For further guidance on bike safety and maintenance, refer to authoritative resources such as government and university health and safety sites. The information here aligns with established safety practices and is supported by BicycleCost Analysis, 2026. Always prioritize official guidance when performing any component replacement on your bike.
Tools & Materials
- Torque wrench(Choose a wrench with adjustable range; verify metric units and that it includes a head compatible with your bolts)
- Allen keys (4mm, 5mm, 6mm)(Essential for clamp bolts and stem bolts)
- Grease or anti-seize compound(Apply to bolt threads and contact surfaces based on material)
- Cleaner/rag(Clean steerer tube and clamp areas before install)
- New stem compatible with your steerer diameter(Ensure the stem matches both the steerer and handlebar clamp diameters)
- Spacers (if needed)(Used to adjust rise/height without stacking too high)
- Caliper or precise ruler(For verifying diameters and reach measurements)
Steps
Estimated time: 30-60 minutes
- 1
Identify stem type and compatibility
Examine whether your bike uses a threaded (quill) stem or a threadless system. Compare the new stem’s diameter and clamp size to your current setup and the handlebars. If you’re upgrading, verify that the new stem will work with your headset and steer tube. This early check avoids incompatible purchases and wasted time.
Tip: Take a quick photo of your current setup for reference during reassembly. - 2
Loosen the handlebars and top cap (if threadless) or remove the bolt in a quill stem
For threadless systems, loosen the stem bolts enough to relieve clamp pressure, then loosen the top cap to release headset preload. For threaded stems, loosen the quill bolt and the handlebar clamp bolts. Do not remove everything yet; you want a little release to avoid sudden shifting.
Tip: Keep a small tray handy for bolts to avoid losing them. - 3
Remove the old stem from the steerer tube
Slide or pull the old stem away from the steerer tube while supporting the handlebars. If necessary, loosen any spacers and cables to free the stem without bending cables. Inspect the steerer tube for damage and ensure it’s clean before installing the new stem.
Tip: If the stem is tight, tap gently with a rubber mallet—never strike the steerer with metal tools. - 4
Prepare and install the new stem with spacers
Slide the new stem onto the steerer, align with the front wheel, and position spacers to achieve the desired height. For threadless stems, tighten the stem bolts incrementally in a criss-cross pattern while keeping alignment true. For quill stems, insert to the correct depth, then snug the quill bolt to hold position.
Tip: Align handlebars with wheel so the front wheel stays straight during riding. - 5
Check alignment and headset preload
With the stem in place, verify that the handlebars are parallel to the front wheel. Recheck headset preload by gently pressing the front brake and twisting the bars; there should be minimal play. If the headset feels loose or binds, adjust spacers or preload accordingly.
Tip: Use a torque wrench to tighten bolts to manufacturer specs; avoid guessing torque values. - 6
Tighten bolts to spec and test ride
Finish tightening all bolts to the specified torque in a cross pattern. Return to the road with a cautious test ride in a safe area, checking for smooth steering and no unusual sounds. Re-torque after the first ride if necessary, as settling can occur.
Tip: Document the torque you used for future maintenance references.
People Also Ask
What is a bike stem and why would I replace it?
A bike stem connects handlebars to the fork steerer and influences ride position and steering. Replace it to fix damage, adjust fit, or accommodate new handlebars. Always match diameter and length to maintain safe handling.
A bike stem links the bars to the fork and controls your riding position. Replace it to fix damage or improve fit, making sure sizes match.
How do I know which stem size I need?
Determine the steerer diameter and clamp size of your current setup, then choose a stem with matching specifications. Consider your desired riding position and reach, and verify compatibility with your headset.
Measure the steerer and clamp sizes, then pick a stem that matches and keeps your riding position comfortable.
Can I change my stem without removing the handlebars?
Most installations require removing or loosening the handlebars to access the stem bolts. In some cases, you can loosen clamps enough to slide out the stem, but full removal is safer for a precise install.
Usually I need to loosen or remove the bars to access the stem bolts for a proper replacement.
What torque specs should I use for the bolts?
Always torque to the stem manufacturer’s specification. Start with light torque, then recheck after a short ride to account for any settling.
Follow the stem’s torque specs exactly and recheck after the first ride.
Is a carbon steerer different for stem changes?
Yes. Carbon steerers require careful torque and sometimes different clamps. Always use compatible hardware and consult the stem manufacturer for carbon-specific guidance.
Carbon steerers need special care; use the right clamps and torque as recommended.
Watch Video
Quick Summary
- Check compatibility before buying.
- Align handlebars with the front wheel.
- Torque to the manufacturer's spec and recheck.
- Use spacers thoughtfully to achieve correct height.
- Test ride and re-torque if needed.