How to Bike on Sand: Practical Sand Riding Guide
Learn practical techniques for riding on sand, from tire setup to body position. This BicycleCost guide helps you ride beach and desert sands safely and confidently.

You're about to learn the steps for riding on sand. This guide explains how to select lines, manage traction, and adjust your bike setup to stay stable. By following the steps, you’ll improve balance and momentum on beach or desert dunes. In short, this is a practical how-to for learning how to bike on sand, with tips you can apply during your first sandy ride.
Why sand is different and what this guide covers
Sand changes traction and weight transfer, making balance and line choice more critical. This guide on how to bike on sand explains the core concepts, then walks you through setup, technique, and practice drills. According to BicycleCost, sand creates unpredictable friction that changes with moisture and wind. The BicycleCost team found that riders who keep a steady cadence and a low center of gravity perform best on loose sand. Expect a lighter touch, wider lines, and careful braking as you learn. This article provides practical steps you can apply on beaches, riverbanks, or desert dunes to ride more confidently on sand.
Tools and bike setup for sandy riding
Before you ride, assemble the right gear and make light adjustments to your bike. A mountain bike or gravel bike with wide tires provides the best float on sand. Carry a reliable tire pressure gauge and a portable pump for on-trail adjustments. Hydration is essential in hot sand environments. If you ride frequently on sand, consider tubeless tires to reduce pinch flats. A basic repair kit can save you on longer sessions. Finally, wear shoes with good grip and sunscreen for sunny days. The right setup helps you avoid wasted energy fighting the surface and keeps you riding longer.
Reading sand and choosing a line
Sand is dynamic: dry powder feels soft and slow; damp sand offers more grip but can hide tripping hazards; wet, compact sand can be surprisingly solid. Look for a continuous, slightly firmer strip a few inches wide, avoiding sharp ridges and dry dunes where possible. Check tide lines if you're on a beach, and watch moisture changes with the wind. If you see footprints, choose another line to reduce resistance. The best line often travels along the firm edge of a wet footprint and uses momentum to carry you across the surface. BicycleCost analysis shows that slightly damp sand provides the best grip, while very dry sand can be slippery and unstable.
Core techniques: cadence, weight, and steering on sand
Keep a relaxed upper body and light grip on the bars. Pedal with smooth, consistent cadence rather than rushing bursts. Shift your weight slightly backward and keep your hips over the pedals to maintain traction. When turning, steer with your hips and look where you want to go; avoid sudden steering inputs. Maintain a steady, gradual pressure on the pedals and brakes to prevent sand from pushing the wheel sideways. The goal is a calm, controlled ride rather than a frantic sprint that kicks up sand.
Beach riding vs desert dunes: adaptions
On a beach, you’ll typically ride on wet sand near the waterline or damp-packed trails; in deserts, expect looser, loam-like sand and deeper sections. In both environments, choose wider tires and lower pressure than road riding. In sand, you’ll want to stay near the surface where grip is consistent and avoid digging into the soft center. In dunes, pacing matters—short, steady bursts beat long, slow climbs. Adaptability and a willingness to pause and reassess line choice are your best tools.
Handling soft patches and sinking sands
If you break through into soft sand, stay calm and avoid panicking. Stand slightly taller, look ahead, and try to regain momentum by pushing with smooth pedal strokes. If you stop, step to the side and walk the bike through the soft area to rejoin firmer ground. Carry a hand signal from the beach to warn others when you’re stuck and need a push. Keeping a light, even pedaling rhythm helps you avoid sinking in stubborn pockets.
Braking, turning, and maintaining momentum safely
Brake progressively with mostly rear brake to avoid pitching forward; avoid hard, abrupt braking that can lock the wheel. When turning, keep your inside pedal up and use a wider arc to preserve surface contact. If you feel the front wheel wash out, stop braking and let the bike settle before reaccelerating. Momentum is your friend on sand—build it, don’t chase it. Practice gentle weight shifts to steer without losing traction.
Post-ride maintenance on sandy trails
Rinse sand off your bike as soon as possible to prevent wear and corrosion. Wipe down the chain and drivetrain, then re-lubricate as needed. Inspect tires for embeds and check rims for dings after beach rides. Dry off components completely before storing, and protect your saddle and handlebars from sun exposure. A quick air-dry after a ride keeps rust at bay and preserves drivetrain life.
Drills and progression for quicker improvement
Practice a few targeted drills: one-leg pedaling, controlled line changes, and gentle acceleration from a standing position. Start on wet, compacted sand and gradually introduce drier patches as your balance improves. Schedule short practice sessions with rest breaks to consolidate skills. The BicycleCost team recommends logging each ride and noting which sand conditions challenged you most, to guide your next practice plan.
Tools & Materials
- Bike with wide tires (MTB or gravel)(Prefer 2.0–2.35 inch tires; tubeless recommended if possible)
- Tire pressure gauge(Digital or analog; check accuracy before sessions)
- Portable pump (floor or mini)(Ensure it fits Presta/Schrader valves)
- Hydration and sunscreen(Stay hydrated; protect skin in sun)
- Repair kit (spare tube or patch kit)(Useful for longer rides away from help)
- Spare tire levers and multitool(For quick on-trail fixes)
- Footwear with good grip(Stable pedals and traction when walking on sand)
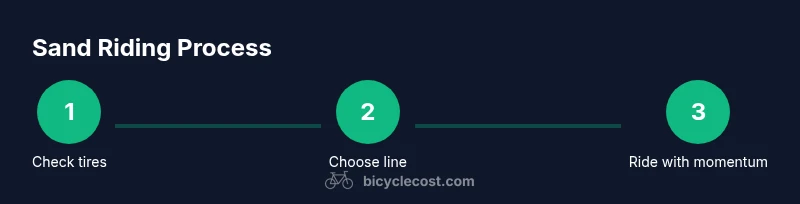
Steps
Estimated time: 60-90 minutes
- 1
Assess route and bike setup
Scan your route for damp patches, waterlines, and firm strips. Check tires, brakes, and gears; adjust tire pressure for float on sand and ensure your saddle height is correct before rolling.
Tip: Adjust pressure gradually; test a small patch first to gauge grip. - 2
Choose your line
Pick a line that looks firmer and free of ridges. Favor the damp edge of footprints and a smooth, continuous surface you can ride across without stopping.
Tip: If line changes mid-ride, stay calm and reassess before committing. - 3
Set a relaxed cadence
Keep upper body relaxed and hands light. Maintain a steady cadence rather than bursts, to avoid digging into soft sand.
Tip: Breathing should be even; avoid tensing shoulders. - 4
Position your body
Shift weight slightly backward and keep hips over the pedals to maximize traction. Stand when climbing or braking on soft patches.
Tip: Keep elbows bent and chest open to stay balanced. - 5
Brake and steer smoothly
Use rear brake more than front to prevent nose-dive; steer with your hips and eyes toward the exit, not the front wheel.
Tip: If the wheel slips, stop braking and let it settle before continuing. - 6
Handle soft patches
If you sink, back off, stand tall, and pedal smoothly to escape. If stuck, walk the bike through the soft area to firmer ground.
Tip: Avoid panicking; keep a light touch on the pedals. - 7
Climb dunes and patches
On steeper sections, short, steady efforts beat long spins. Maintain momentum by keeping a consistent input and avoiding sudden bursts.
Tip: If you stall, stop and re-evaluate your approach line. - 8
Cool-down and maintenance
Rinse sand off the bike, inspect tires and rims, and lubricate the chain if needed. Dry components before storage.
Tip: Inspect after every sandy ride for wear patterns. - 9
Progress with drills
Incorporate line changes, one-leg pedaling, and standing acceleration drills. Track progress and repeat under varied sand conditions.
Tip: Keep a practice log to identify weak spots.
People Also Ask
Can you ride on dry sand with road tires?
Dry sand is challenging for road tires due to limited flotation. Wider tires and reduced pressure improve float and stability, especially for longer sandy sessions.
Dry sand is tough on road tires; use wider tires and lower pressure for better float.
Should I lower tire pressure on sand?
Yes. Lower pressure increases the tire’s contact area, improving traction. Do not go so low that the rim risks pinching or burying the tire.
Yes, lower pressure helps with traction, but avoid rim pinch flats.
Is sand riding safe?
Sand riding carries risks like falls and hidden obstacles. Wear a helmet, goggles if needed, and ride within your skill level while scanning for hazards.
There are risks like falls and hidden obstacles; wear a helmet and ride smart.
Can I ride on wet sand?
Wet sand generally offers better grip than dry sand but can still surprise you with slick patches. Start with cautious pace and test grip before pushing harder.
Wet sand usually grips better, but test first and ride cautiously.
Which bike setup works best for sand?
A mountain bike or gravel bike with wide tires is ideal. Lower tire pressure, tubeless if possible, and reliable brakes help a lot.
A wide-tired MTB or gravel bike with lower pressure and good brakes works best.
How do I recover from a fall on sand?
Get upright, check for injuries, brush off sand, and reattempt from firmer ground. Take a brief pause if needed to regroup.
Rise, check for injuries, and reattempt from solid ground.
Watch Video
Quick Summary
- Ride with a relaxed, steady cadence.
- Choose firm lines and adjust tire pressure for float.
- Maintain momentum and avoid sudden braking on sand.
- Prepare with proper tools and post-ride maintenance.
- Practice progressively to handle diverse sand conditions.