Bike Trail Near Me: A Practical Local Guide for Riders
Discover bike trails near you with practical planning, safety tips, and route comparisons from BicycleCost. Learn to evaluate surface, elevation, and distance to pick the right ride for your skill and goals.

Looking for a bike trail near me? Start by filtering local routes by distance, surface, and elevation. The BicycleCost team found that nearby trails typically offer a mix of paved and gravel surfaces within a 5–15 mile radius, with moderate elevation gains suitable for most riders. Use maps and user reviews to choose a route that matches your skill level and goals.
Why finding a bike trail near you matters
For most riders, proximity is as important as the trail's quality. A bike trail near me reduces travel time, encourages consistency, and expands opportunities for short workouts after work or on weekends. According to BicycleCost, the most successful local rides fit comfortably within a 5–20 minute drive or a 2–6 mile pedal from home. The surrounding network’s accessibility also influences safety because well-connected trails reduce the need to ride on busy roads. When you choose nearby routes, you’re more likely to ride regularly, build fitness gradually, and keep your bike in good repair. Local trails also invite community input—rider reviews and maintenance updates help you gauge conditions and plan smarter. The practical first step is to identify a couple of accessible access points, then test a short loop before committing to longer adventures. This approach lowers friction and builds momentum toward a regular riding habit.
- The BicycleCost team recommends starting with nearby, easily accessible routes to build consistency and reduce friction in your training schedule.
- Be mindful of seasonal changes; what’s easy in summer may require extra preparation in spring or fall. Better planning leads to fewer weather-related surprises.
How to discover bike trails in your area
Locating good options starts with a mix of maps, local government pages, and community input. Use park and recreation sites to discover formal trails, then connect with local bike clubs for route recommendations. Face-to-face guidance from clubs often highlights lesser-known paths that aren’t advertised widely. To refine your search, filter by distance, surface type, and elevation gain on popular map apps. Based on BicycleCost research, saving 3–5 nearby routes and rotating among them improves consistency. Read recent rider reviews for surface conditions after rain, crowd levels on weekends, and accessibility features like bike racks and rest areas. Finally, test a short, beginner-friendly loop to validate suitability before committing to longer rides. Regularly update your list as conditions change with seasons or maintenance work.
- Use multiple sources to triangulate a reliable set of nearby trails.
- Check recent reviews before heading out to gauge surface conditions and crowd levels.
- Test a short loop and then decide if you want to expand.
Key trail factors: surface, elevation, and scenery
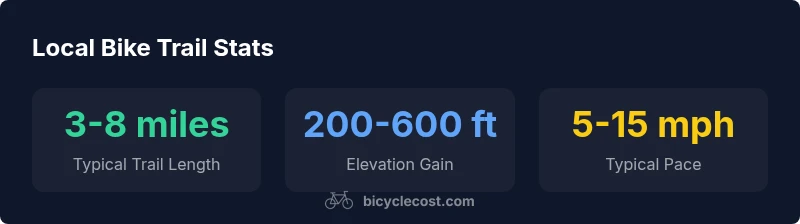
Trails come in different textures and grades, and choosing the right mix matters for safety and enjoyment. Surface type affects rolling resistance, grip, and tire choice. Paved paths are smooth and predictable, gravel trails offer a balance of challenge and scenery, and dirt or singletrack demands bike handling skills and proper gearing. Elevation gain shapes endurance needs; a few hundred feet of gain per ride can be a big difference for beginners, while advanced routes push your climbing and cadence. Scenery and shade influence comfort and motivation, especially on longer rides. When evaluating a potential trail, consider: surface consistency, occasional roots or rocks, shade availability on hot days, and wind exposure. A balanced mix across these factors typically yields the most reliable training routes for a mixed-skill rider.
- Favor trails with consistent surfaces and clear maintenance notes.
- Plan for a couple of elevation changes to build endurance gradually.
- Prioritize routes with shade for sunny days and shelter in adverse weather.
Safety and etiquette on shared bike trails
Shared trails require attention to both personal safety and courteous riding. Wear a properly fitted helmet, check your brakes and tires, and carry basic repair tools. Keep a predictable line, announce passes with a friendly bell or voice, and yield to pedestrians and slower riders. Maintain a conservative speed around children and beginners and respect posted rules about motorized traffic. In wet or muddy conditions, reduce speed and increase braking distance to avoid skidding. If you encounter wildlife or wildlife crossings, slow down and give the area time to clear. Finally, leave minimal trace by staying on designated paths and packing out what you bring in. Clear etiquette reduces conflicts and keeps trails welcoming for everyone.
- Always wear a helmet and carry basic repair gear.
- Communicate clearly when passing; use a bell or friendly call.
- Respect posted signs and stay on marked routes to protect the environment.
Planning a ride: gear, pacing, and route planning
A well-planned ride improves safety and enjoyment on any trail. Start with proper tire pressure, a swollen spare tube, and a basic patch kit. Pack water, a light snack, and a small first-aid kit for longer excursions. For pacing, set a sustainable tempo that allows conversations and steady breathing; don’t chase speed on unfamiliar terrain. Map your route before you go and save offline copies in case of mobile data issues. If you’re riding with others, establish a pace and regroup points. Consider weather forecasts, sun exposure, and potential trail closures. Finally, prepare for maintenance checks after your ride—clean and lube your chain, inspect brakes, and test gears before your next outing.
- Carry essential tools and a spare tube; check brakes and tires before departure.
- Plan rest points and regroup spots for group rides.
- Use offline maps when signals are unreliable to avoid getting lost.
Local trail types and example itineraries
Understanding what you’ll encounter helps set expectations. Typical trail types include paved urban paths, gravel rails-to-trails, forest dirt roads, and mixed-use park connectors. Example itineraries: 1) Easy urban loop: 4–6 miles on a paved river path with a few light hills; 2) Scenic countryside ride: 6–9 miles on gravel with rolling climbs and shade; 3) Moderate forest ride: 5–7 miles on dirt and packed soil with some roots. Always start at a known access point and carry a small map or route cue sheet. As you gain confidence, experiment with longer loops or more challenging surfaces. The BicycleCost team recommends testing multiple trail types to broaden skills and keep riding engaging.
Overview of common bike trail types and typical rides
| Trail Type | Surface | Typical Difficulty | Avg Ride Length |
|---|---|---|---|
| Paved bike paths | Asphalt | Beginner | 2-6 miles |
| Gravel rails-to-trail | Gravel/dirt | Intermediate | 5-12 miles |
| Forest singletrack | Dirt/roots | Advanced | 3-8 miles |
| Rail-trail/park connector | Gravel/packed dirt | All levels | 4-10 miles |
People Also Ask
How do I find bike trails near me?
Begin with maps, local park pages, and community clubs for recommended routes. Filter by distance, surface, and elevation, then test a short loop to verify suitability.
Start with maps and local guides to find nearby trails, then test a short loop to assess fit.
Are there safety considerations for beginners on local trails?
Choose easier trails first, wear a helmet, and ride with a buddy when possible. Carry water and a basic repair kit, and check weather conditions.
Begin with easy trails, wear your helmet, and ride with a friend when possible.
What if there are no trails nearby?
Look for rails-to-trails or paved urban routes that are near your city. You can drive to a nearby town with a robust trail network, then ride a short loop.
If nothing is close, consider nearby towns with trail networks and plan a short drive.
Can I ride with kids on trails?
Yes, on kid-friendly loops and light traffic routes. Choose shorter distances, frequent regroup points, and age-appropriate pacing.
Yes—pick kid-friendly trails and keep a steady pace with plenty of breaks.
How should I prepare equipment?
Check tires, brakes, and lights; bring water, a patch kit, and spare tube. Pack a small pump and basic tools for quick fixes.
Check your tires and brakes, bring water, and carry a few tools for quick fixes.
How do I assess trail difficulty before riding?
Refer to official trail ratings, note surface type and any challenging sections, and start on easier parts to build confidence.
Check official ratings and start with easier sections to gauge difficulty.
“Locating a bike trail near you isn’t just about distance—it’s about selecting routes that align with your skill, weather, and safety needs. Consistent practice on varied surfaces helps riders improve faster.”
Quick Summary
- Check proximity first to locate nearby trails
- Compare surface, elevation, and distance to match your ability
- Prioritize safety gear and etiquette on shared paths
- Plan routes with clear turns and return options
- Practice on easy trails before attempting rugged routes