How to Put Bicycle on Uber Eats: A Practical Guide
Learn how to ride the Uber Eats bike-delivery path safely and legally. This comprehensive guide covers eligibility, signup steps, gear, route planning, safety practices, and troubleshooting for delivering by bike in 2026.

On Uber Eats, bicycle delivery is supported in many markets. To put a bicycle on Uber Eats, verify local availability, sign up as a delivery partner, and choose bicycle as your vehicle type if offered. Then prepare your bike, wear safety gear, complete onboarding, and start accepting bike deliveries.
Understanding the concept and scope
Bicycle delivery on Uber Eats is a real option in many dense urban markets. It combines the agility of a rider with the efficiency of a well-planned route, allowing couriers to navigate traffic and deliver hot meals quickly. The BicycleCost team notes that bike couriers often benefit from lower barrier-to-entry compared with motorized delivery in certain neighborhoods, especially where parking is scarce. If you’re weighing your delivery setup, consider your local infrastructure, safety climate, and the typical order volume in your area. Remember that bicycle delivery also aligns with green transportation goals and can reduce your carbon footprint per shift. Always check the Uber Eats partner portal for current vehicle type options and city-specific requirements.
In practice, a bike courier operates like any other delivery driver but with unique gear, routing considerations, and safety practices. You’ll optimize for shorter blocks, avoid heavy traffic times when possible, and leverage bike lanes and sidewalks only where allowed by law. The goal is reliable, safe delivery that keeps customers happy while preserving your health and time. This section sets the stage for practical onboarding steps and the gear you’ll need to succeed as a bike courier in 2026.
Prerequisites and eligibility
Before you can put a bicycle on Uber Eats, confirm you meet local eligibility criteria. Common requirements include a minimum age, a valid driver or rider account, and residential or business eligibility within the city where you plan to operate. Some regions require a background check or identity verification, as well as a device capable of running the Uber Eats app and receiving push notifications for order updates. In many markets, successful cyclists on the platform have a reliable helmet, front and rear lights, and a secure delivery bag. The BicycleCost team emphasizes that preparation begins well before your first order: review city regulations, ensure your bike is in good mechanical shape, and assemble essential safety gear.
From a safety perspective, you’ll want to maintain current insurance or rider coverage as applicable by local law. While insurance requirements vary, having coverage can protect you in case of incidents during delivery. This is also a good moment to scan local bike laws—some municipalities have specific rules about riding on sidewalks or using bike lanes during certain hours. By clarifying eligibility up front, you avoid onboarding delays and can focus on delivering confidently from day one.
Getting started: sign up and vehicle selection
To begin delivering by bike on Uber Eats, you’ll need to sign up as a delivery partner and go through onboarding. Open the Uber Eats driver app or partner portal and follow the prompts to create or link your account. If the platform supports bicycle delivery in your city, you’ll see an option to select or confirm ‘bicycle’ as your vehicle type during onboarding. If bicycle isn’t listed in your region, you’ll typically be guided to use another mode or you’ll be instructed to wait until the city adds support. It’s important to complete all required documents, accept the terms of service, and run through any in-app safety tutorials. Once onboarding is complete, test a small practice order to ensure notifications, navigation, and payment flows work smoothly.
The onboarding process is designed to be straightforward but thorough. The goal is to verify your identity, ensure you understand safety expectations, and configure your device so you receive and execute orders reliably. After you’re live, keep your profile information up to date and monitor your first week’s activity to gauge order density and peak delivery times in your area.
Gear and bike prep for reliable deliveries
A reliable bike setup is foundational for consistent, safe deliveries. Begin with a well-maintained bicycle: check brakes, tires, chain, and gears; ensure tires have adequate tread and proper inflation. Equip a durable delivery bag or panniers that attach securely without obstructing riding or access to brakes. Use high-visibility gear—reflective vest, bright jacket, and lights (front and rear) to maximize visibility in varying light conditions. Consider adding fenders to reduce splashes when riding in rain and a small lock for securing your bike at delivery points. Always carry a basic repair kit, spare tube, tire levers, and a portable pump. In addition, bring a power bank to keep your phone charged, a weather-appropriate layer, and rain covers for bags. A well-prepared rider minimizes delays, protects the order integrity, and boosts customer satisfaction. BicycleCost’s insights underscore that practical gear and bike condition directly influence on-time deliveries and rider safety.
Safety, laws, and best practices
Safety should be your top priority when delivering by bike. Always wear a certified helmet and use lights at dawn, dusk, or night. Obey traffic laws, ride predictably, and avoid risky maneuvers like weaving between cars. Plan routes that favor bike lanes and lower-traffic streets whenever possible, and be cautious at intersections. Keep your delivery bag secure and avoid overloading racks, which can affect balance and braking. In some places, riders must wear reflective gear after dark, and some sidewalks are off-limits. Check your local jurisdiction’s rules and Uber Eats guidelines for any city-specific restrictions. Regularly inspect your bike before shifts to prevent mechanical failures that could compromise safety or delay orders.
Route planning and customer communication
Effective route planning begins with a quick assessment of the city’s bike infrastructure and the typical variability of traffic. Use a reliable mapping app that supports bike-friendly routing and re-route if conditions change mid-shift. Communicate clearly with customers when delays occur due to weather, traffic, or hallway access at delivery locations. A short, polite note posted via the app or left with the order can uphold customer expectations and reduce the chance of rating issues. As you gain experience, you’ll identify preferred corridors and stop patterns that minimize time on busy roads while preserving safety.
Pro tips include batching deliveries in close proximity to reduce travel time, and using protected bike lanes whenever available. BicycleCost suggests documenting any unusual events (like blocked paths or unsafe intersections) so you can learn and adapt your routes over time.
Troubleshooting common issues and onboarding updates
New drivers often encounter onboarding delays, vehicle-type availability changes, or notification issues. If you don’t see bicycle as a vehicle option, double-check city eligibility and ensure you’re operating within a supported market. If orders aren’t appearing, verify that your device permissions, Uber Eats app version, and network connectivity are up to date. For safety updates or policy changes, regularly review in-app announcements and the partner resource center. If you encounter a delivery that requires you to transport unusually large items or sensitive foods, communicate with support and apply best-practice handling to protect the order and prevent damage. Keeping your app and devices current minimizes the friction between onboarding and real-world deliveries.
Real-world tips for successful bike deliveries
Consistency matters. Establish a dependable pre-shift checklist, a known post-delivery secure area for your bike, and a predictable handling routine for each order. Build a simple maintenance rhythm to catch issues early, and ensure you’re visible to customers and pedestrians. Consider pairing your bike setup with a compact rain cover, a lightweight toolkit, and a small first-aid kit for emergencies. By prioritizing safety and reliability, you’ll be able to deliver more orders, build favorable ratings, and expand potential delivery windows in your market.
Tools & Materials
- Smartphone with Uber Eats app(Latest version; push notifications enabled)
- Reliable bicycle(In good mechanical condition; brakes working well)
- Delivery bag or panniers(Secure attachment, weather-resistant if possible)
- Helmet(Certified safety standard)
- Front and rear lights(Bright and functioning; use at low light)
- High-visibility clothing(Reflective vest or jacket)
- Bike lock(Compact, secure when unattended)
- Repair kit (patch kit, tire levers, spare tube)(Carry on every shift)
- Air pump or CO2 inflator(Keep tires properly inflated)
- Power bank(Keep phone charged during shifts)
- Rain gear or bag covers(Useful for bad weather)
- First-aid kit (basic)(Small and light)
Steps
Estimated time: 45-90 minutes for onboarding and initial setup
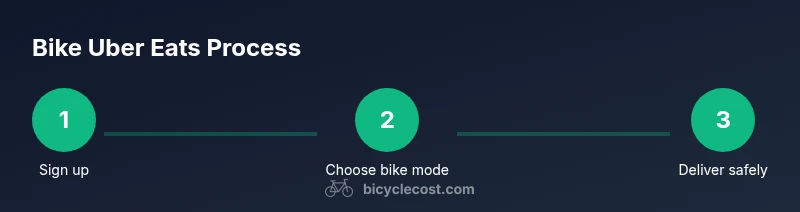
- 1
Check eligibility
Open the Uber Eats partner portal and confirm bicycle delivery is supported in your city. Complete any required identity checks and ensure your account is in good standing before you begin onboarding.
Tip: If bike delivery isn’t listed for your city, consider waiting for regional rollout or using a different delivery mode temporarily. - 2
Sign up and select bike as vehicle
Initiate or complete onboarding as a delivery partner. If the option is available, select bicycle as your vehicle type and review any city-specific safety guidelines.
Tip: Have your ID and proof of residency ready to speed up onboarding. - 3
Prepare your bike and gear
Inspect brakes, tires, chain, and gears. Attach a secure delivery bag, ensure lights work, and wear a helmet. Pack rain gear and a repair kit for contingencies.
Tip: Do a quick brake test before each shift to prevent mid-delivery issues. - 4
Test run and familiarize routes
Do a short practice ride to check app navigation, order flow, and route suggestions. Familiarize yourself with bike lanes, intersections, and known hazards in your area.
Tip: Set a preferred route that prioritizes protected lanes and signage. - 5
Start accepting orders safely
Begin accepting bike-delivery orders during active hours. Maintain steady speed, deliver with care, and communicate any delays to customers via the app.
Tip: Keep conversations brief and courteous to maintain customer ratings. - 6
Review performance and maintenance
After shifts, review delivery times, success rate, and any mechanical issues. Schedule routine maintenance, top off tires, and replace worn parts as needed.
Tip: Track recurring issues to adjust routes or gear as needed.
People Also Ask
Is bicycle delivery available in all cities?
Bicycle delivery is available in many but not all markets. Check the Uber Eats partner portal for city-specific options and rollout status.
Bike delivery is available in many markets; check your city on the Uber Eats partner portal to confirm availability.
What gear should I carry for bike deliveries?
Carry a durable delivery bag, helmet, front and rear lights, a repair kit, and a pump. Weather-appropriate rain gear helps in all seasons.
Bring a delivery bag, helmet, lights, repair kit, pump, and rain gear as needed.
Do I need special insurance for bike delivery?
Insurance requirements vary by location. Check local regulations and consult your own coverage to ensure you’re protected during deliveries.
Insurance rules depend on where you ride; verify local regulations and your policy to stay protected.
What should I do if I can’t select bicycle as a vehicle type?
If bicycle isn’t listed, the city may not support bike deliveries yet. You can use another approved mode and monitor updates in the partner portal.
If bike isn’t listed, bike delivery isn’t available in your city yet; use another mode and check for updates.
How do I handle delays or difficult customers while on bike?
Communicate promptly and politely via the app, adjust expectations, and focus on safe riding. Avoid confrontations and escalate issues to support when needed.
If delays happen, message the customer and stay safe; contact support if needed.
What maintenance routine improves delivery reliability?
Regularly inspect brakes, tires, and drivetrain; keep tires inflated; carry a repair kit; and schedule periodic professional tune-ups.
Keep brakes, tires, and drivetrain in good shape; carry a repair kit and do periodic tune-ups.
Watch Video
Quick Summary
- Verify city support and complete onboarding before riding.
- Prioritize safety gear and bike maintenance.
- Plan routes with bike infrastructure in mind for efficiency.
- Communicate clearly with customers about delays.
- Review performance and maintenance after each shift.